


This article explains what new features you will find in Zutec’s February 2023 119 release to our in-browser Cloud platform.
All the Cloud features are available but won’t take effect unless you choose to use them.
Zutec Cloud: Enhanced user interface (Beta)
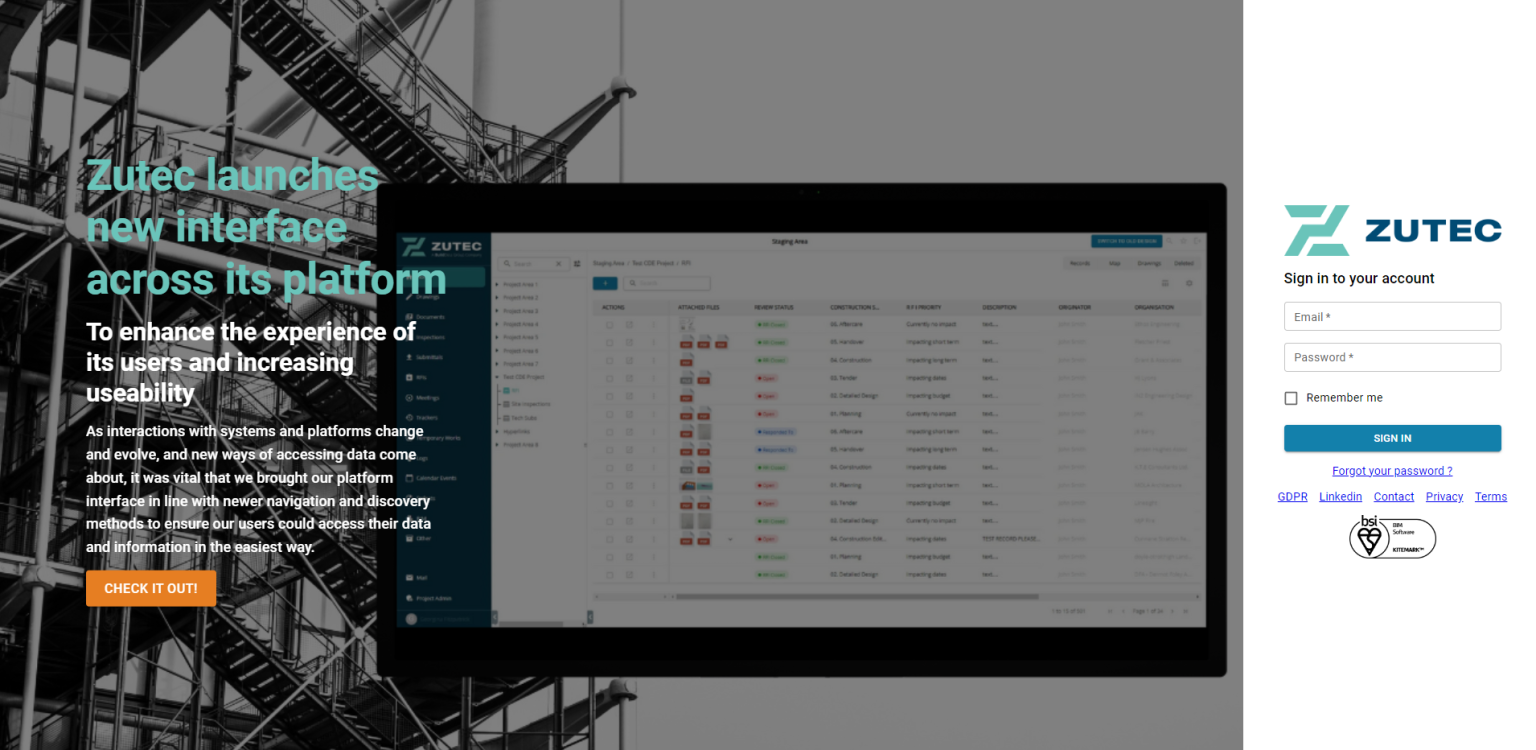
Zutec Cloud new login user Interface
Zutec Cloud new portfolio user interface
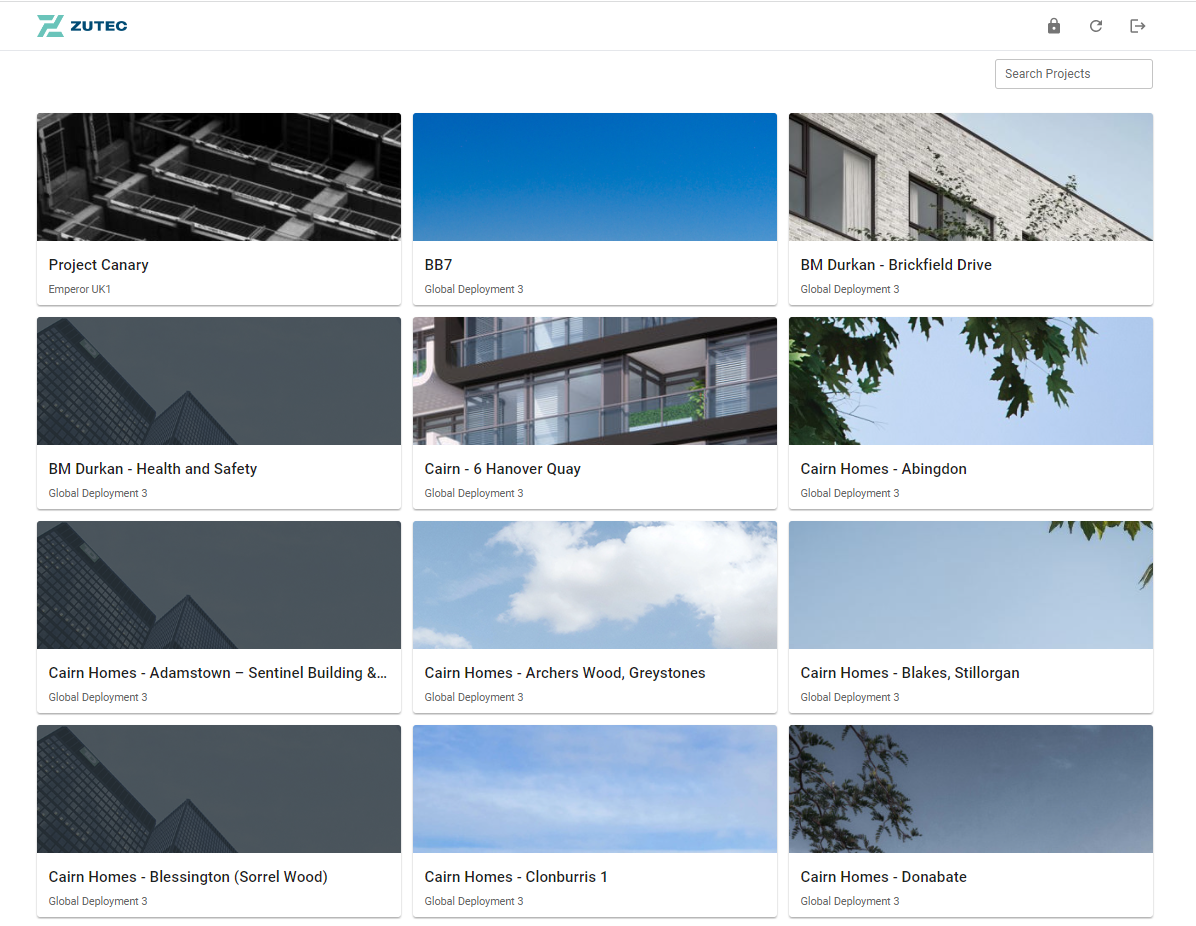
The Portfolio screen is displayed for a User that has access to multiple Projects/Zones on Zutec, including Enterprise Clients.
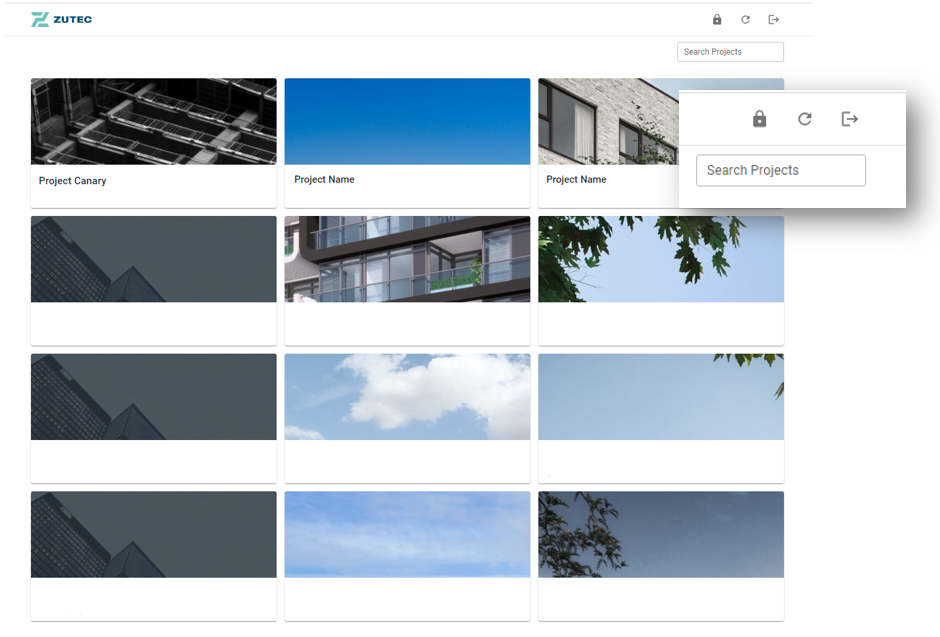
Portfolio Features
-
Search Projects
-
Reset Password
-
Refresh Projects
-
Logout
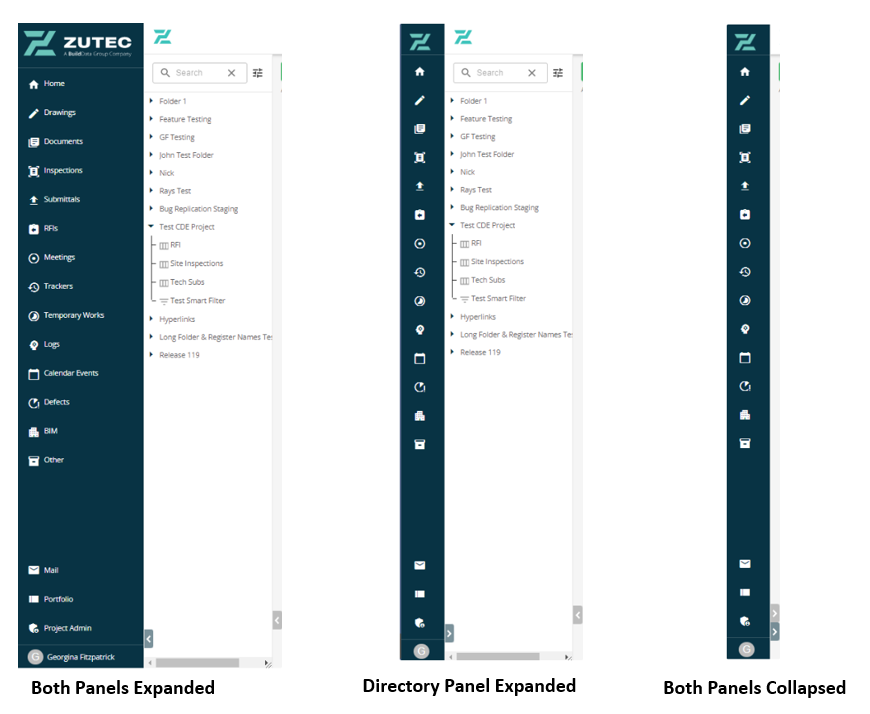
Navigation improvements
Register user interface improvements
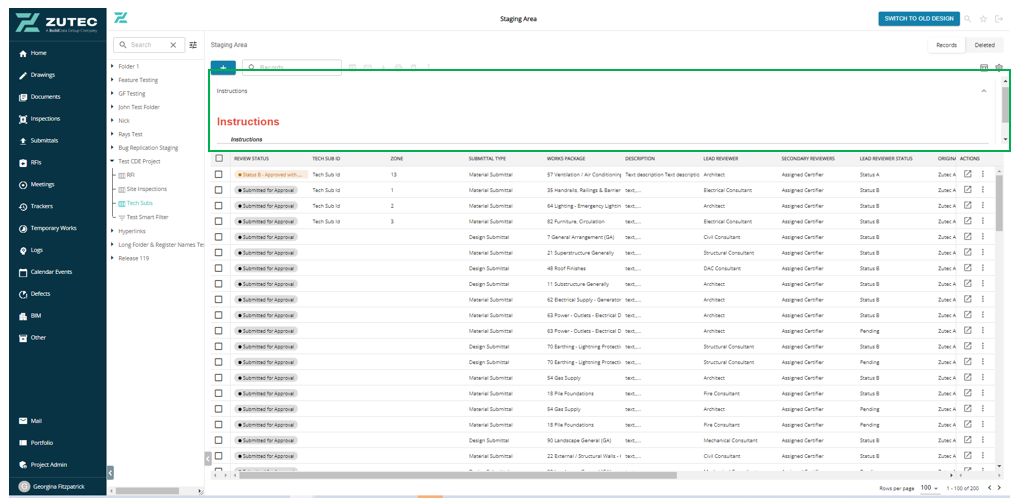
Comments Section
-
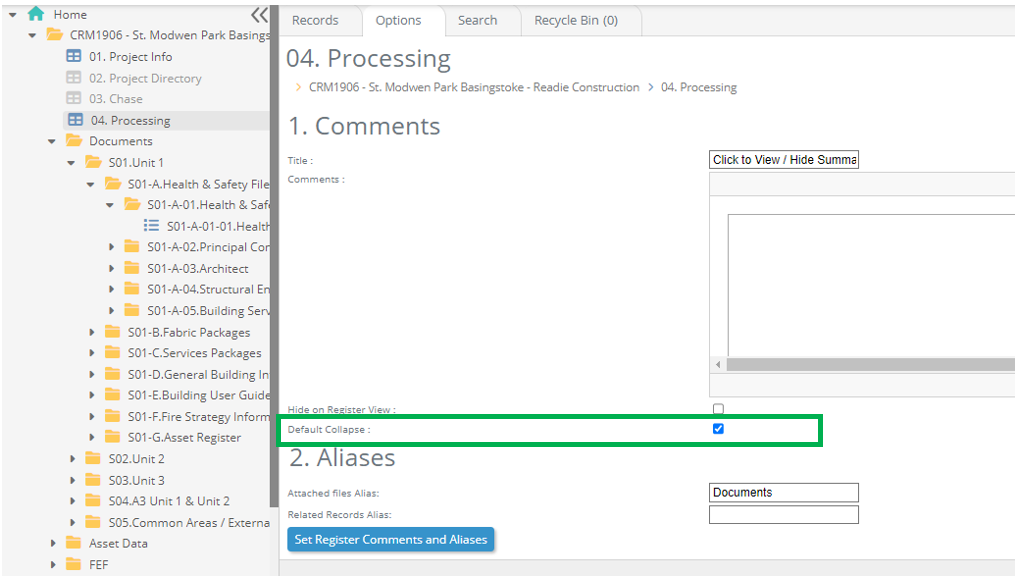
Comments Section can be enabled on a Register though Options - Comments
-
Comments:
-
Title
-
Enabled on Register View
-
Expand / Collapse by Default
-
Content : Formatted text, images, or Power BI.
-
-
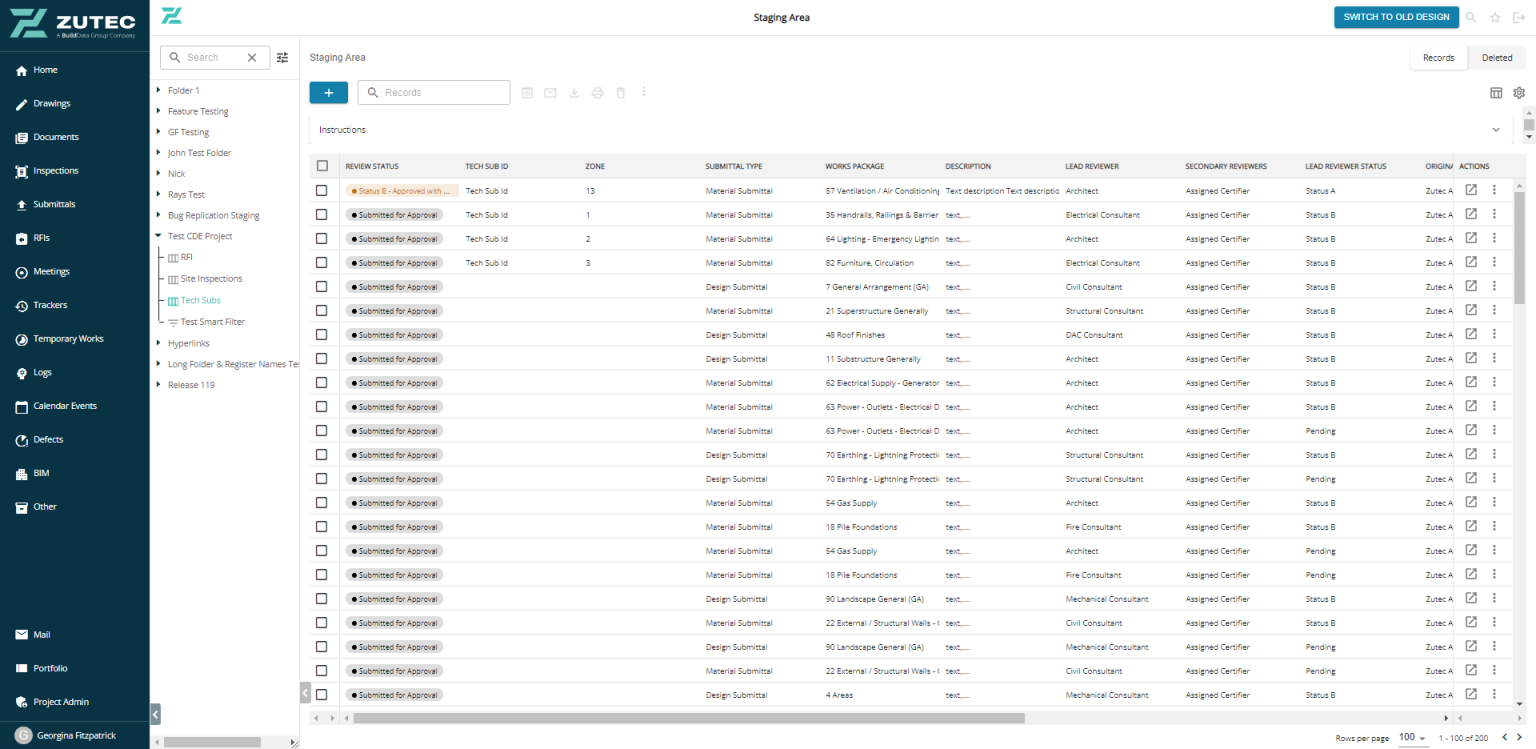
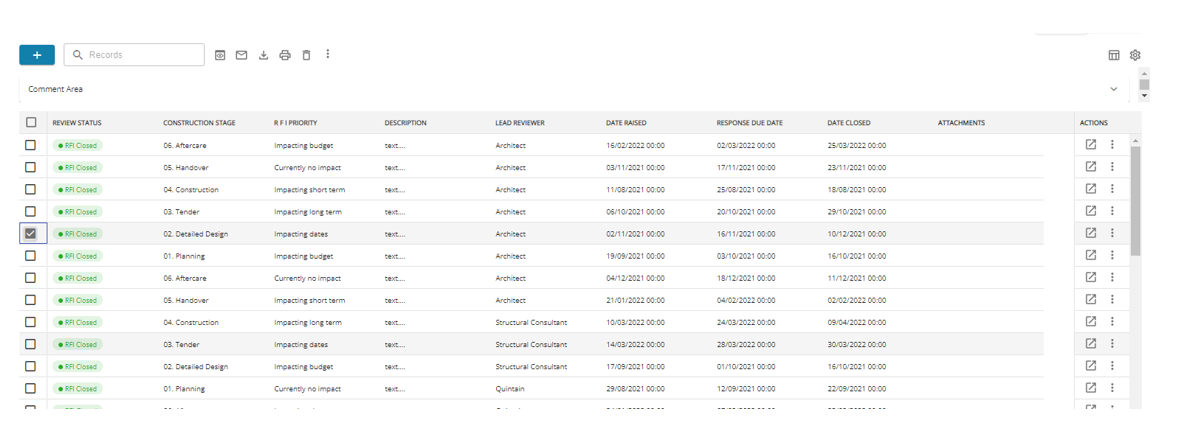
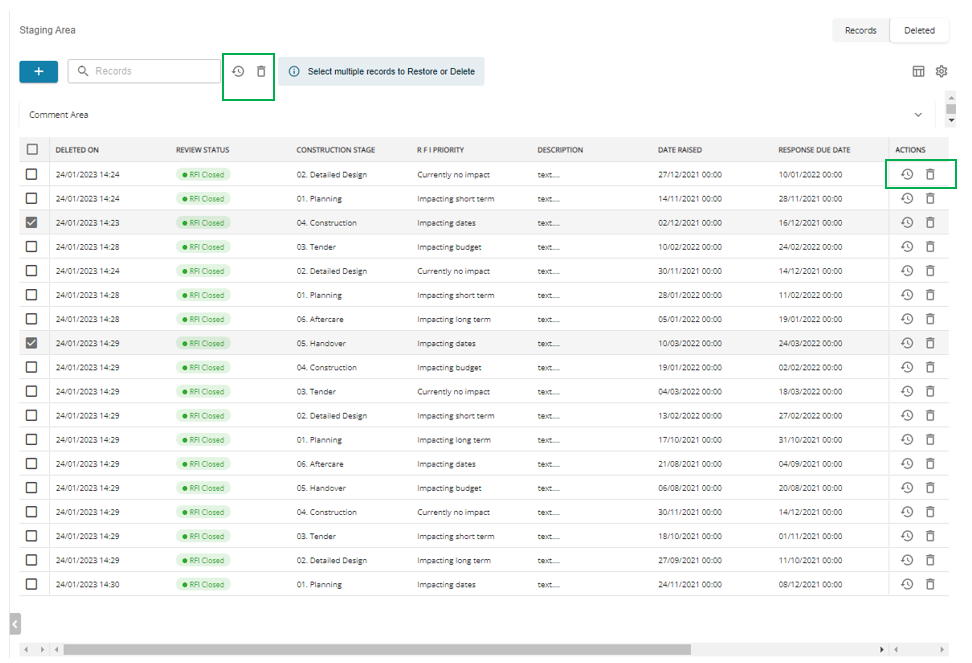
Register: improvements
-
Select All.

Register - Select All
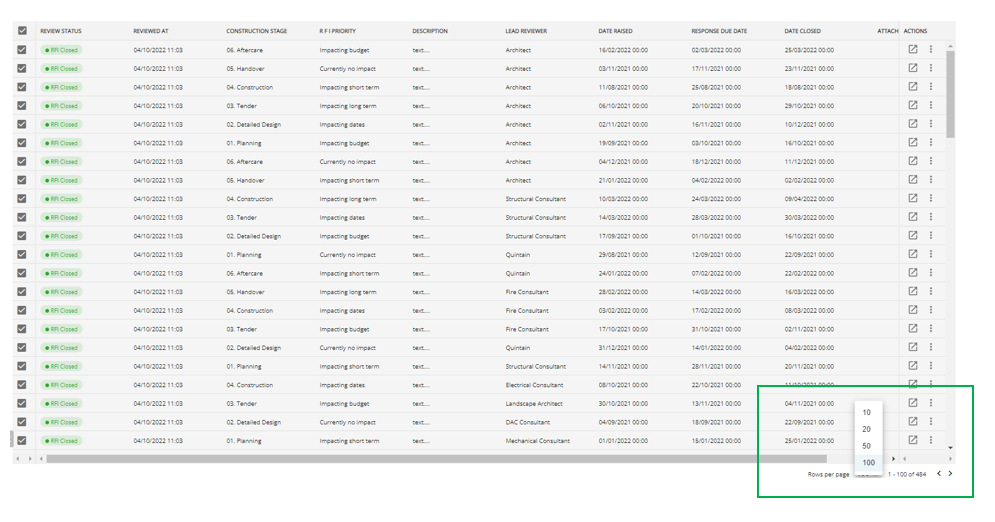
Records / Rows per page.
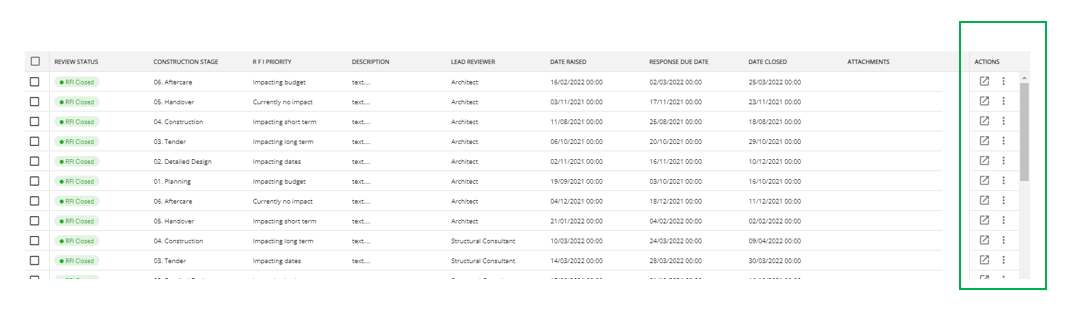
Actions displayed on the right of the table.
Displays Arrows on heading on hover, to indicate that the column can be ordered by ascending or ascending.
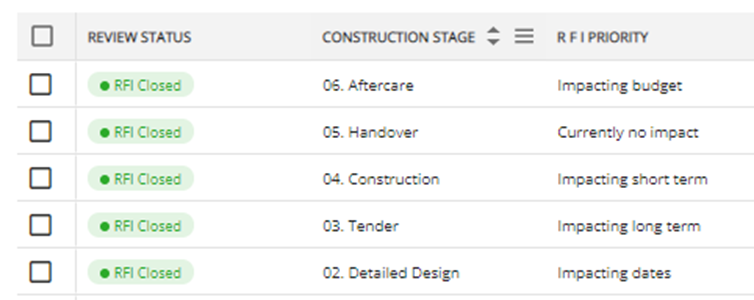
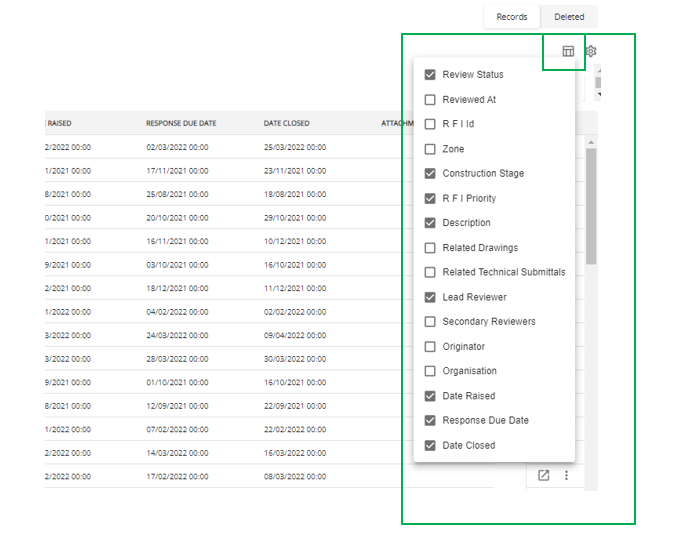
Column View
Row Shading on Hover, or when selected.
Top row of table remains static, to allow user to scroll the table vertically.
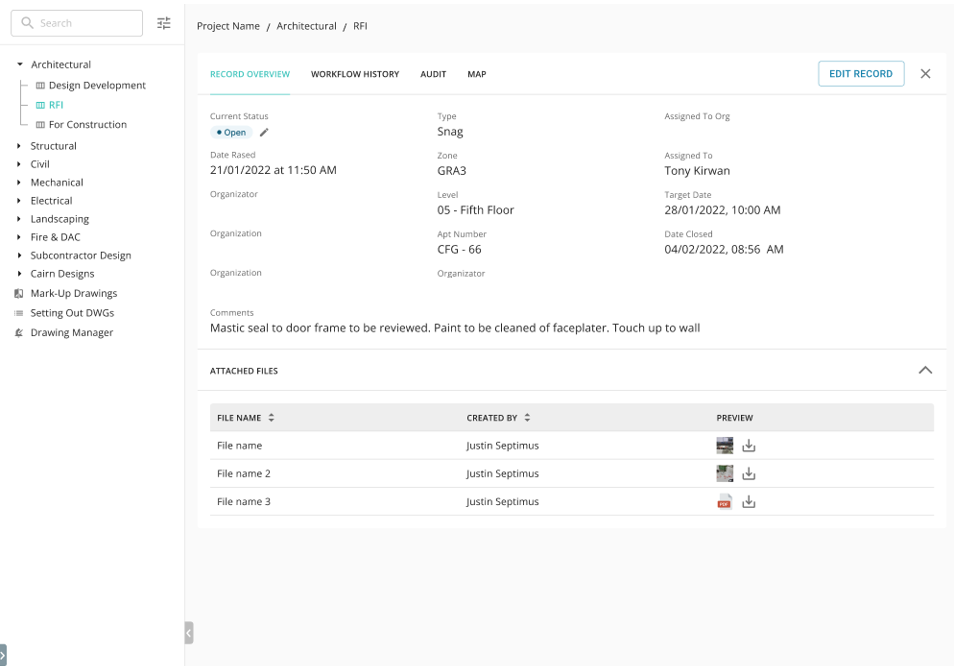
View record: design improvements
-
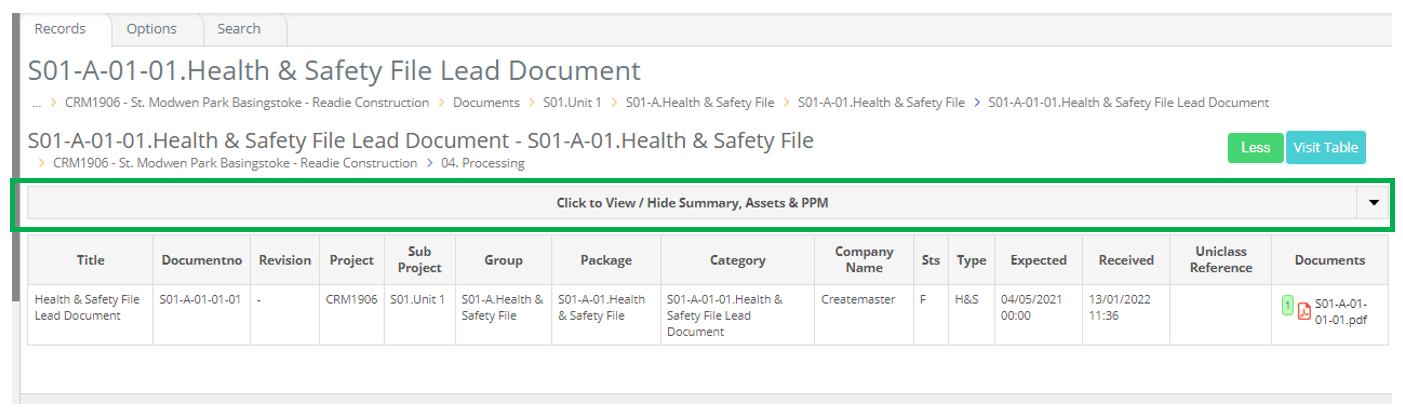
The Record Overview is displayed by default.
-
A User can close the record screen by clicking on the X (close) button on the top corner of the screen. This closes the record view and navigates back to the Register Screen.
-
The Edit Record button is displayed on the top right of the screen.
-
On a Register that has a Workflow Assigned to it, the Current Status is displayed as the first item in the record overview.
-
Attached Files can be view in the Attached Files Section of the Record Overview.
-
The User can minimise and maximise the Attached Files section by clicking on the up and down arrow.
-
If there are no attached files, the Attached Files title is displayed as faded (disabled) and minimised.
-
The Attached Files table displays:
-
File Name - example image_name.png
-
Created By
-
Preview - Hover to Preview Images, click to open.
-
Download - to download file.
-
Workflow history
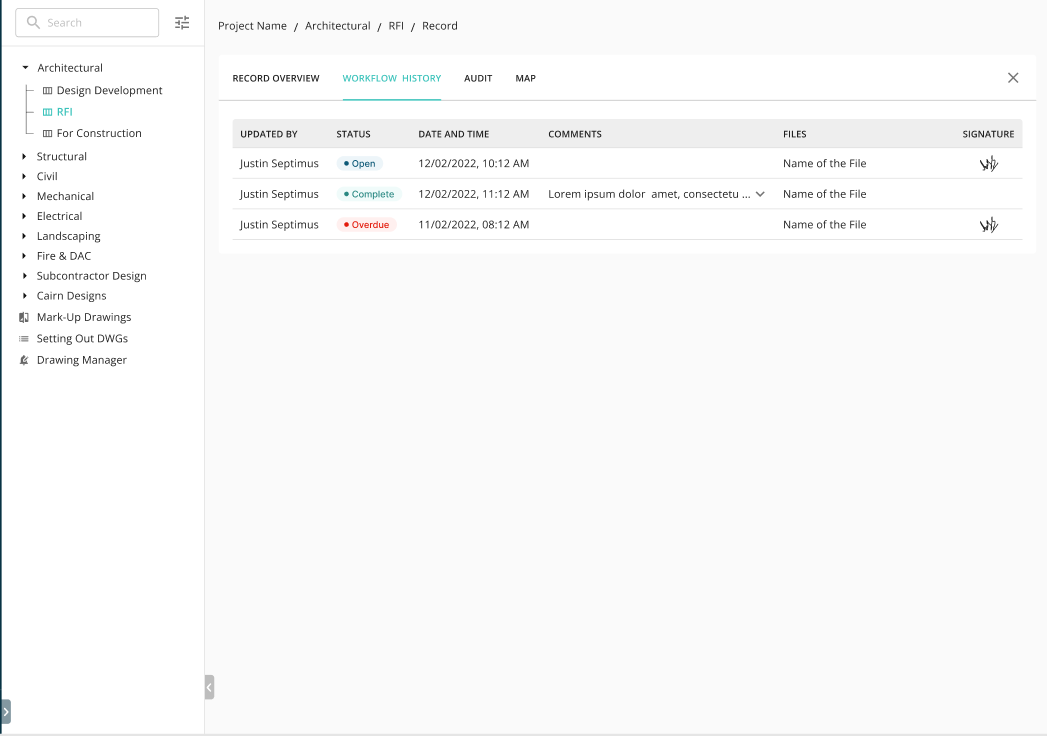
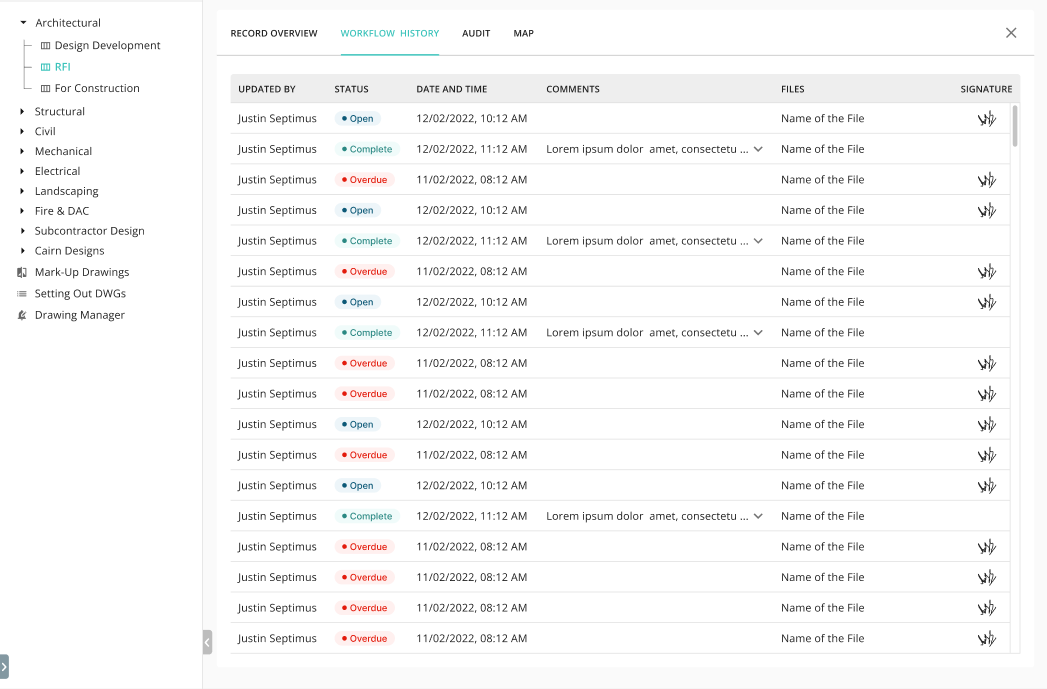
Workflow History replaces the term Review Status History
-
Workflow History Tab is displayed on the Record View if a Workflow is assigned to a Register.
-
When Selected it will display the Workflow History of the Record
-
Displaying the following:
-
Updated By - The Name of the person that updated the Workflow Status
-
Status - Updated Workflow Status
-
Date and Time - Date and Time that the Workflow Status get updated.
-
Comments* - Comments entered when updating the Status.
-
Files* - Files attached when updating the Status.
-
Signature* - Display thumbnail of Signature. Hover to display preview of the Signature.
-
*Displayed if configured on the Workflow.
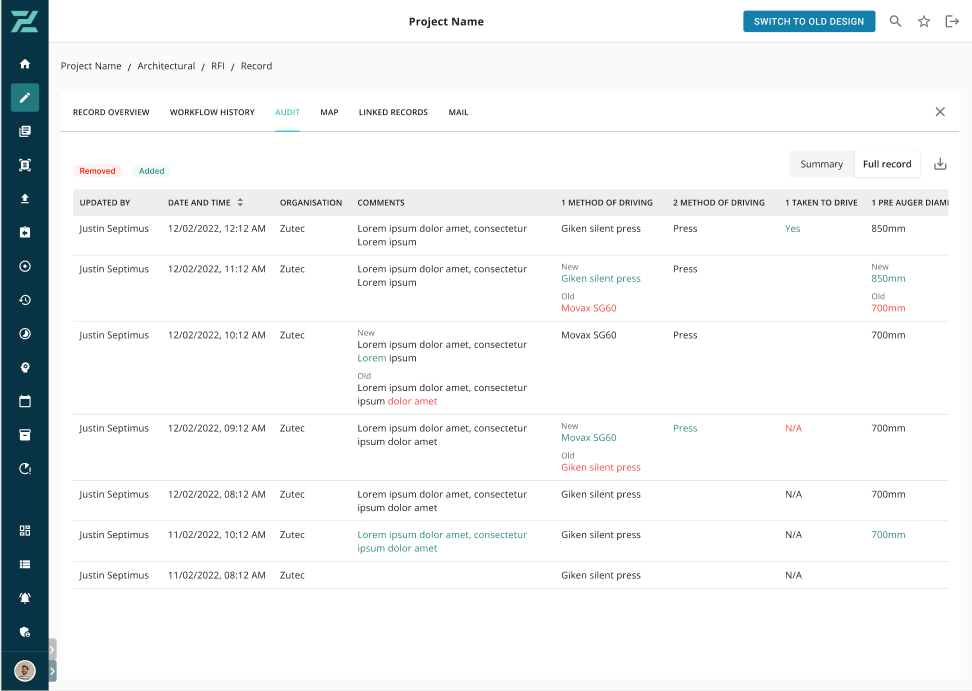
Audit history
-
The Full Record Audit displays all changes made to each record.
-
Each time a record is edited it will be saved.
-
The Full Record view displays all fields of the Record and highlights the changes made at the time of the update.
-
Updated By - Name of the person that edited the record
-
Date and Time - Date and time of when the record was saved.
-
Each field in the Record displayed.
-
When a change was made in a field display
-
New - Displayed in Green font
-
Old - Displayed in Red Font.
-
-
-
-
Displays the records ORDERED by Date and time - Latest first.
-
Allow for ordering by Date and Time.
-
Display a vertical scroll bar when number of rows exceed height of the screen.
-
Display a horizontal scroll bar when number of columns exceed the width of the screen.
-
On hover on row, display background of row as grey.
-
Export - The ability to export the Full Record Audit history to excel.
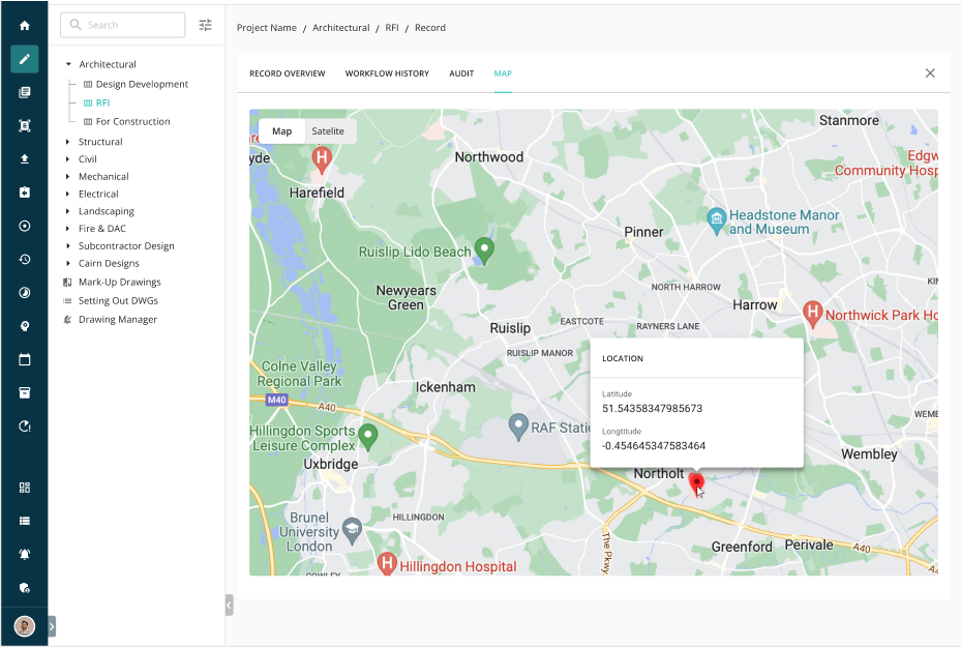
Record: map view
-
Display the Map tab on a Record View when GPS location is turned on on a Register.
-
This captures the location of the person when the record gets created.
-
Displays Marker indicating the location of where the record was created from.
-
Click on the Marker on the Map to display the GPS Coordinates.
Register: deleted records user interface
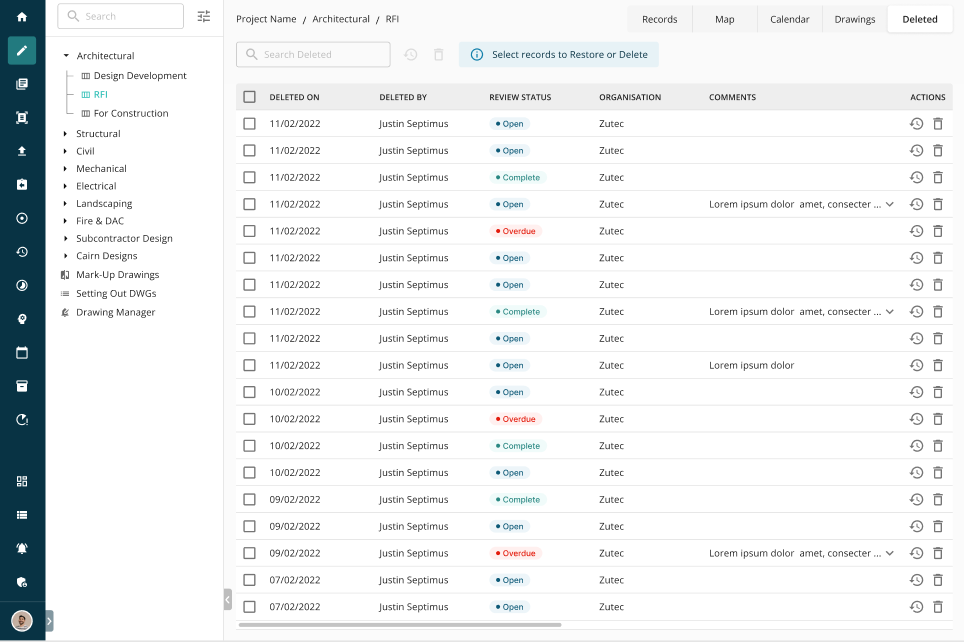
Deleted replaces the Recycle Bin on a Register
This screen is displayed by clicking on the Deleted Button on a Register.
New UI for Deleted Screen
Key Features
New Table Design
Deleted On
Deleted By
Horizontal and Vertical Scrollbars
Search
Select records to Restore or Delete.
Actions for Restore and Delete displayed on each row.
Manage security zones changes
Expand / collapse project directory setting.
A new setting has been added to the Manage Security Zones to allow a Super Admin to set the Project Directory to be expanded or collapsed by default.
-
Navigate to Manage Security Zones
-
On the Zone select Edit.
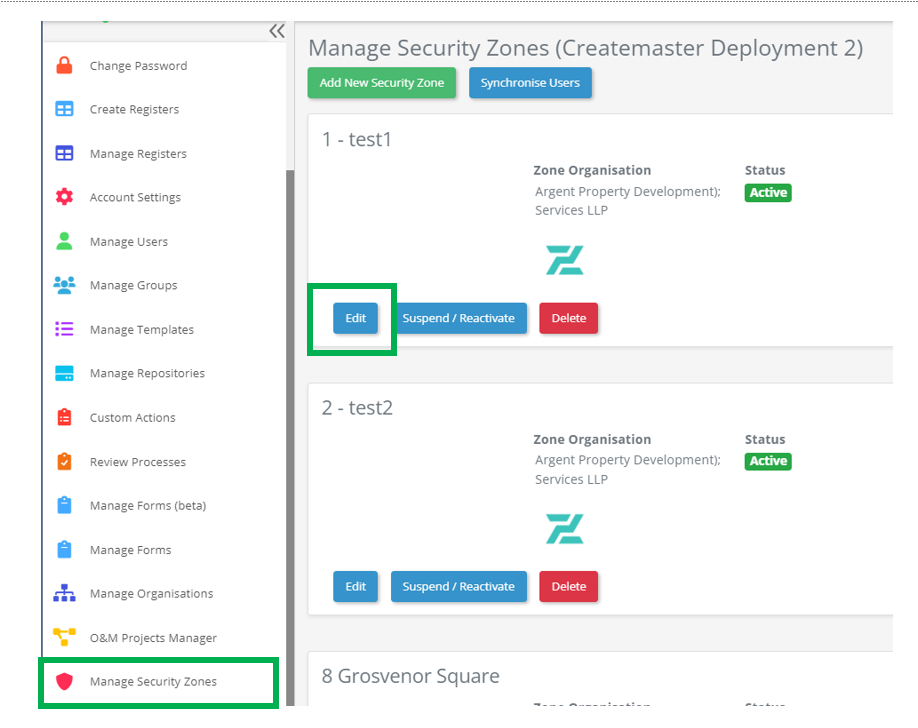
Manage Security Zones - Edit
Scroll down to a new setting :
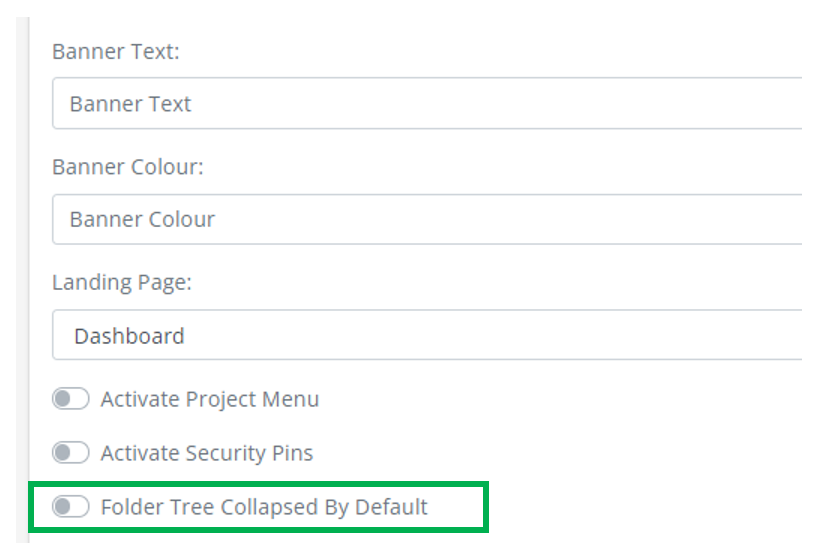
Folder Tree Collapsed By Default
Turn on/off to collapse or expand by default.
Click on Save Settings.
Set Landing page to a particular Register.
A new setting has been added to the Manage Security Zones to allow a Super Admin to set the the Landing Page on a Zone. This sets what page is displayed when logging into the Zone.
-
Navigate to Manage Security Zones
-
On the Zone select Edit.
-
Scroll to the Landing Page section.
-
Select Register from the dropdown list.
-
Enter the Register Node ID (this is the node Id of the Register you wish to display as the default landing page).
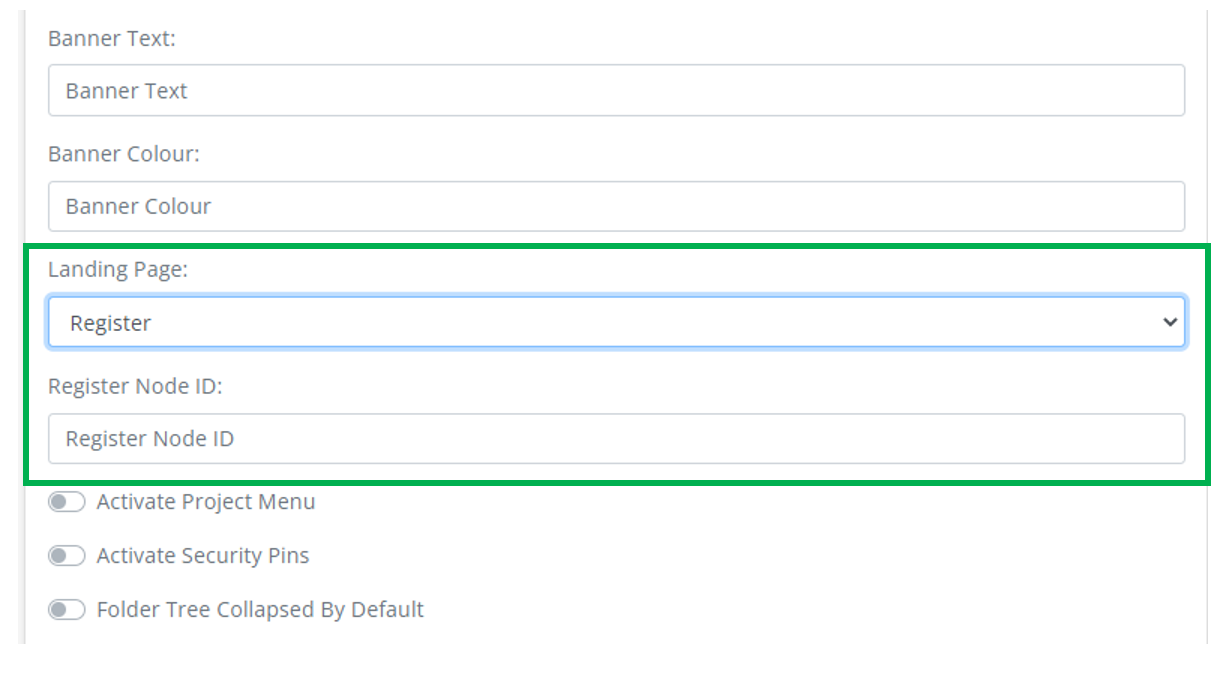
Landing Page Settings
-
Click on Save Settings button to save these changes.
-
When a user logs in to this Zone , the Register will be displayed.
Collapse / expand the comments section on an association based on the register setting.
A change has been added to the Association of a Register. Based on the setting within the Register Options, to expand or collapse a comments section, the Association will have the same behaviour.
Forms: new feature to autoscroll to the first page containing inputs
A new feature has been added to Forms to Automatically scroll to the firs t page in the Form that contains inputs.
Benefit : This allows for forms to be designed in a way that informational pages or legal disclaimers for example can be added to the beginning of a form, without the need for these pages to be scrolled through when adding a new form, or editing a form.
The AutoScroll only occurs where these pages are placed at the beginning of a Form.
Form design
Add Pages to the beginning of a Form, that displays information only such as text or images.
Adding a new Form.
The Form will Automatically scroll to the first page within the form that contains inputs.
Editing a Form.
The Form will Automatically scroll to the first page within the form that contains inputs.
Viewing a Form.
When viewing a Form, the first page of the form is displayed.
Zutec field (Android & iOS)
Forms - New Feature to AutoScroll to the first page containing inputs.
Adding a new Form.
The Form will Automatically scroll to the first page within the form that contains inputs.
Editing a Form.
The Form will Automatically scroll to the first page within the form that contains inputs.
Viewing a Form.
When viewing a Form, the first page of the form is displayed.