Here's what's new in version 124.2.
We value your feedback to help us make future enhancements. If you have any questions or feedback, please get in touch via our Help Centre.
Zutec Cloud: Centralised user management
Overview
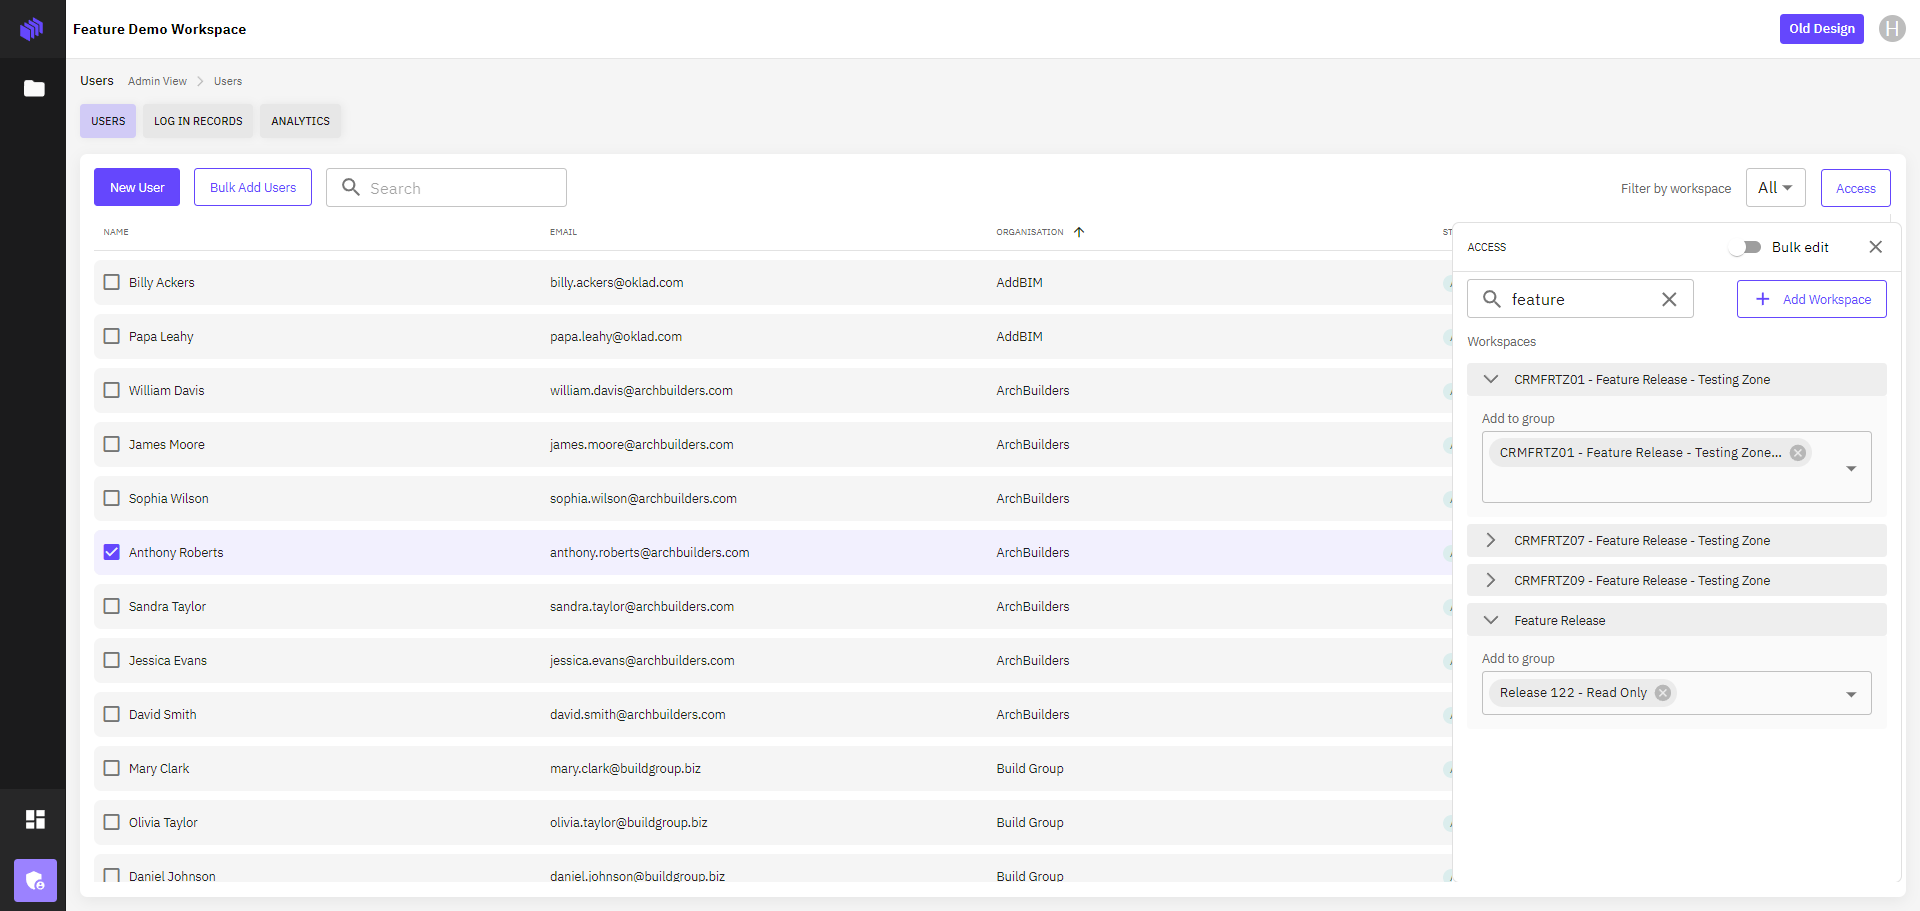
The new centralised user management functionality has been introduced to provide a streamlined, secure, and efficient way for client administrators to manage user accounts from a single location. This ensures a more organised approach to access controls, significantly reducing administrative overhead and enhancing security protocols across the platform.
Key features
- View all users and workspaces: Admins can now view a comprehensive list of all workspaces and users to understand and manage user access. Filter by the current workspace or any owned workspace to view the current set of users.
- Create/manage users: Create and manage user accounts in a single location, making it simpler to add new users and update existing user details as needed for any workspace.
- Bulk add users: Bulk create new users and assign them to workspaces and user groups, making it easy to onboard multiple new users in a few clicks.
- Add/edit users to workspaces: Admins can assign and modify user access to multiple or specific workspaces, offering flexibility in granting access based on user roles and responsibilities.
- Add/edit users to user groups: Admins can assign or modify user group access in workspaces within the same journey, ensuring efficient and cohesive management of user roles and permissions across different teams and projects.
- Create new organisations: If new users are from a company that does not exist currently on the project, admins can now create the organisation within the same Add User workflow, creating a streamlined process.
Benefits
- Streamlined management: Centralises user management, reducing the time and effort required to manage access across various parts of the platform.
- Reduced errors: Minimises the risk of errors in user access rights by providing a single, unified interface for user management.
- Enhanced security: Improves overall security by ensuring consistent application of access controls and permissions.
- Time efficiency: Saves significant time, allowing client administrators to focus on more strategic tasks.
How to Use
- To access the user management interface, log in to the Zutec platform, navigate to Admin, and select Users.
- The screen will display all users across all workspaces where you have administration access. Use Filter by Workspace to view all available workspaces. Search for specific users using the Search tool. You can also filter users using any of the column headers alphabetically.
- The page will display the status of user accounts. Users with deactivated status will not have access to any workspaces. To view a specific user's access, select the user and select Access to open the access panel. This will display all the workspaces that a particular user can access.
- To view the user group assignment, open a workspace, and you will see the user groups that have been assigned.
- To add a user to a new workspace, click the Add Workspace button and click Add to select the required workspace.
- Click Done to confirm your selection. Once selected, the user group assignment window will open. The user will now be assigned to the workspaces and groups chosen displayed in the Access panel.
- To edit a user group, select the Workspace, and add or edit user groups as desired.
- To remove a workspace entirely from the user's account, click Remove on the workspace.
Using the bulk add user wizard
- Click New User to add new users.
- To add multiple users select Bulk Add Users. Then add a comma-separated list of of emails in the dialogue box.
- Click Next to validate the data. The system will extract the first name, last name, and organisation. If the organisation is not already in our database the field will be highlighted in red.
- To create a new organisation, click the Add New button and enter the details in the dialogue box. Click Save.
- Click Next to set user access. Once the desired workspaces have been added with the correct permissions, click Next. When you are happy click Confirm.
- Now you will be able to see your new users in the user list and can view and edit their access details using the access panel.
NOTE: Access can only be viewed by a single user. If multiple users are selected, users cannot view current access. They can only bulk edit to add new workspaces or user groups.
Zutec Field: Filtering project data using form fields
Overview
The latest update to Zutec Field introduces an advanced filtering capability, allowing users to streamline and customise their view of project data directly within the app.
Key features
- Dynamic form field filters: Administrators can create filters on Zutec Cloud that sync seamlessly with Zutec Field. These filters can be based on any form field, allowing for a highly customisable filtering experience.
- User-driven data filtering: On Zutec Field, users can now select options from the predefined filter fields to immediately see a refined view of the project data. This selection dynamically adjusts the data and forms presented, focusing only on the relevant information.
- Enhanced project focus: Specifically useful for users such as housebuilders, who can set a filter for specific attributes like Plot. Selecting a particular plot will automatically adjust the displayed project data and forms to only show information relevant to that plot, thereby facilitating a more focused and efficient workflow.
Benefits
- Increased efficiency: This reduces time spent navigating irrelevant data, allowing users to focus on specific aspects of a project.
- Improved user experience: Simplifies the user interface by minimising data overload, making it easier to manage large sets of information on mobile devices.
- Enhanced customisation: Offers project teams the flexibility to tailor data views to their specific needs and workflows, enhancing productivity on the go.
How to Use
Setting up filters in Zutec Cloud:
- Navigate to Admin and then select Filter Fields.
- Click on Select Field to add and then click Add.
Using filters in the Zutec Field:
- Open the Zutec Field app and navigate to the Projects home screen.
- Click Plot No or Plot Name to filter by plot number or plot name.
- Select the desired plot number or names and click Save.
- Click through to view records.
This is designed to make project management more efficient and user-friendly, providing tools that fit the specific needs of professionals in the construction industry.
Zutec Cloud: Performance improvements
Overview
This release focuses on significant performance enhancements across various components of our platform, achieved by addressing key issues identified through server monitoring tools. The updates include modifications to database queries, backend bug fixes, and optimisations in file requests and server calls.
Key features
- General improvements: Enhanced overall system performance by modifying database queries and fixing backend bugs.
- Cloud: Improved speed of file requests by optimising the request handling process.
- API: Enhanced loading times by modifying how and when server calls are made.
- Server web-services (field-cloud sync): Improved sync process speed by optimising the handling of server requests for drawings and drawing register links.
Benefits
- Increased efficiency: Users will experience faster system performance, reducing waiting times, and enhancing productivity.
- Improved user experience: Quicker file requests and loading times contribute to a more seamless and efficient workflow.
- Optimised syncing: Faster synchronisation of drawings and drawing register links ensures that users have up-to-date information more rapidly.
Zutec Cloud and Field: Drawing Manager permissions
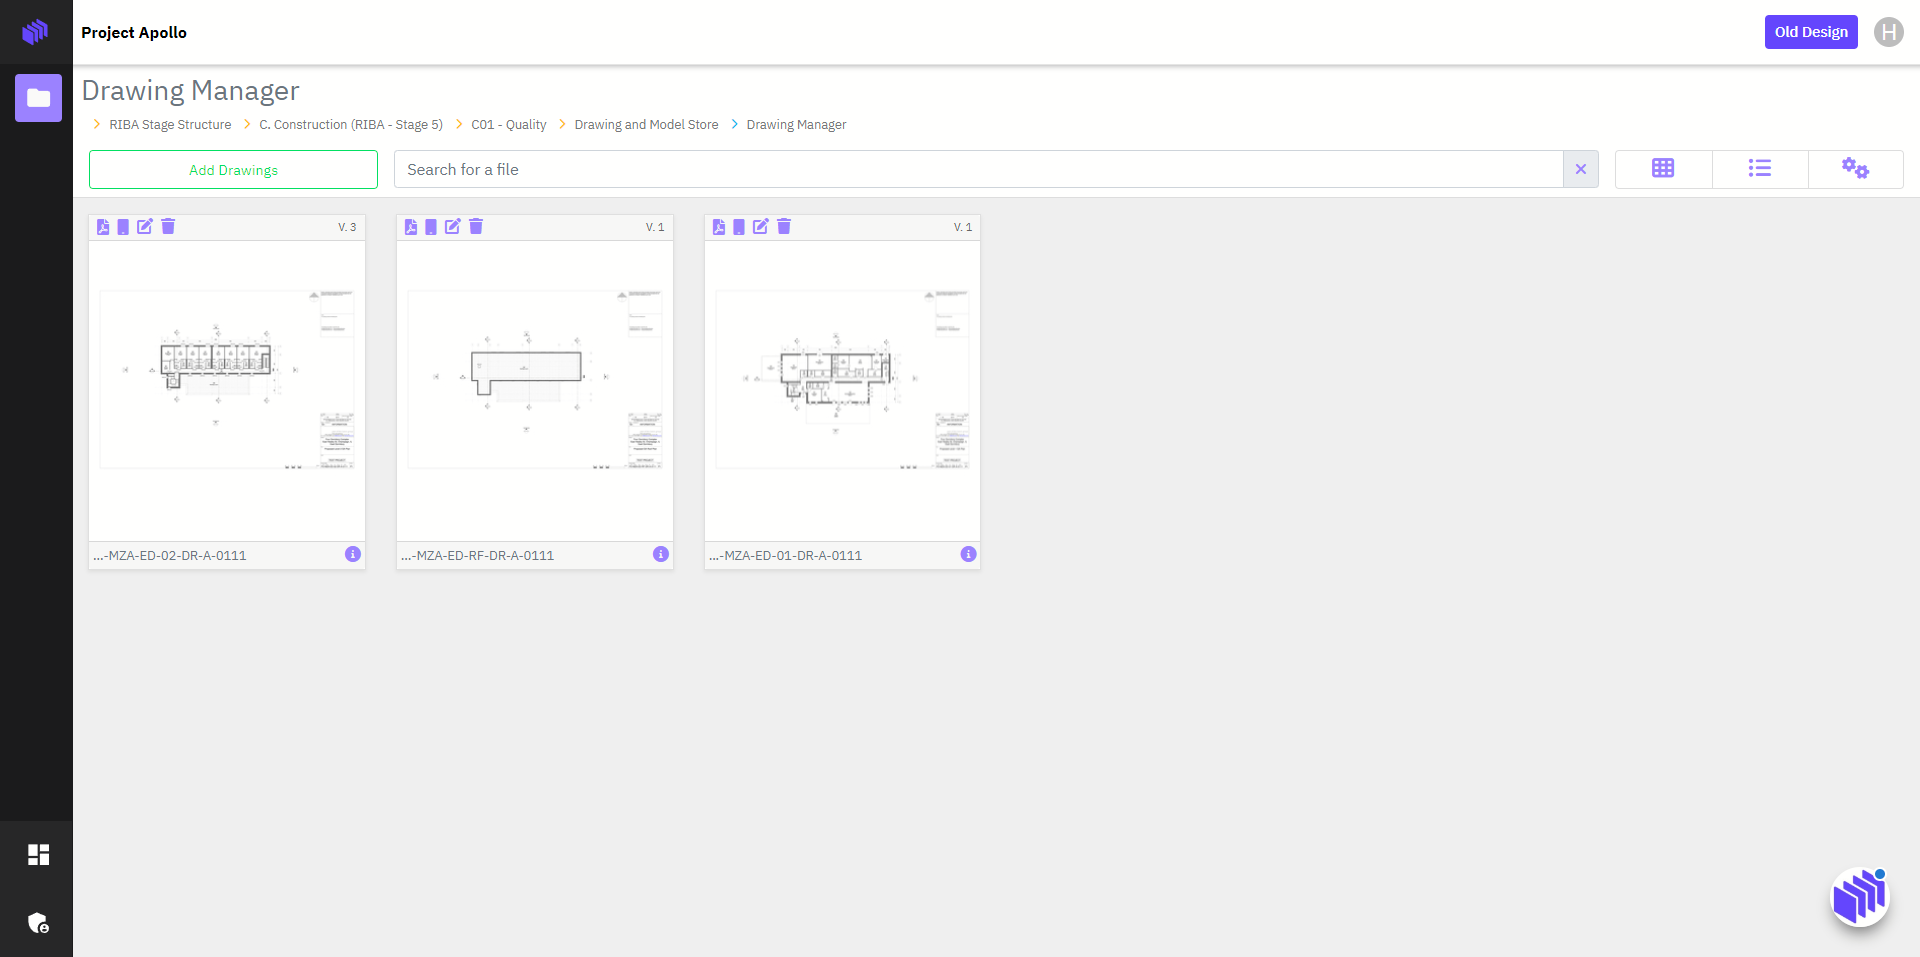
Overview
In response to user feedback and requests, we have updated the access control mechanism for drawings associated with registers. This change aims to enhance security and provide better management of drawing permissions.
Key features
- Previous method: Access by Register permission
- Zutec Field and Cloud users had automatic access to all drawings linked to registers, regardless of their access to the Drawing Manager node where the drawings resided.
- New method: Access by permission on Drawing Manager Node
- Users now require explicit access to Drawing Manager nodes to view or mark up a drawing.
- If a user has full access to a register but no access to Drawing Manager nodes, they will see no drawings.
- Access to drawings is cumulative, based on the Drawing Manager nodes for which they have permissions.
Benefits
- Enhanced security: Ensures users can only access drawings they have explicit permissions to, reducing the risk of unauthorised access.
- Improved management: Provides better control over drawing permissions, making it easier to manage who can view and mark up drawings.
How to use
To view or mark up drawings, users must be granted explicit access to the relevant Drawing Manager nodes. Administrators can manage these permissions through the standard permission settings and ensure that users have the necessary access to the appropriate Drawing Manager nodes to see the drawings linked to their registers.
Zutec Cloud: Connect registers in different workspaces using Event Flow Builder
Overview
The latest enhancement to the Event Flow Builder extends its capabilities by enabling administrators to connect to registers outside of their current workspace.
This update introduces the new Insert or Update action for the Form Builder, which will keep registers in sync with each other and send specific data to specific workspaces or registers based on filters.
This functionality also works with updates from external sources, such as incoming webhooks and Excel. The enhancement replaces the need for multiple custom actions, providing a cleaner, more secure, and less bespoke solution for data integration and sharing across workspaces.
This enhancement streamlines the management of data across different project workspaces and simplifies the integration process, making it more efficient and less prone to errors.
Key features
- Cross-workspace register connection: Administrators can now set up event flows which connect to registers located in different workspaces. This allows for broader data integration and streamlined event management across multiple projects.
- Enhanced customisation of event flows: This caters to clients with diverse and geographically dispersed assets by facilitating more dynamic and complex event setups.
Benefits
- Improved data integration: Ensures that data from various workspaces can be interconnected, providing a holistic view and reducing the need for manual data transfers.
- Increased flexibility: Administrators can tailor event flows more precisely to project needs, including scenarios where events impact or rely on data from multiple workspaces.
- Enhanced Efficiency in Event Management: Reduces bottlenecks and improves the responsiveness of the system to project changes and requirements.
How to Use
- Log in as an administrator. To create an event flow navigate to the desired register and click on Options.
- Then select Manage Event Flows.
- Click on Create Flow and add a name in the dialogue box. Then click Save.
- To add a trigger to the event flow click Create.
- Select the type of trigger you want in the dialogue box and click Save Trigger.
- Click + Action and select your action type in the dialogue box.
- This action will either insert a new record if no match is found based on the unique column and additional criteria or update an existing record if a match is found.
- Automatically copies all fields from the parent record to the new or updated record without the need to specify individual fields.
- Select the register you wish to connect to. The dropdown will show all available registers from available workspaces.
- Ensure the nodes shown match the parent register type and are accessible across all workspaces the administrator has access to.
- Select Matches On to select the column the data will match and click Save.
- The Matches on configuration will display a single dropdown containing all register fields, highlighting the requirement for a unique field selection.
- The Sets on field is omitted as this action copies all field data by default.
- To deploy the event flow click Back and switch on the toggle control.
- The flow will immediately begin monitoring the master register and syncing with the child register whenever a record is updated.
- Monitor and adjust the event flows as necessary to ensure optimal performance and data accuracy.
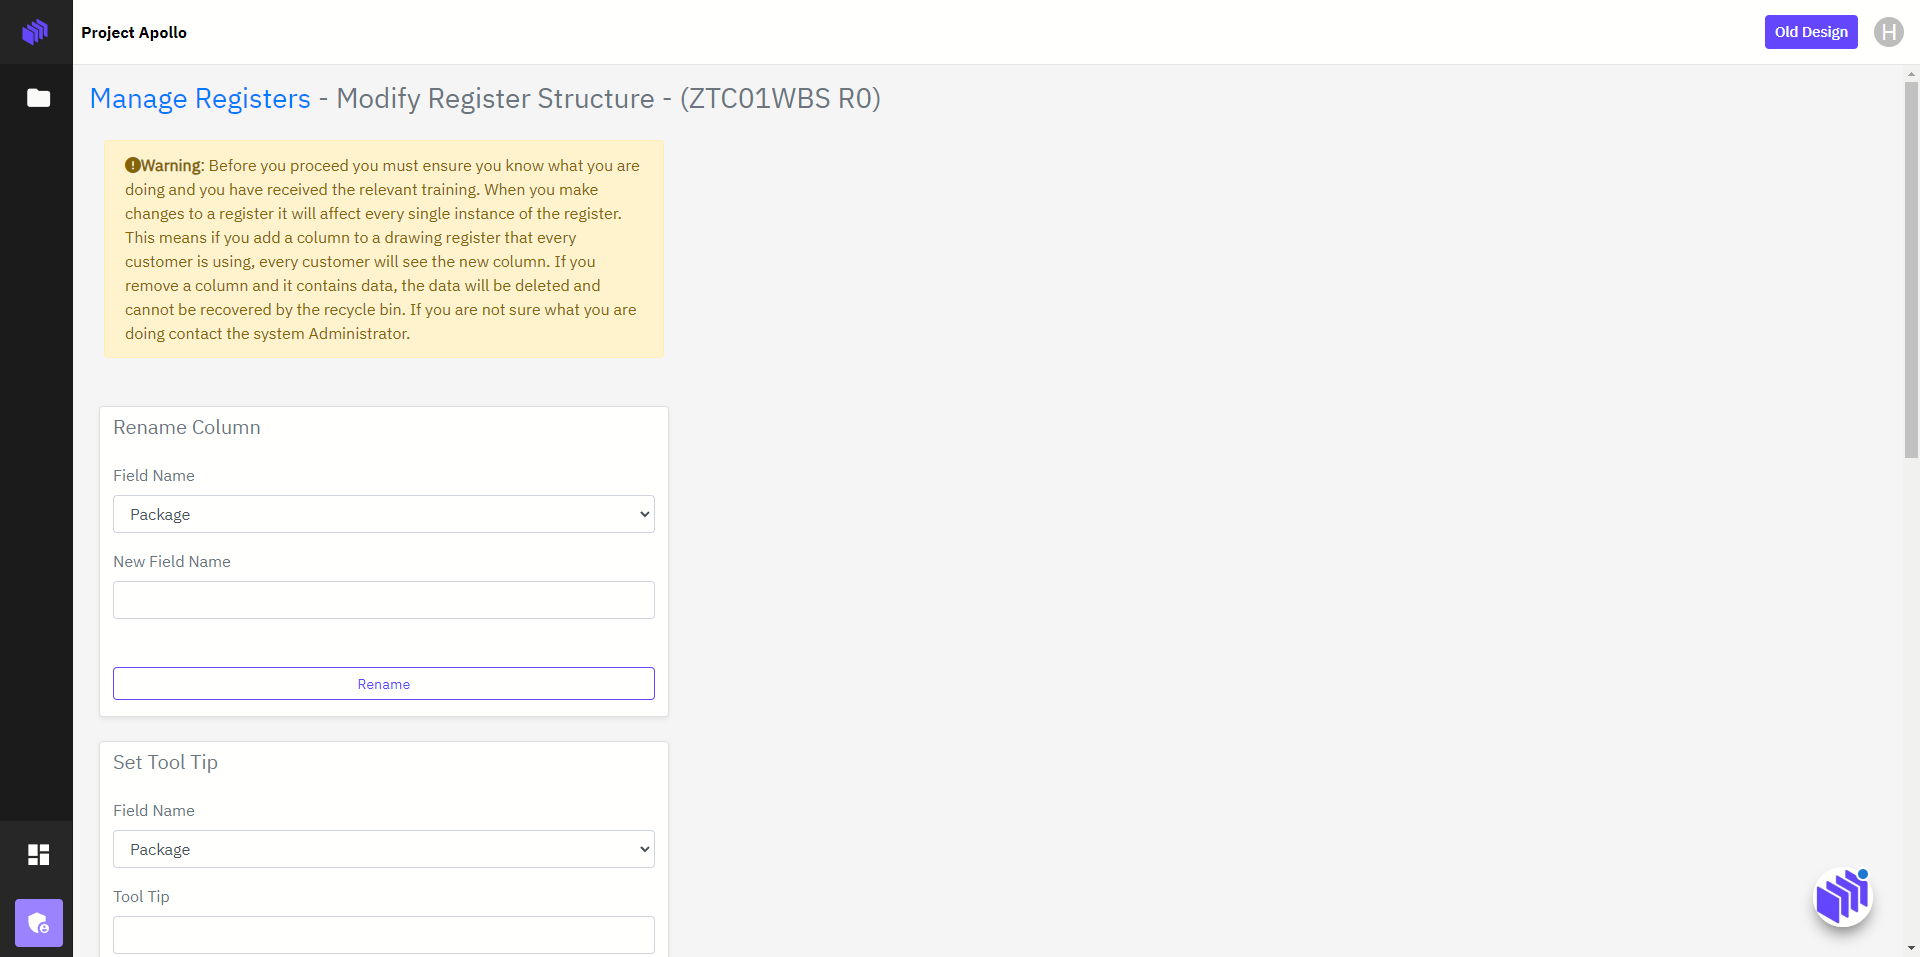
Zutec Cloud: New column renaming functionality for configuration tables
Zutec now supports column renaming for all cases. Previously, users were unable to update a column name if it was used in a configuration table, e.g., User Filters. This update creates a handling mechanism for this and allows all columns to be renamed if needed, ensuring any references are automatically updated.
New UI updates
We are excited to share the latest updates to our new UI. Since its initial beta release, our new UI has undergone continuous enhancements, each bringing us closer to fully replicating the functionality of the old UI.
Bulk download files
Users can now select multiple files and download them simultaneously in the new UI, enhancing efficiency and the user experience.
How to use
- Navigate to the register that contains the files you wish to download.
- On the register, select the checkboxes to choose the rows you wish to download.
- Click on the ellipsis to select more options, then click Download Attached Files. To download the files, click Download.
- The files will be added to a zip folder and downloaded to your machine.
Ability to modify column filters
Users can modify filters they have created for register columns. Previously, users would need to reset the entire filter and begin again.
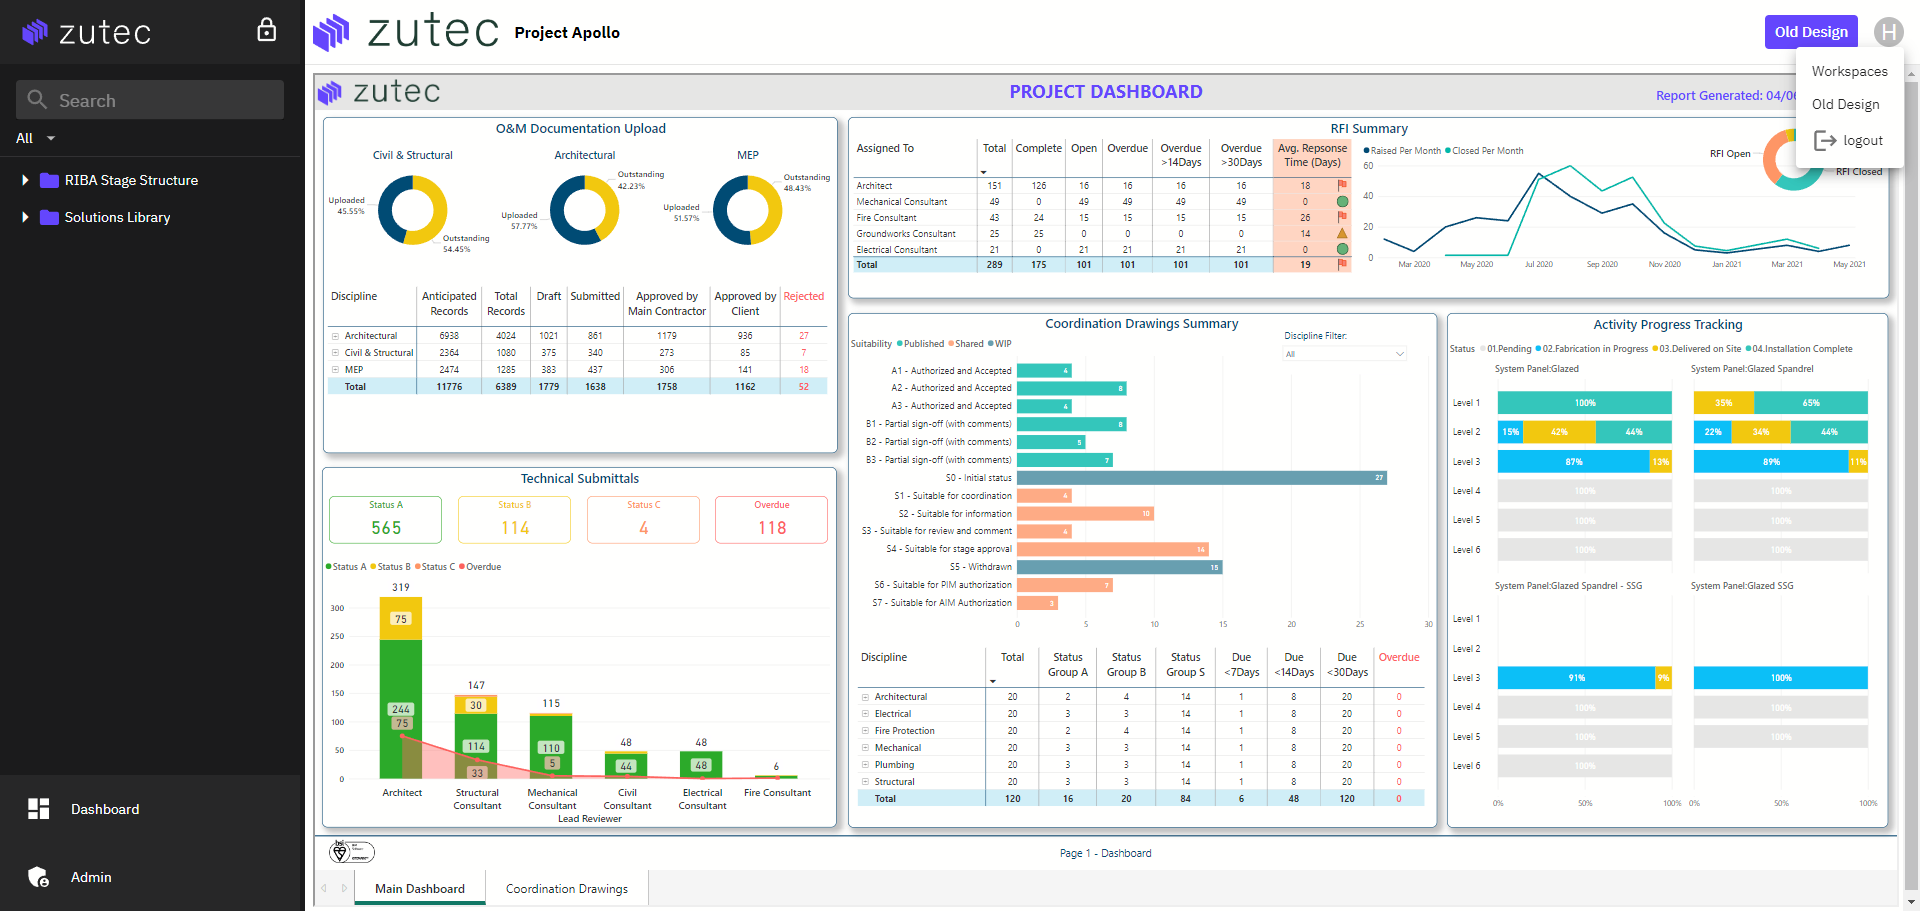
New avatar menu
We have introduced a new avatar menu in our updated UI. This menu includes options to return to the workspace selection page, revert to the old UI, and log out. As we continue to roll out the new UI, additional features will be added to this menu.