


Part L Building Regulations explained
No ifs, no buts. The grace period is over and the time to be compliant with the new uplifted Part L Building Regulation has arrived. Any new housing developments starting on-site after 15 June 2023 now must meet the energy efficiency requirements set out by Part L standards.
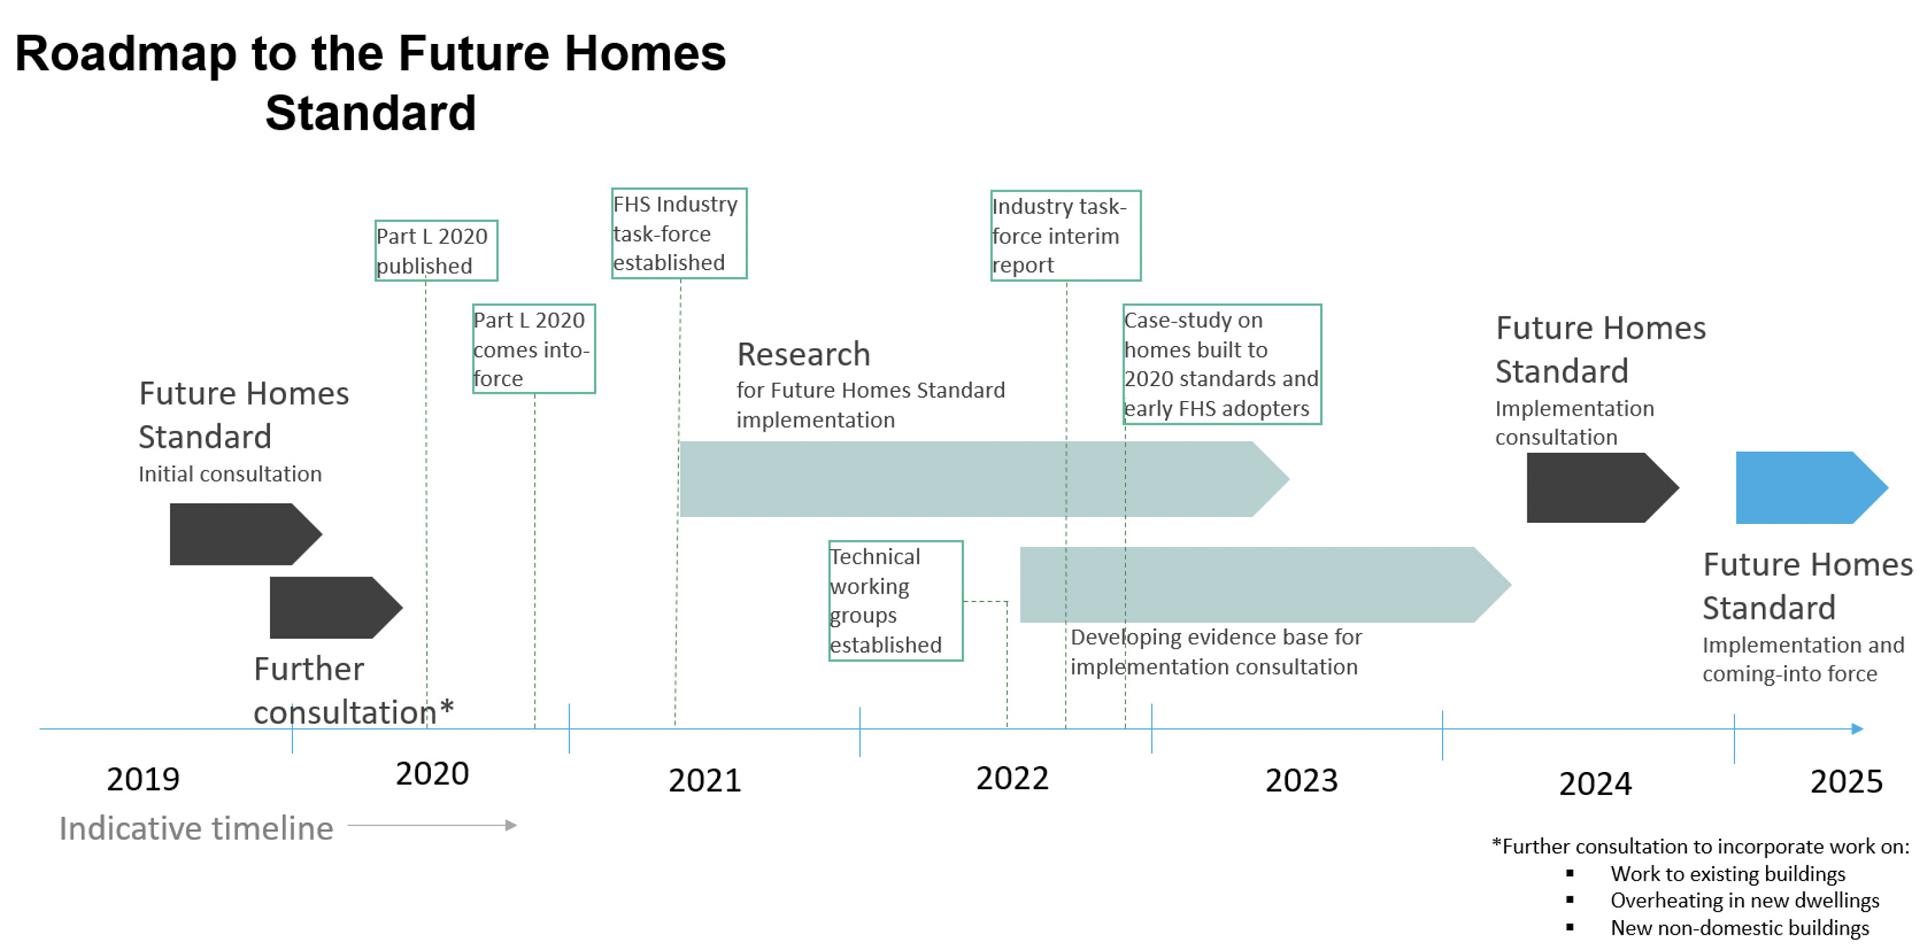
As the world grapples with the urgent need to combat climate change, the construction industry finds itself at a crossroads, poised to play a pivotal role in shaping a sustainable future. In 2025, the groundbreaking Future Homes Standard will become mandatory. It is set to revolutionise the way we build new homes by prioritising low-carbon heating and significantly raising energy efficiency standards. New homes built from 2025 will produce 75-80% less carbon emissions than homes built under the current Building Regulations. However, this paradigm shift has necessitated a substantial leap forward from the existing requirements outlined in Part L of Building Regulation 40.
The uplifted energy efficiency standards, published in 2020, were established as an interim carbon reduction initiative on the journey to the Future Homes Standard. Without taking this step-by-step approach, the leap to 75%-80% less carbon emissions would have been incredibly challenging for housebuilders, contractors, suppliers and architects alike. Uplift to Part L requires at least a 31% reduction in emissions compared to previous standards. The new regulation encompasses a range of crucial aspects that collectively contribute to the sustainability of our homes. From improved insulation and advanced heating systems to optimised lighting and ventilation, every facet must be meticulously addressed to drive down energy consumption, minimise waste, and maximise efficiency.
Additionally, all this needs to be evidenced digitally with high-quality, geo-stamped photographs of each detail so it can be assessed and signed off by the regulator. These standards serve as a stepping stone, bridging the gap between the present and the Future Homes Standard coming into force in a few years, to gradually nurture the industry's transition to a more sustainable paradigm.
Read more about the Future Homes Standard and the uplifted Part L Building Regulations in our blog, ‘Are You Ready for Part L Building Regulations and Photographic Evidence Compliance?’.
Why is there a grace period for Part L compliance?
The transitional period for implementing any new standard, such as the uplifted Part L regulation can be a complex process requiring adjustments and adaptations from impacted stakeholders across the industry. Rolling out standards in stages allows building professionals, assessors and regulators to prepare for these changes and ensure they have the processes in place to address compliancy.
New standards may require significant changes in technology, materials, and construction practices. Rolling Part L out with a grace period has allowed housebuilders time to understand the requirements and put in processes, supply chains, and the workforce to meet the new regulations and get teams up to speed on what they need to do.
As a provider of construction management software to the residential sector, it has served as a great opportunity for Zutec to work with housebuilders and SAP Assessors to develop a solution that meets regulatory and industry requirements, particularly for the mandatory photographic evidence requirement of Part. Developing a solution specifically for this, means we have been able to work with customers to test and refine the process ahead of the hard deadline, ensuring a smooth transition for our customers as they adopt this new way of working. Many of our Part L customers started out their photographic evidence journey with us with a proof of concept (PoC) on one project before full implementation across their sites.
You can explore all the aspects of our Part L solution implementation, how long you can expect it to take, what the key milestones are and how to mitigate risk and common obstacles with a proof of concept, in our blog, ‘Part L implementation: What to expect and what’s involved’.
Part L Photographic Evidence made simple
Capture, store, share, and manage Part L photographic evidence with a dedicated solution to speed up BREL report submissions.

How to evidence the uplifted Part L standard
At six points throughout the house build, photos will need to be captured of the work done. Photos are then sent to the external SAP assessor to show that the insulation and thermal continuity of a house meets standards for sign-off and authorisation before the property can be completed, the BREL report issued, and the EPC lodged.
With the Zutec field application, the process of demonstrating photographic evidence against all the requirements outlined in the Part L standard is easy.
All from an app on your device, users can digitally complete required forms, capture photos related to each plot with the required detail and sign off evidence so information and supporting documentation can be shared with the SAP assessor for approval and stored in one place in the cloud, providing a traceable audit trail later on.
Put simply, with one easy-to-use tool, that can be configured for your business but comes out of the box, you can be up and running to take photographic evidence for Part L in weeks and have a consistent process across your business for capturing, collecting, storing, sharing and getting sign off on evidence for plots for completion.
An overview of the 6 photo stages for Part L photographic evidence
A requirement of the Part L standard is to ensure the as-built construction truly reflects the design stage SAP calculations, ensuring the quality and installation of the building fabric and services are what they should be. To demonstrate this and to capture the evidence, a photograph per detail for each individual plot/development is required and needs to be submitted for sign-off. This photo needs to be in a high resolution and clear to determine what the photo is of and where it is in the plot.
These are outlined below:
- Foundations/substructure and ground floor, to show thermal continuity and quality of insulation in the following places:
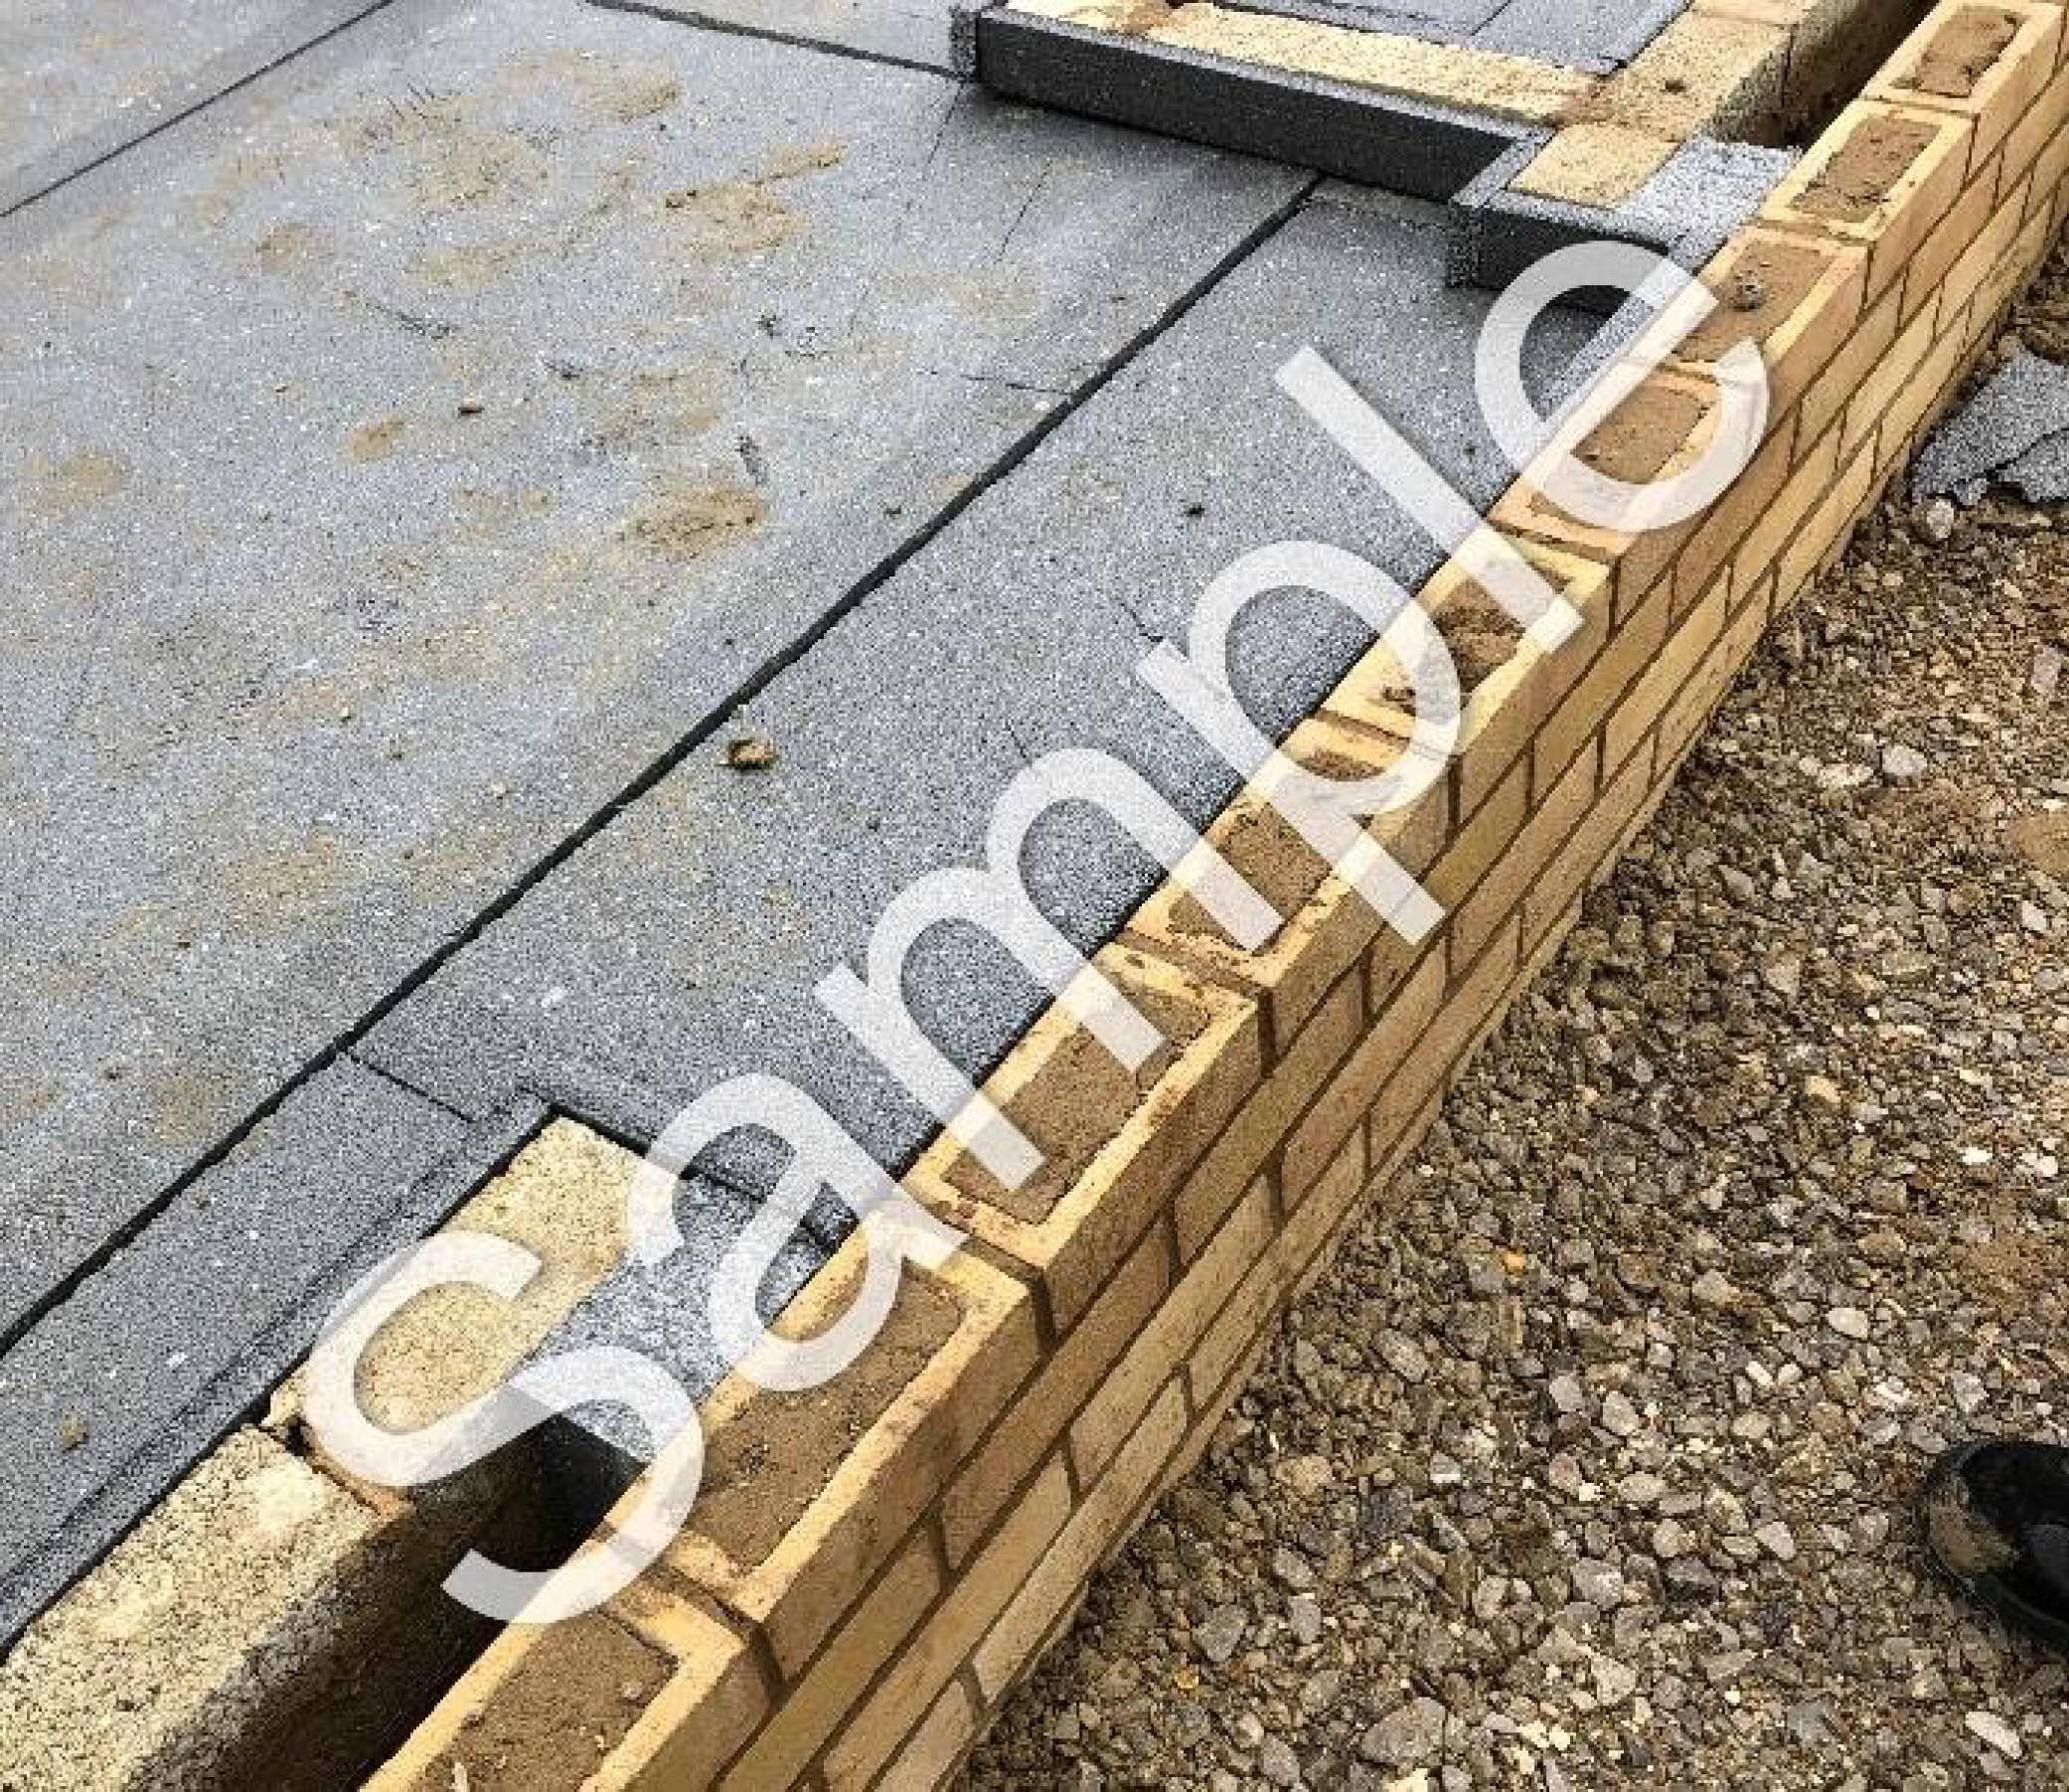
- At ground floor perimeter edge insulation.
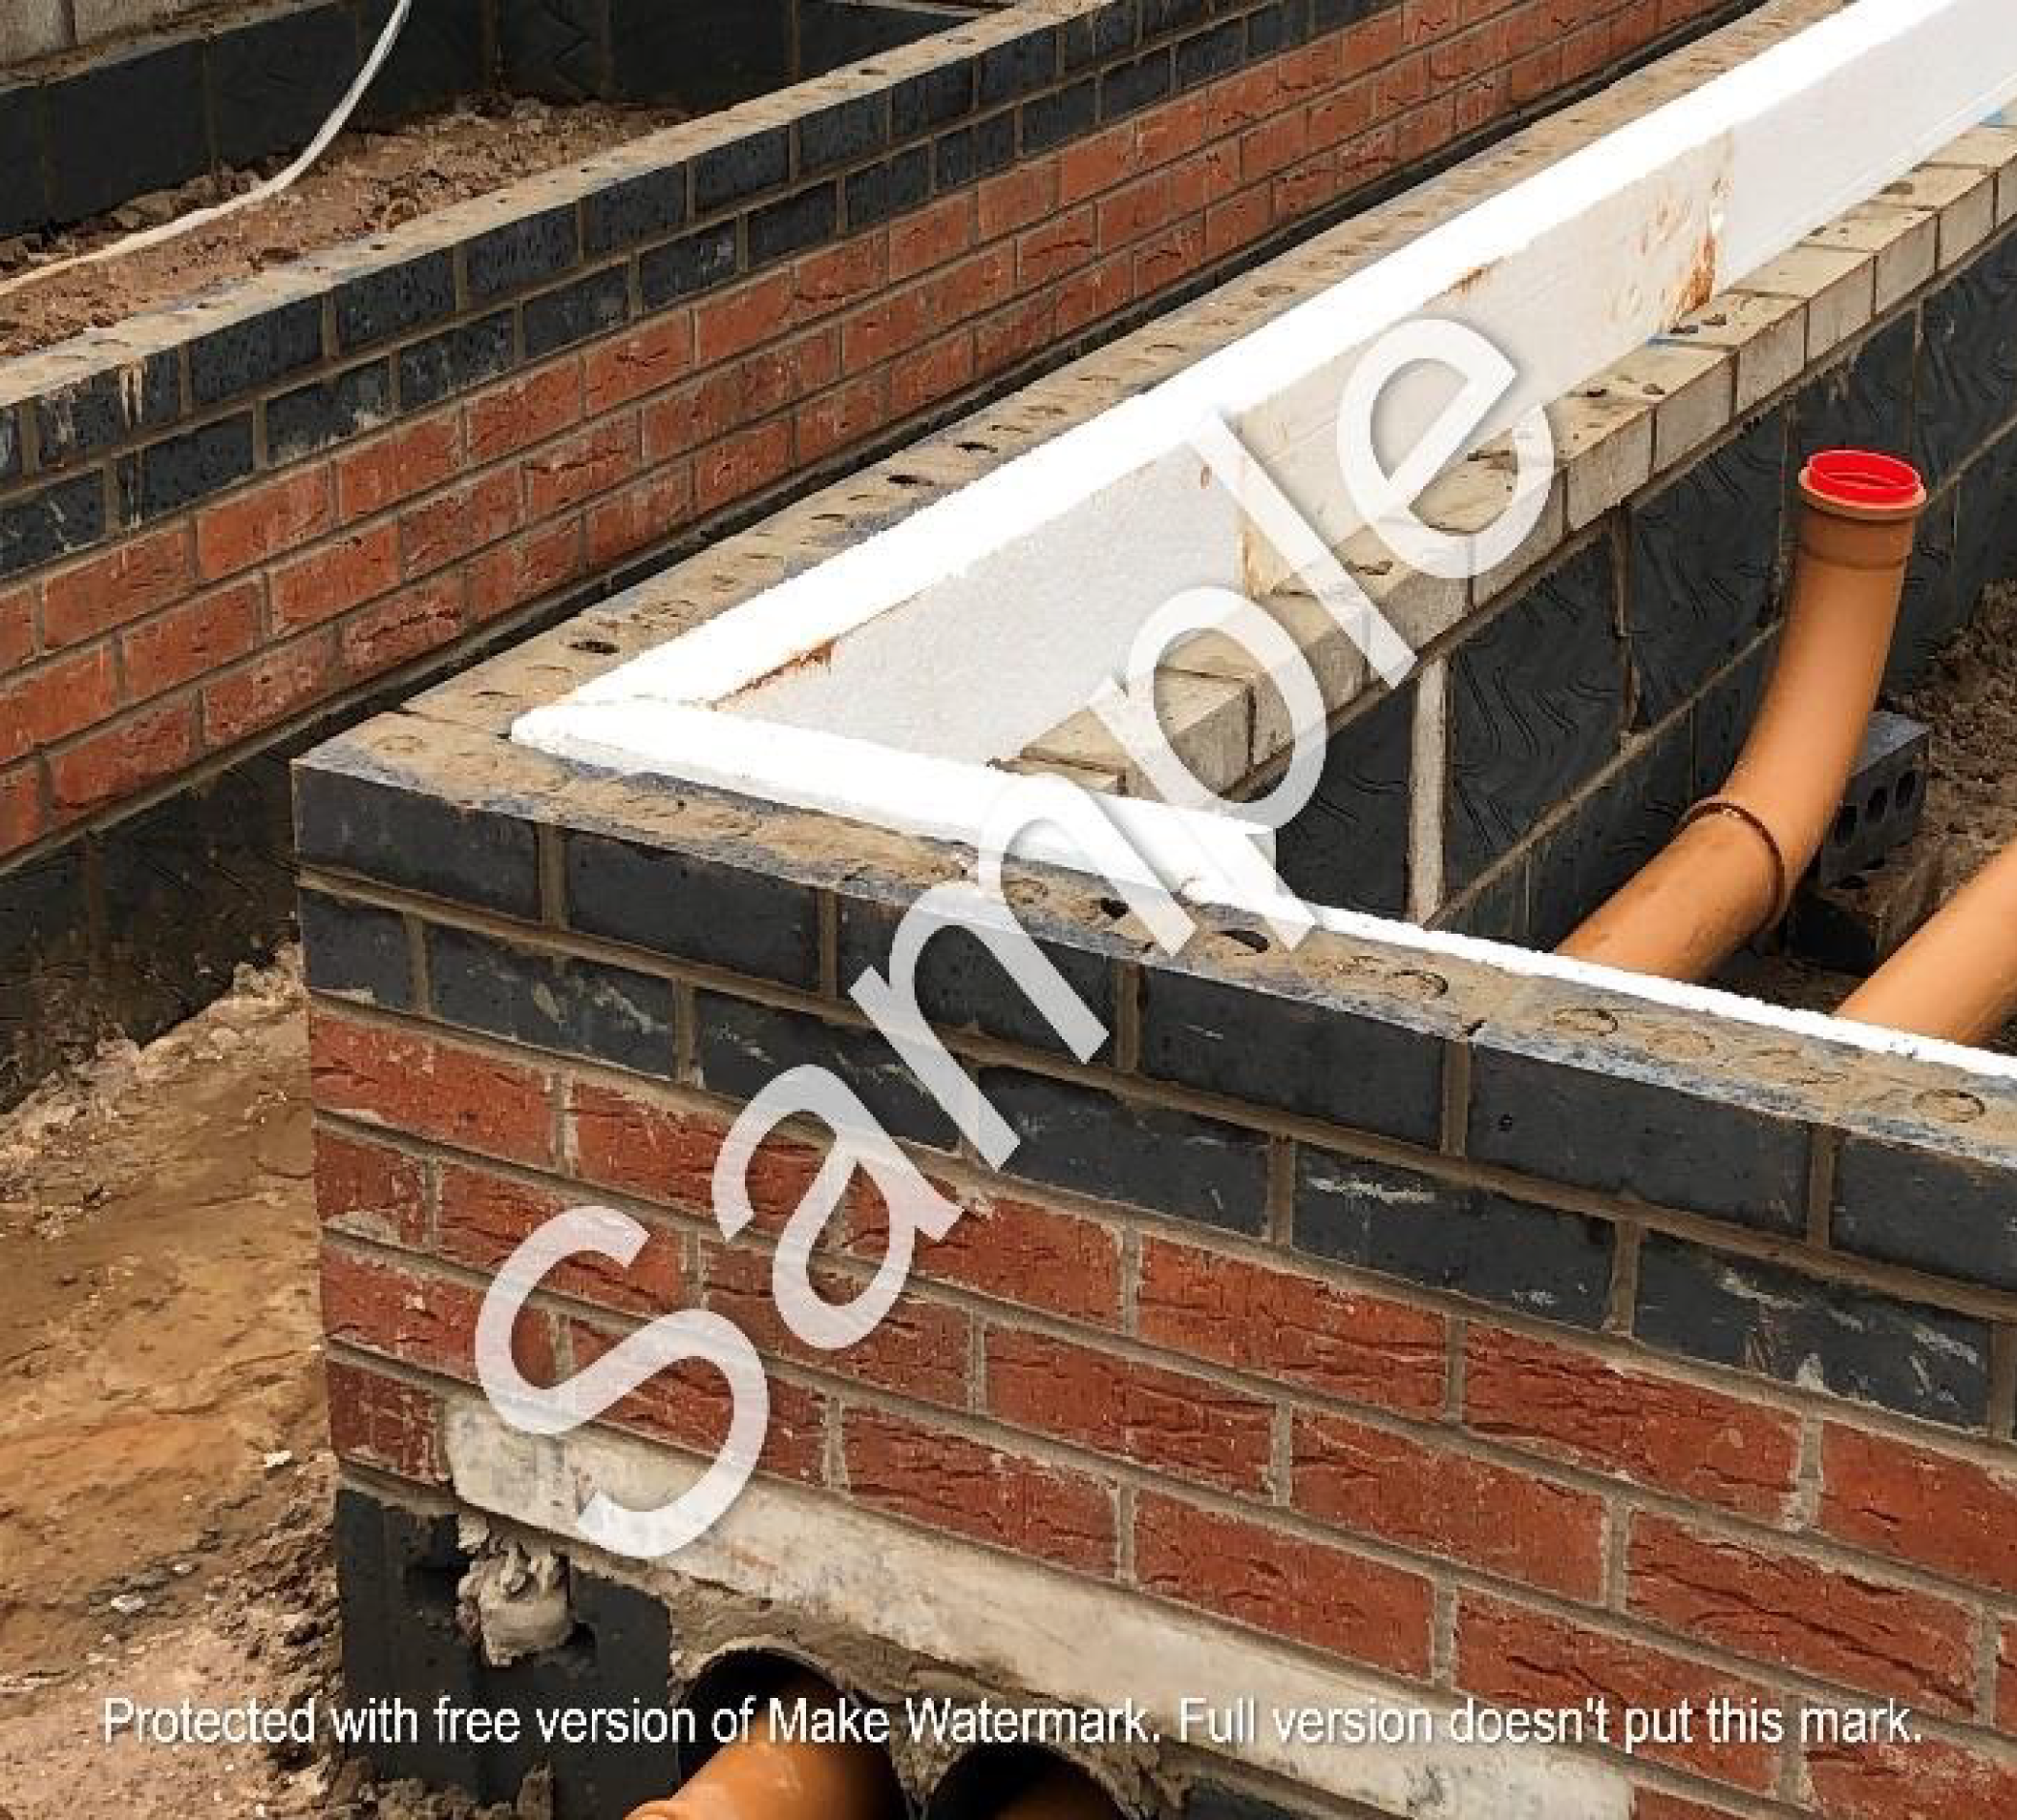
- At external door threshold.
- Below damp-proof course on external walls.
- External walls: for each main wall type, to show thermal continuity and quality of insulation for the following:
- Ground floor-to-wall junction.
- Structural penetrating elements.
- Roof: for each main roof type, to show thermal continuity and quality of insulation at the following:
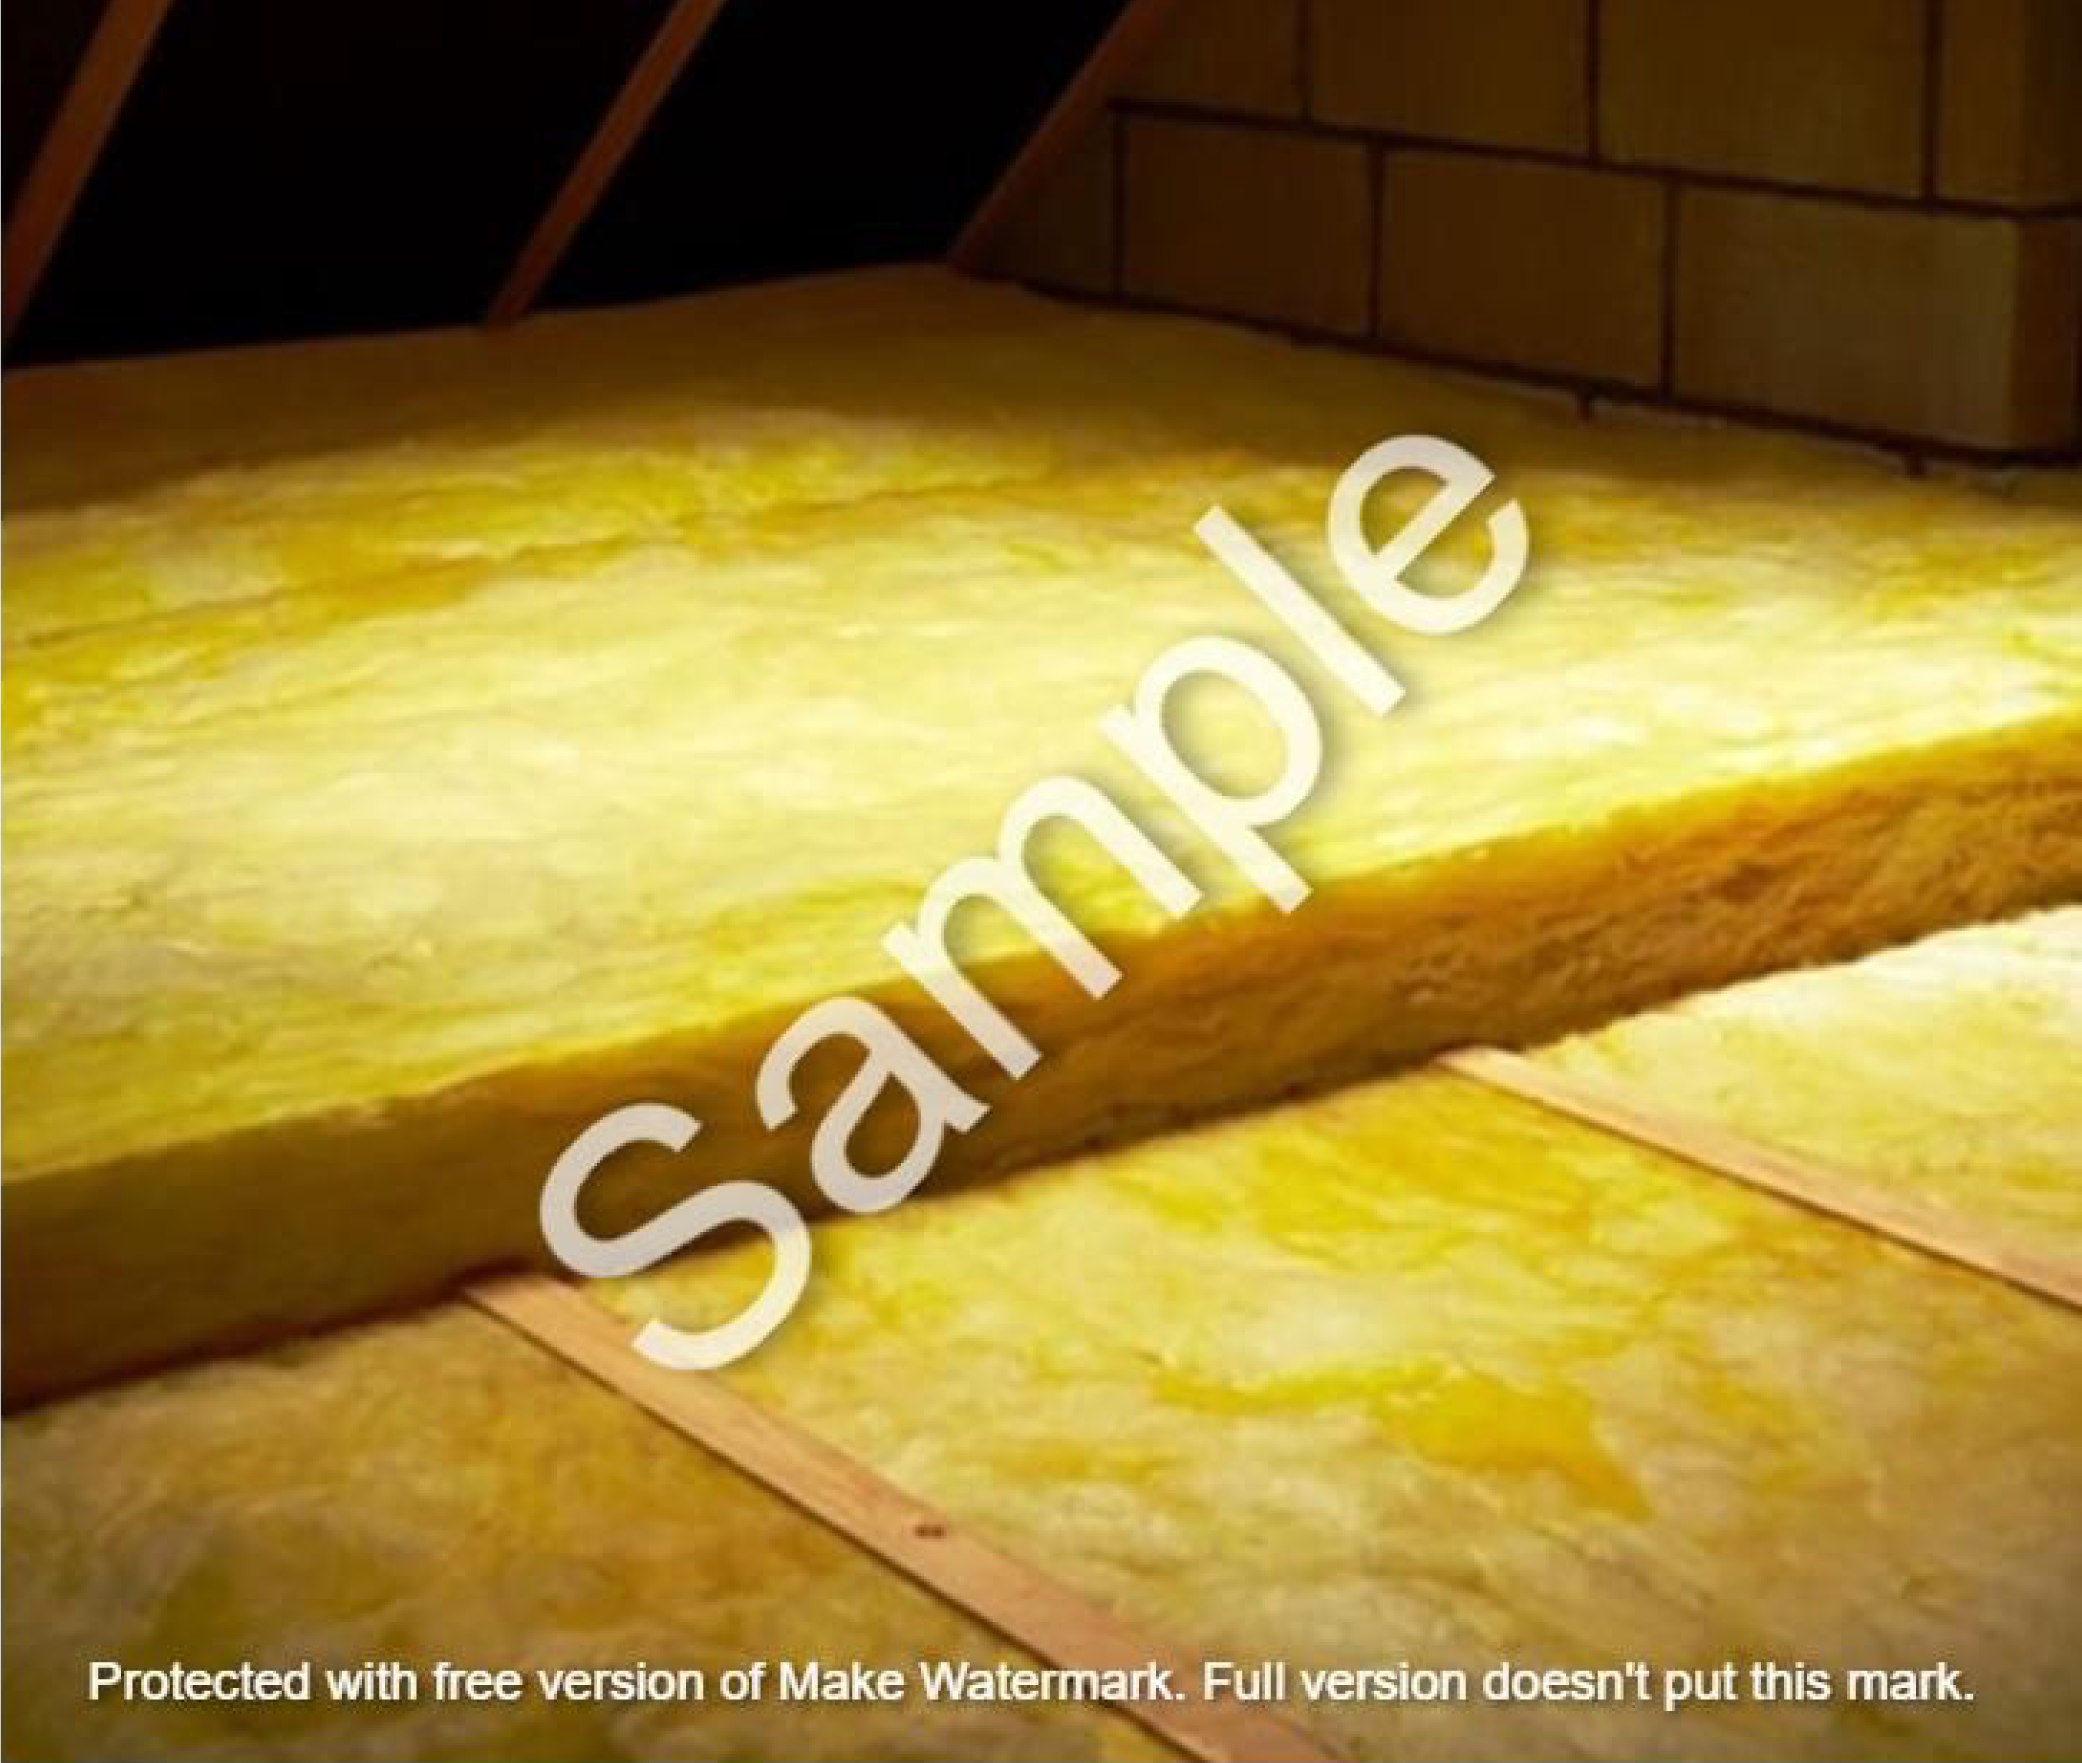
- Joist/rafter level.
- Eaves and gable edges.
- Openings: for each opening type (one image per wall or roof type is sufficient), to show thermal continuity and quality of insulation with photographs of the following:
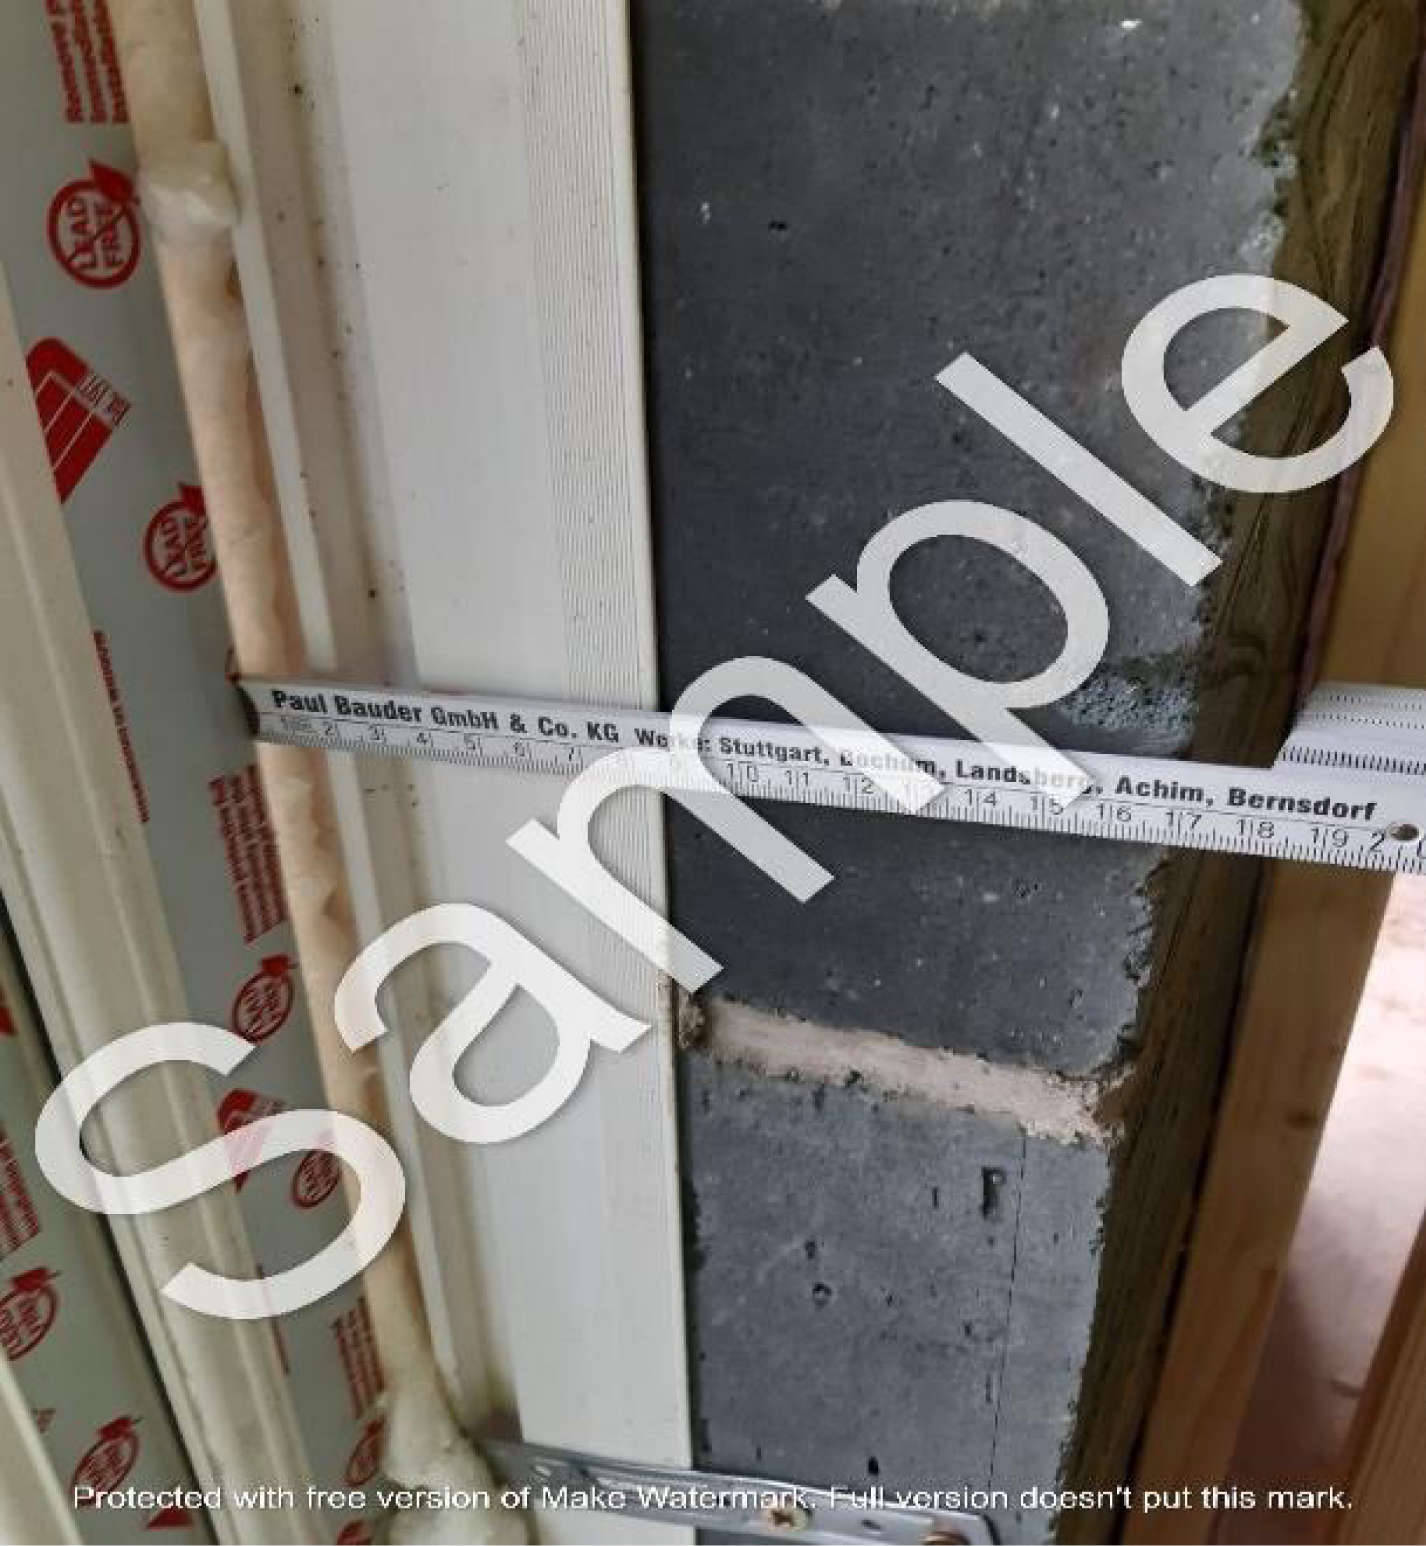
- Window positioning in relation to cavity closer or insulation line.
- External door set positioning in relation to cavity closer or insulation line.
- Airtightness: additional photographs for all details 1–4 to show airtightness details (only if not included or visible in continuity of insulation image).
- Building services: for all plant associated with space heating, hot water, ventilation and low or zero carbon technology equipment within or on the building, show the following:
- Plant/equipment identification label(s), including make/model and serial number.
- Primary pipework continuity of insulation.
- Mechanical ventilation ductwork continuity of insulation (for duct sections outside the thermal envelope).
Once the plot is complete and the BREL report and EPC rating are given, these photographs will be given to the buyer of the new house as evidence to show how the details of the construction of their property.
Using the Zutec Field App for Part L photographic evidence
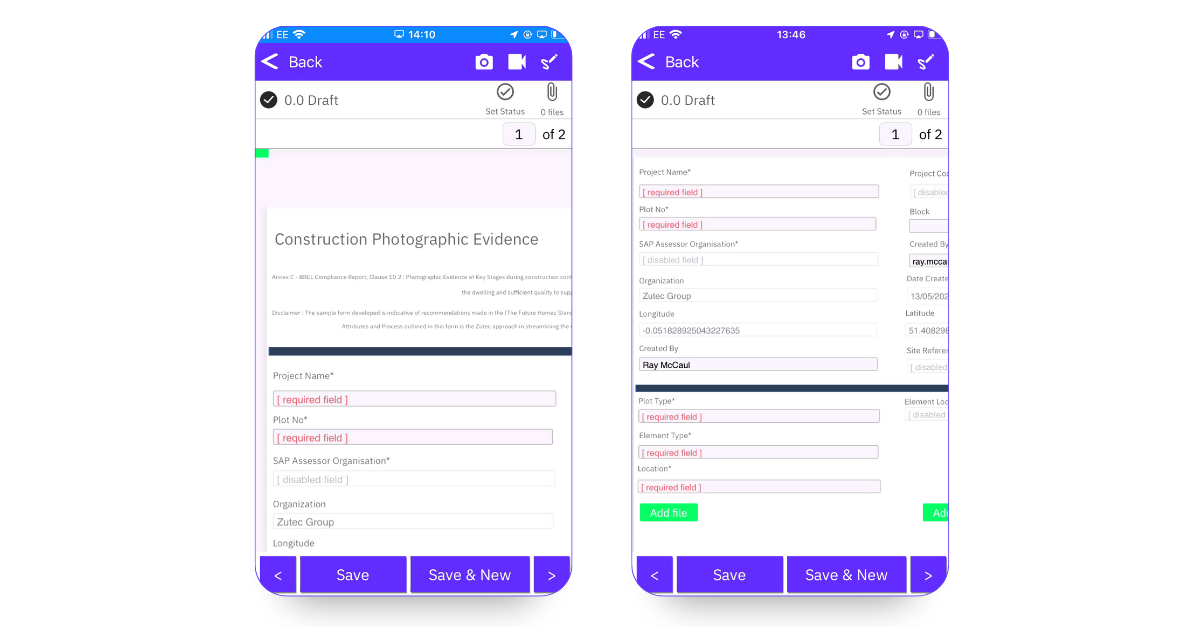
It’s really easy to get started with the Zutec Field app to capture the photos outlined above. Once logged in a home page will display all open projects, each having their own photographic evidence lists.
Pre-defined values to capture plot details, such as the organisation, project code, project name, plot number, longitude and latitude of plot, as well as the detail to which the photo relates to, are enabled to reduce the amount of manual input when capturing evidence.
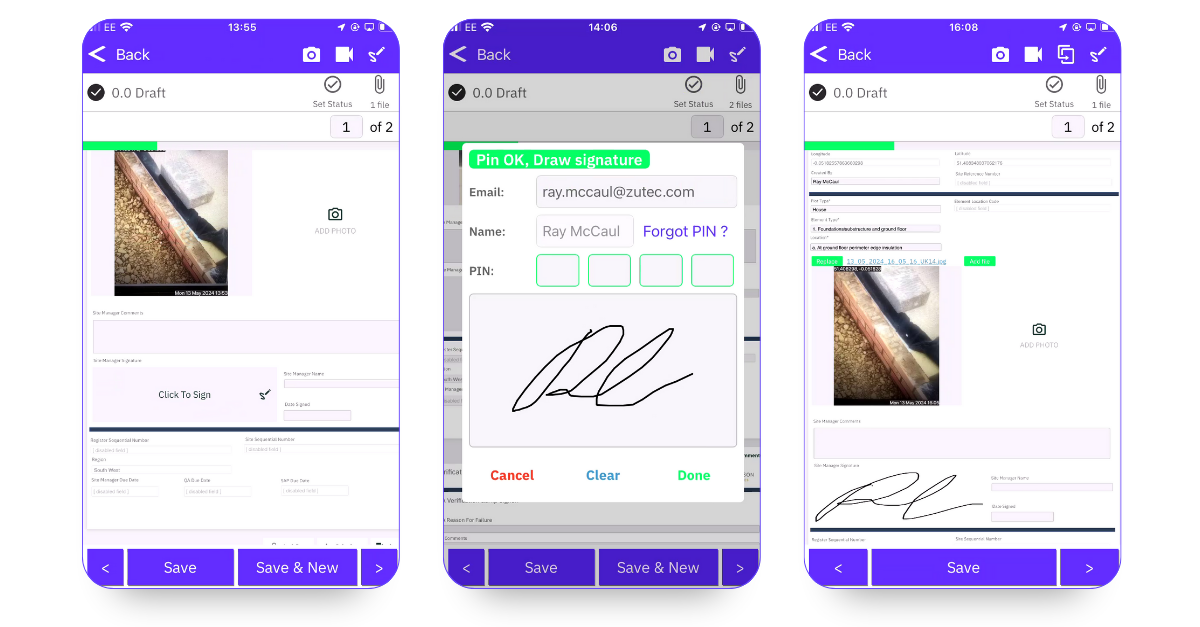
Taking photos on a handheld device is the first step towards creating a record for inspection. The requirement is for a minimum of one photograph for each element/location.
On Zutec there is the ability to add 2 photos per element/location to ensure the detail is captured. High-resolution photos can then be taken within the app and uploaded with or without an internet connection which means a contractor can upload multiple items without worrying about data syncing. As soon as the phone or device is online it will automatically upload to Zutec Cloud.

Once a record is ready for inspection it can be easily submitted to the assessor through the app, and the status can be changed to alert the QA Assessor or SAP Assessor that the photo is ready for review.
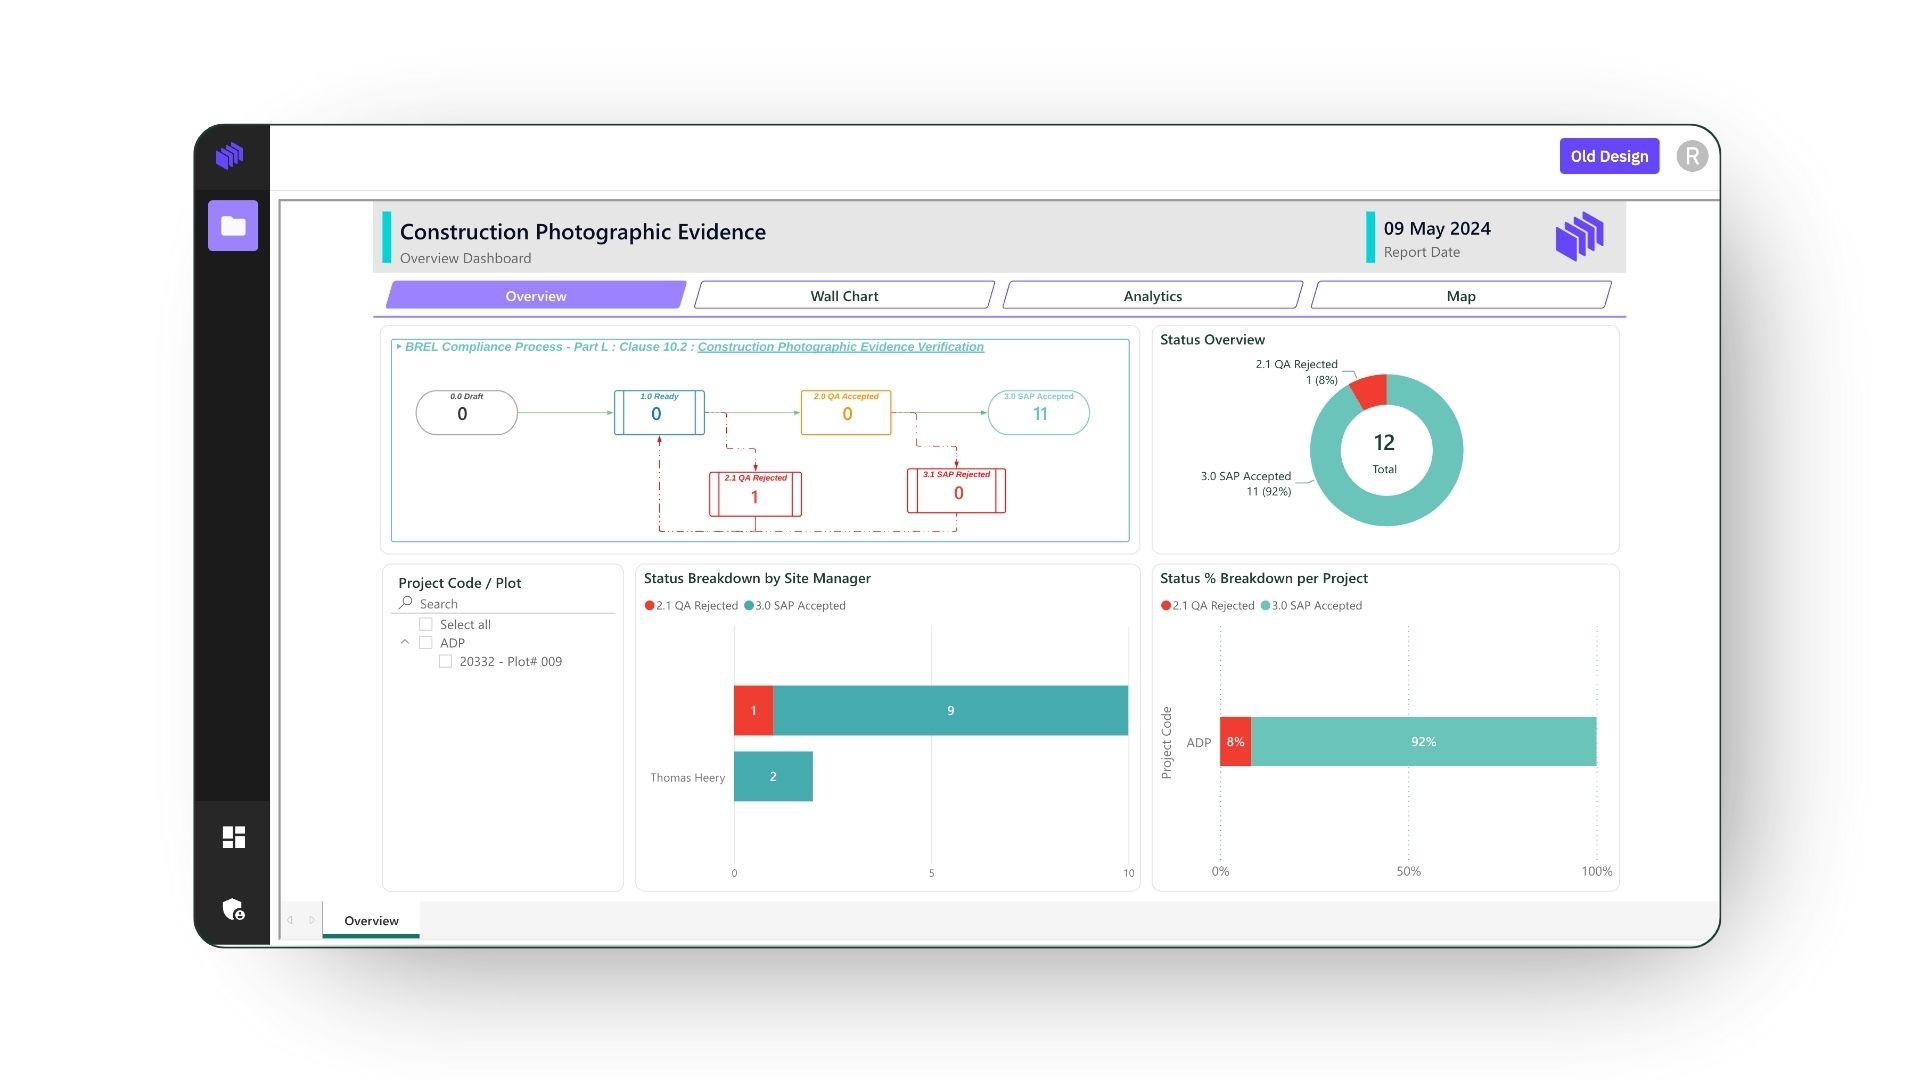
Evidence and information for each plot is then aggregated in the cloud and, from here, a photo can be accepted or rejected and retaken before sign-off is complete.
Dashboards and analytics make progressing projects straightforward. An overview allows users to see the overall status of the project at a glance, while filters can be applied to view specific plots. Live analytics show how long it is taking for records to make it through the process which also helps to identify any bottlenecks.
This is not all, while Part L may be the first step on our customer's journey to quality management, it doesn’t have to be the last. Once a team is embedded in the software and understands how it works, then adding templates for snagging, health and safety, and QA inspections is easy... and means housebuilders can move towards a full quality management tool or common data environment to manage all their building information through easy-to-use field apps and dashboards.
Part L Photographic evidence guidance
While we know what photos need to be taken of which part of the build throughout the construction phase, understanding what photos are acceptable is a different matter. Below is guidance on the types of photographs required for each detail to interpret what has been delivered on-site so it can be compared with an as-built BREL report.
The following are some examples of what photographs should be taken, and what they could look like for each category:
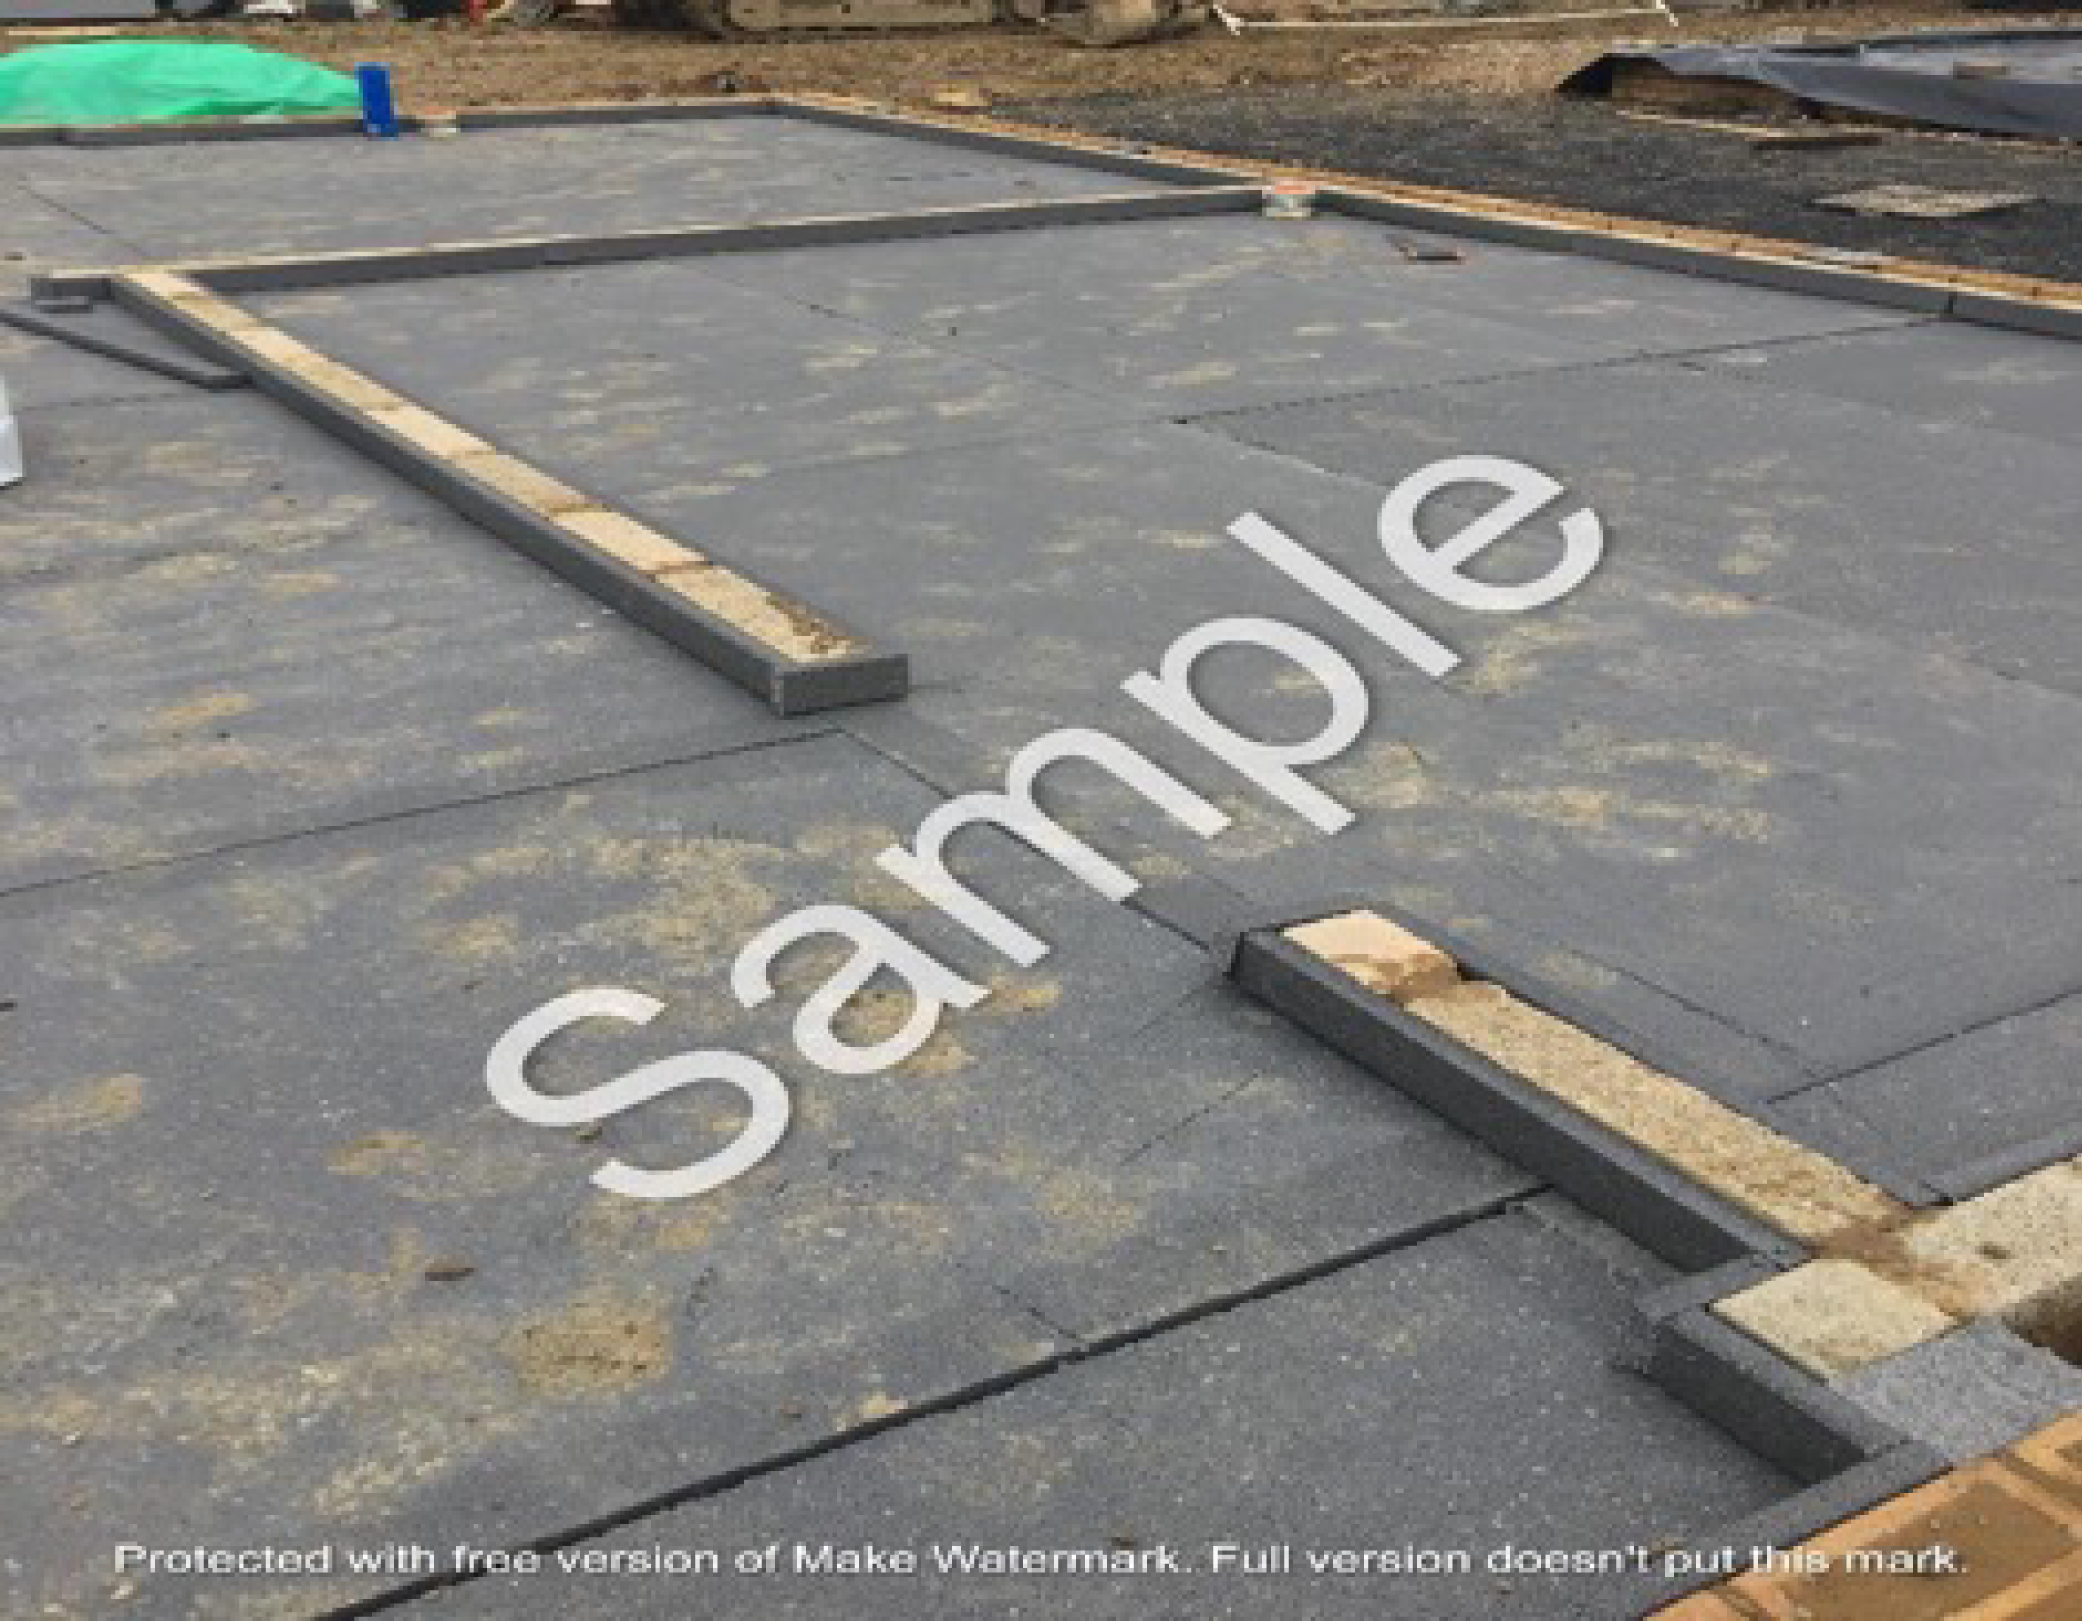 | A photograph should show a continuous strip of insulation in contact with the walls around the perimeter of the ground floor. |
 | A photograph should show a strip of insulation or an insulated cavity closer to the threshold zone. |
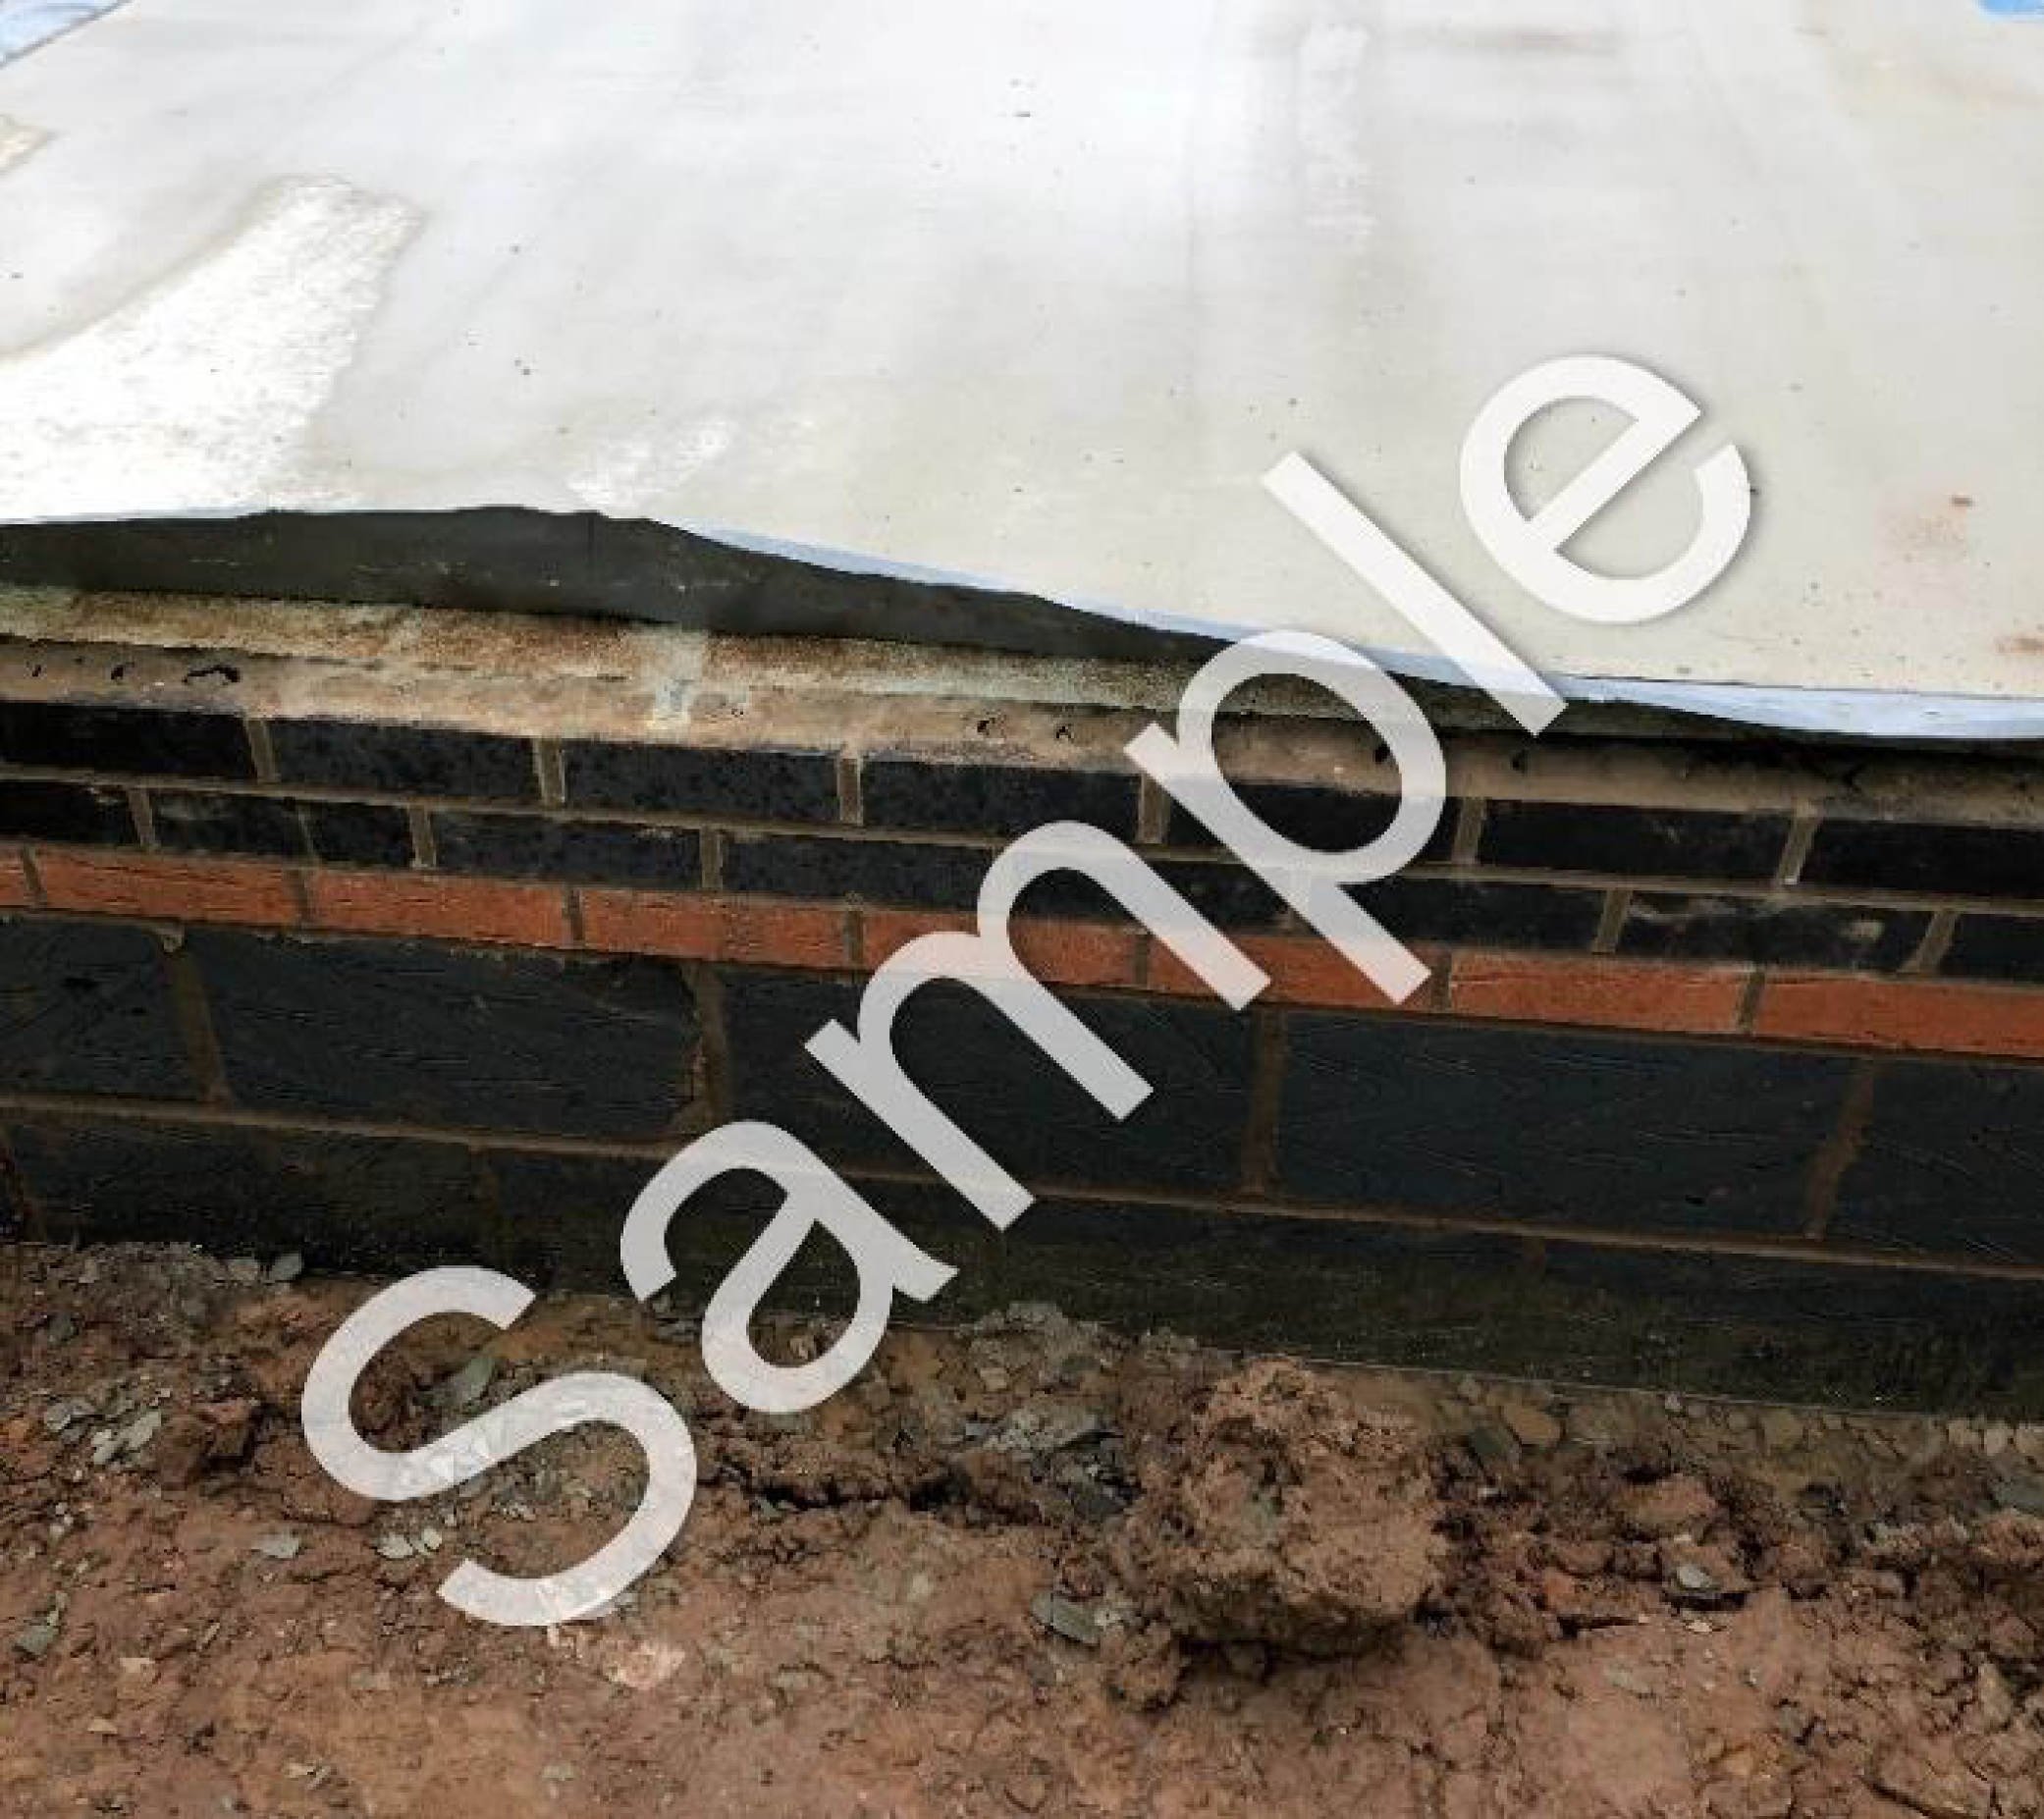 | Moisture-resistant insulation should be fitted below damp-proof course level and extend to the foundation block/structure. |
 | External or cavity wall insulation should extend below the damp-proof course. |
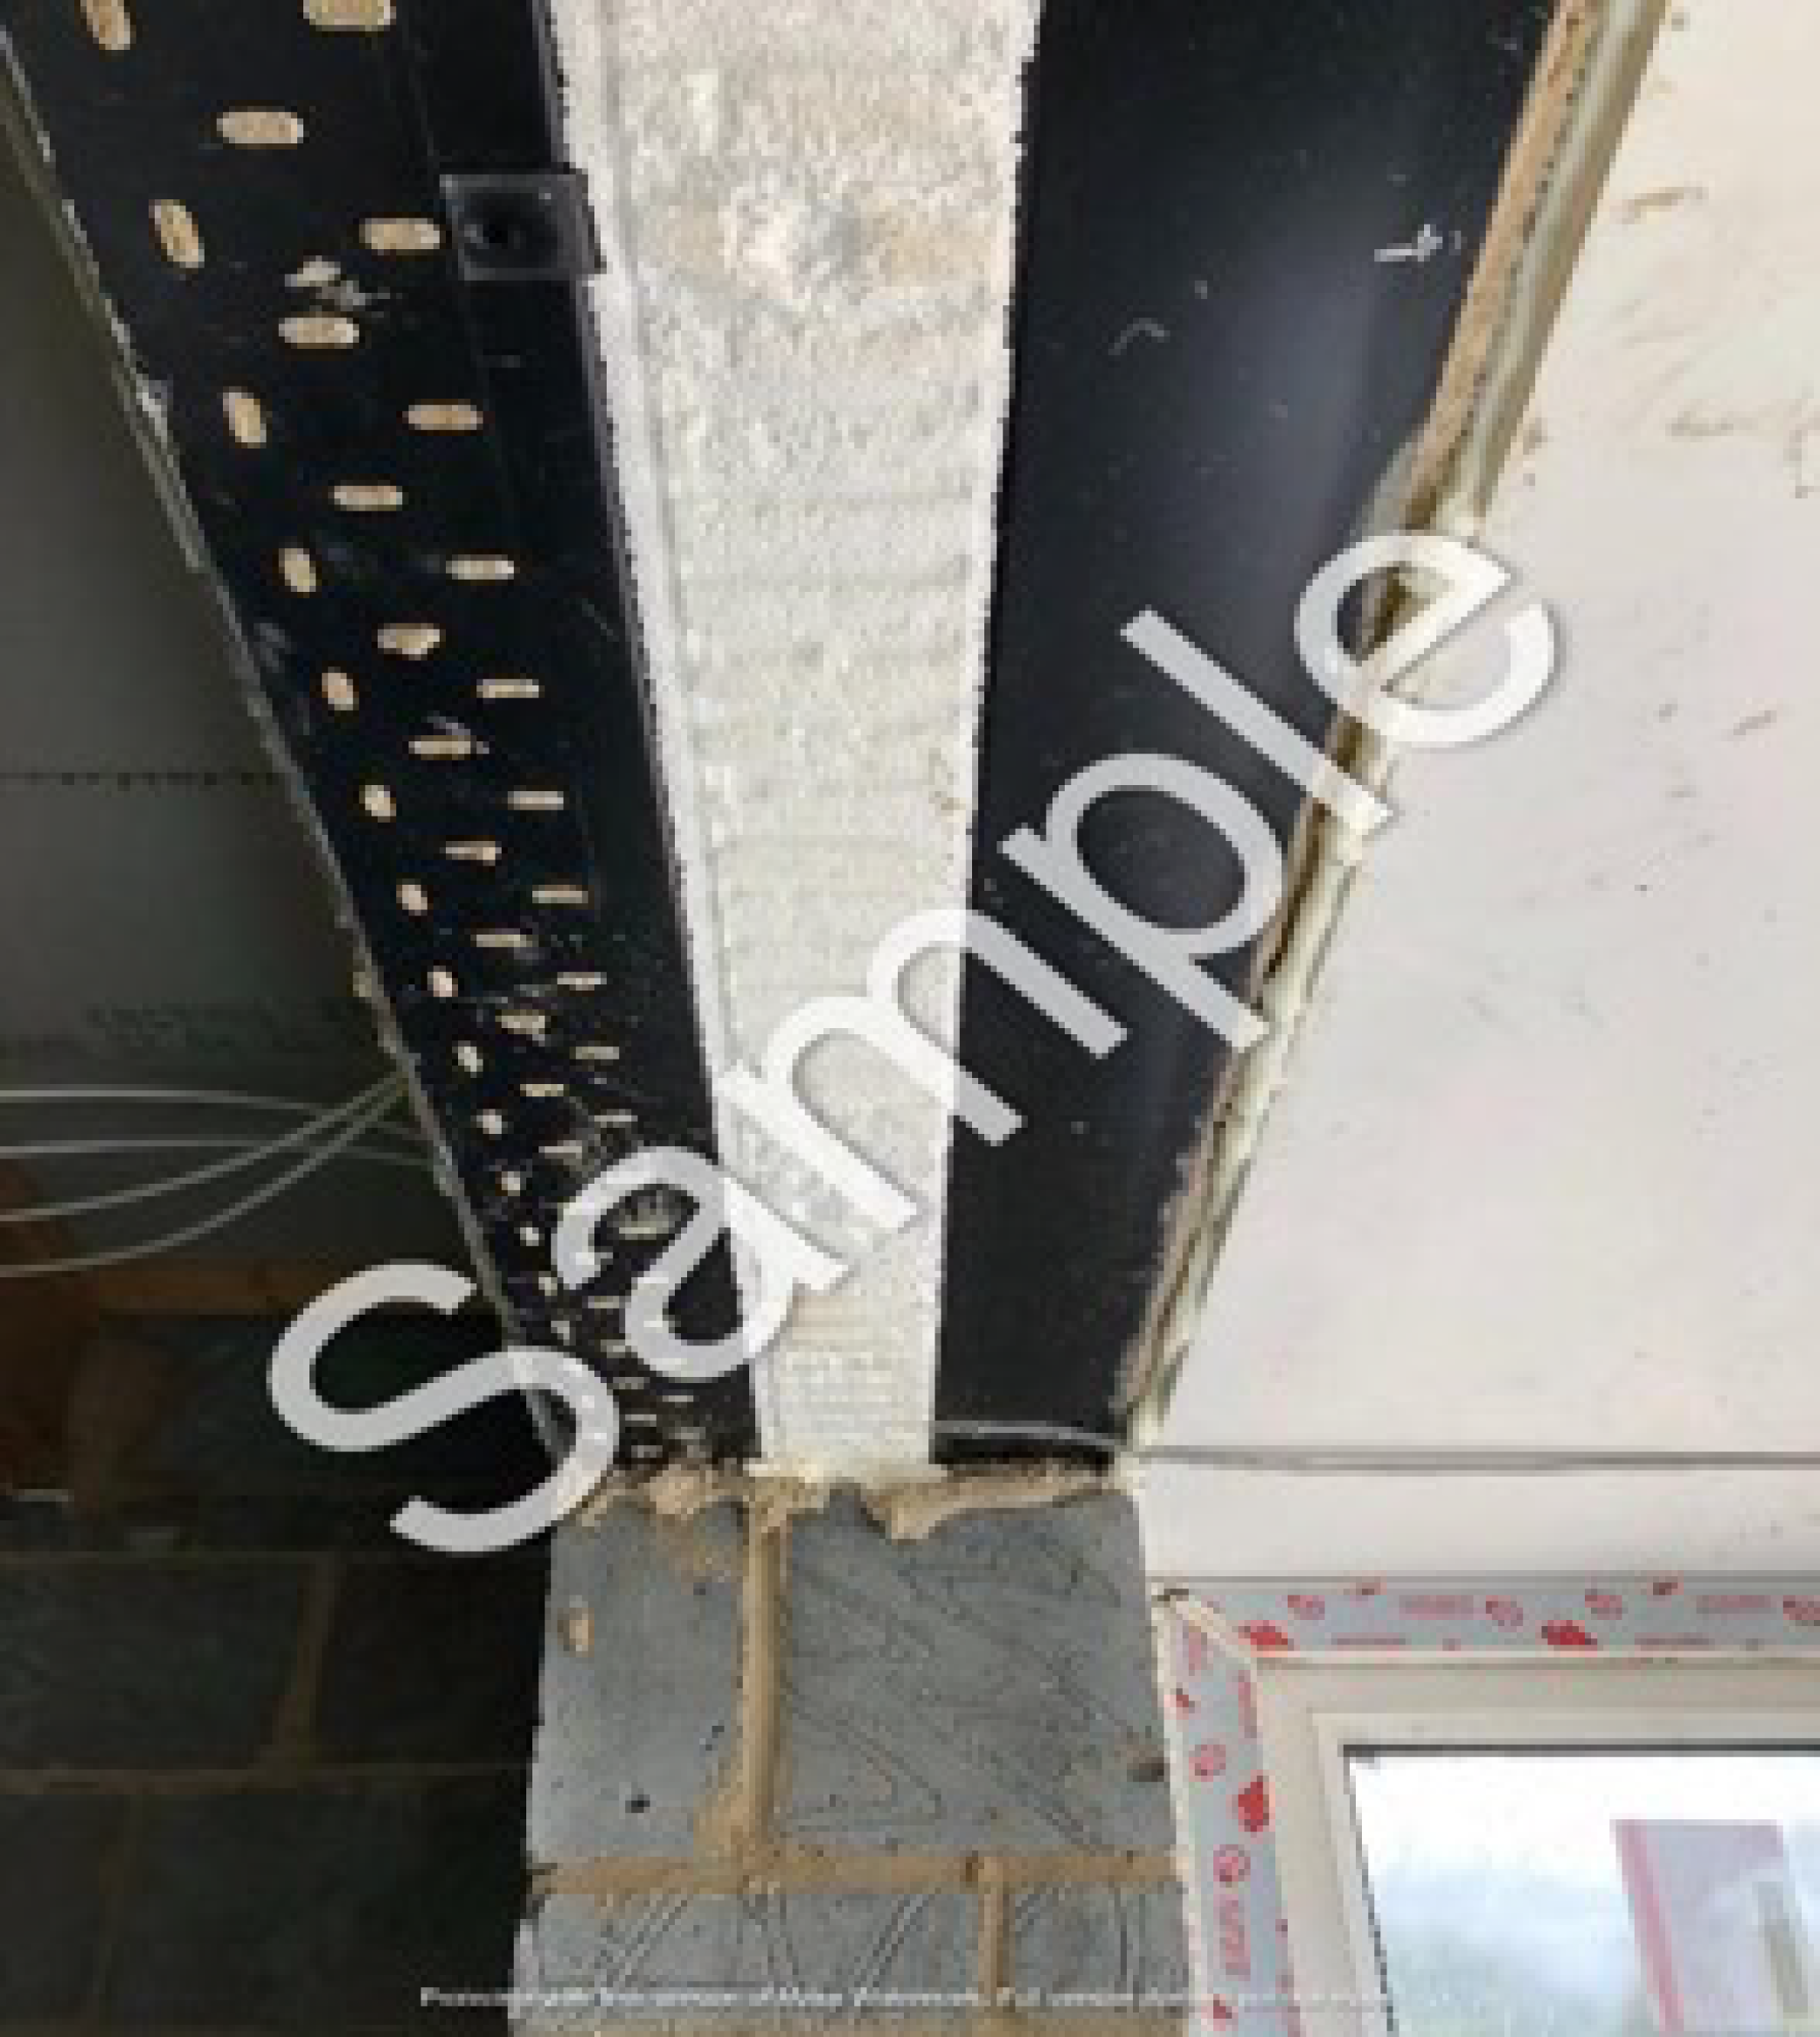 | There are a number of items this could cover but discussions with stakeholders suggest this would usually include lintels, and one photo is required per opening type. |
 | Insulation should be installed tight to the structure, without air gaps, and should extend to the wall insulation. |
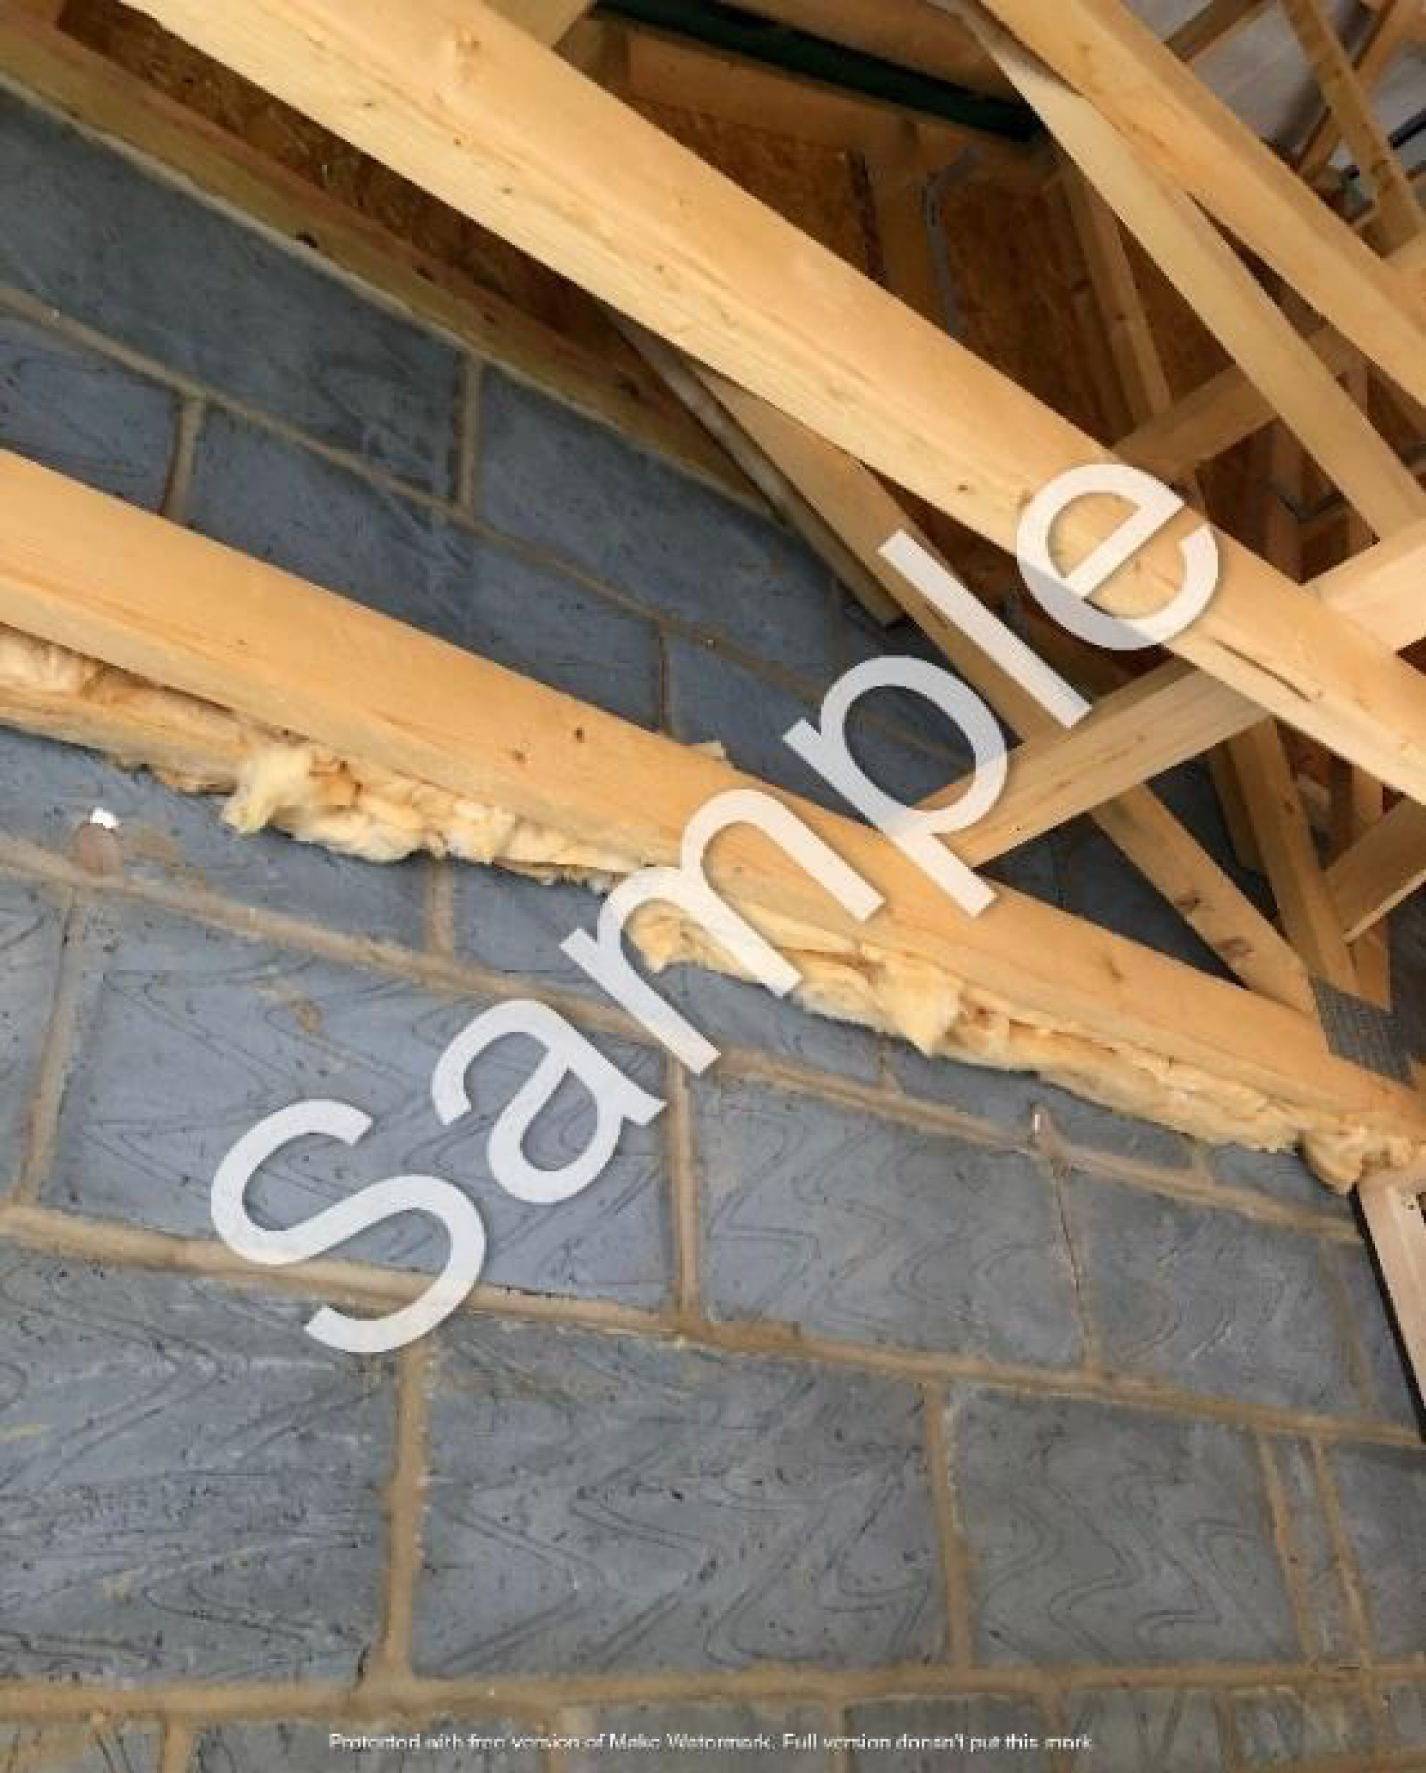 | Gable photographs should show insulation against the inner surface of the external/party walls to minimise cold bridging. |
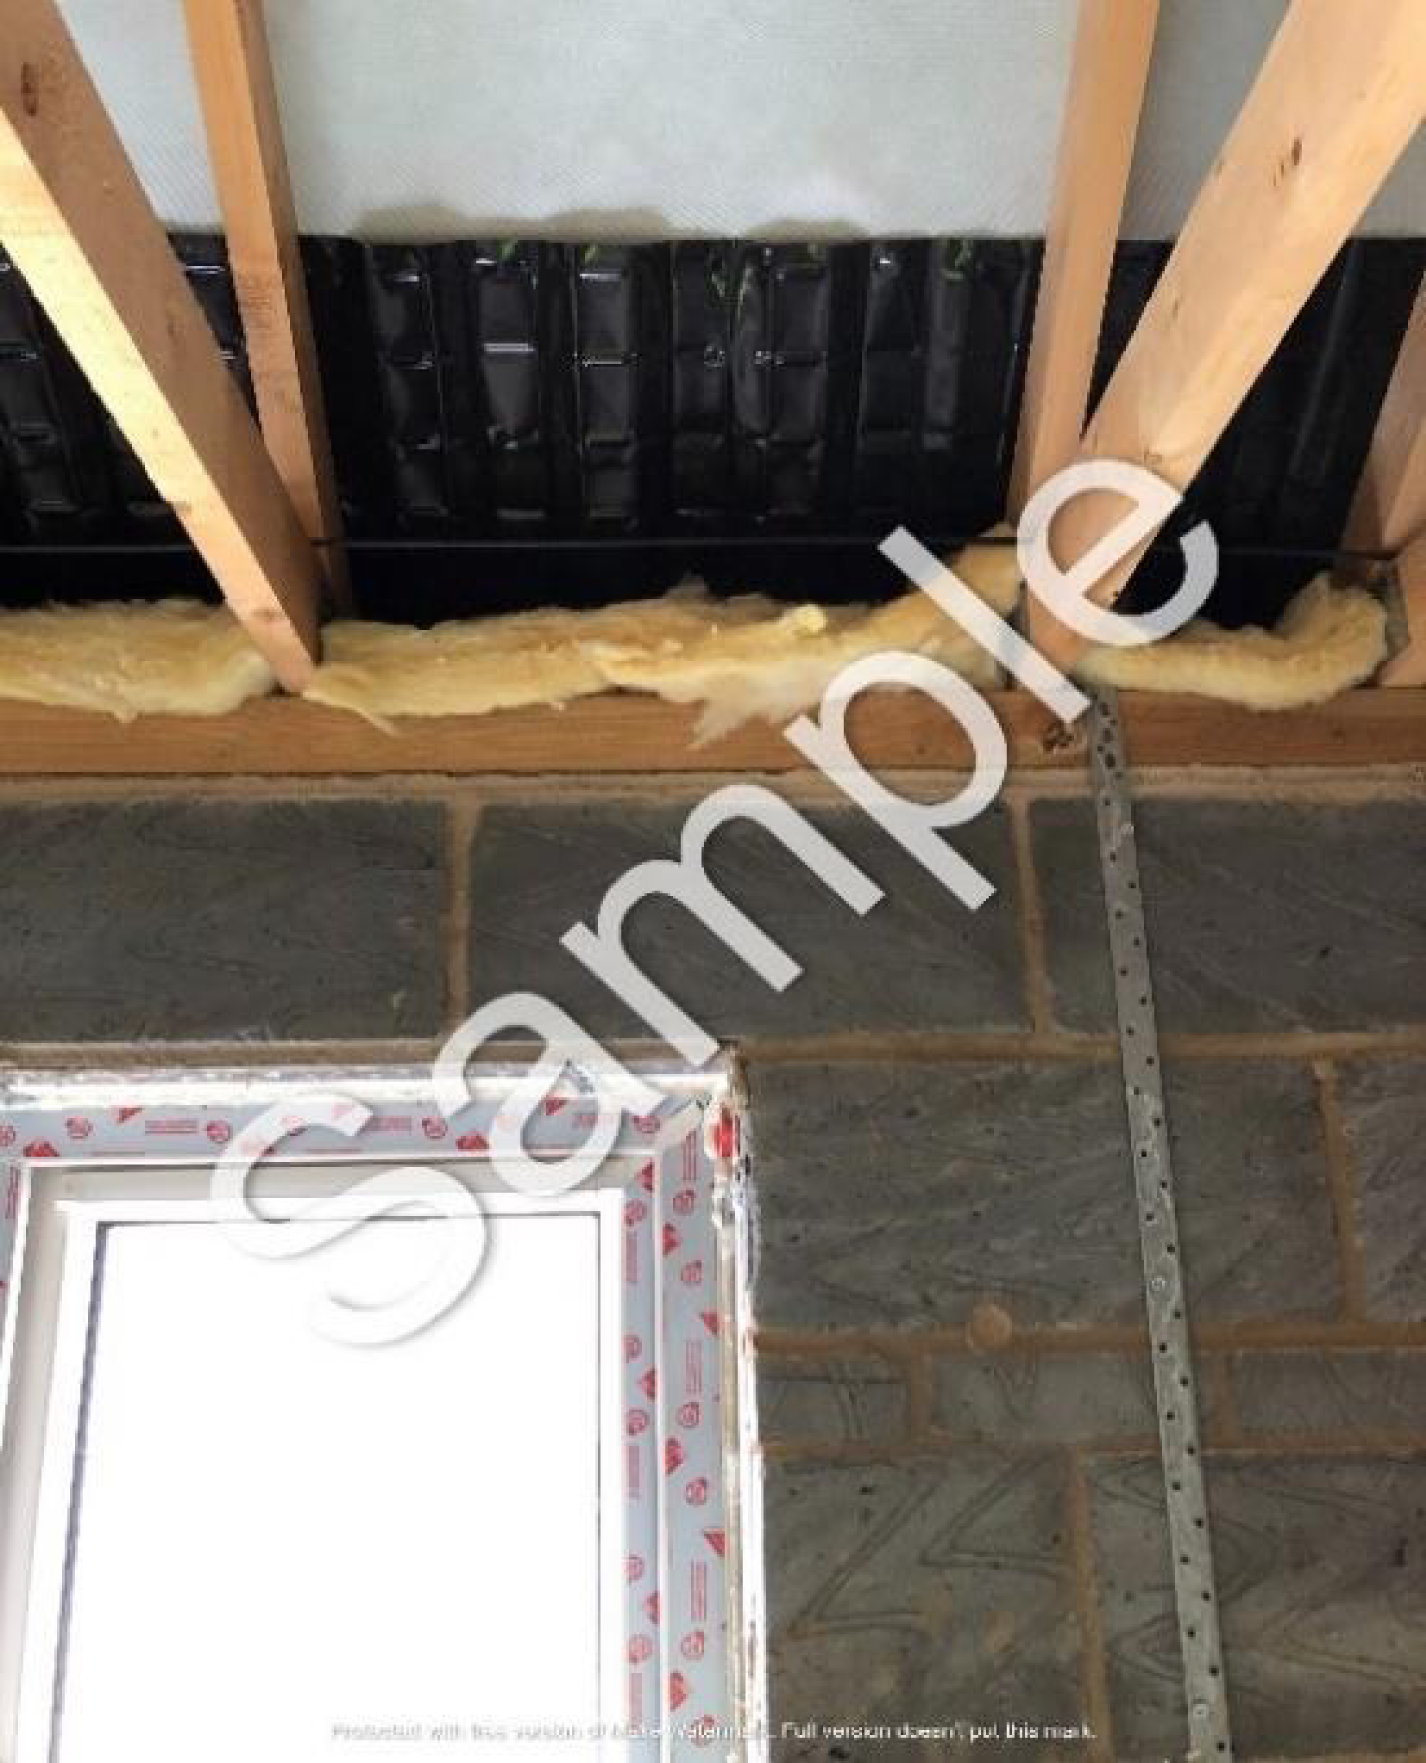 | An eaves photograph should show loft insulation extending beyond the wall insulation to minimise cold bridging. |
 | There should be at least one photo per window/door type. |
If you need to implement a solution quickly to get on top of Part L photographic evidence obligations or would like to understand more about whether our out-of-the-box and fully configurable platform could work for you, book a demo with one of our experts. We’ll be happy to show you exactly how to capture, store, share and manage geolocated photographic evidence for your Part L compliance and how to get started.