


Zutec Field photo journey and performance improvements
With this update, accessing projects after the initial login is now faster, and downloading and uploading files has been optimised for quicker operations. Additionally, we have streamlined the photo journey, reducing the number of clicks needed to save and add new photos, making project management more efficient.
Key features:
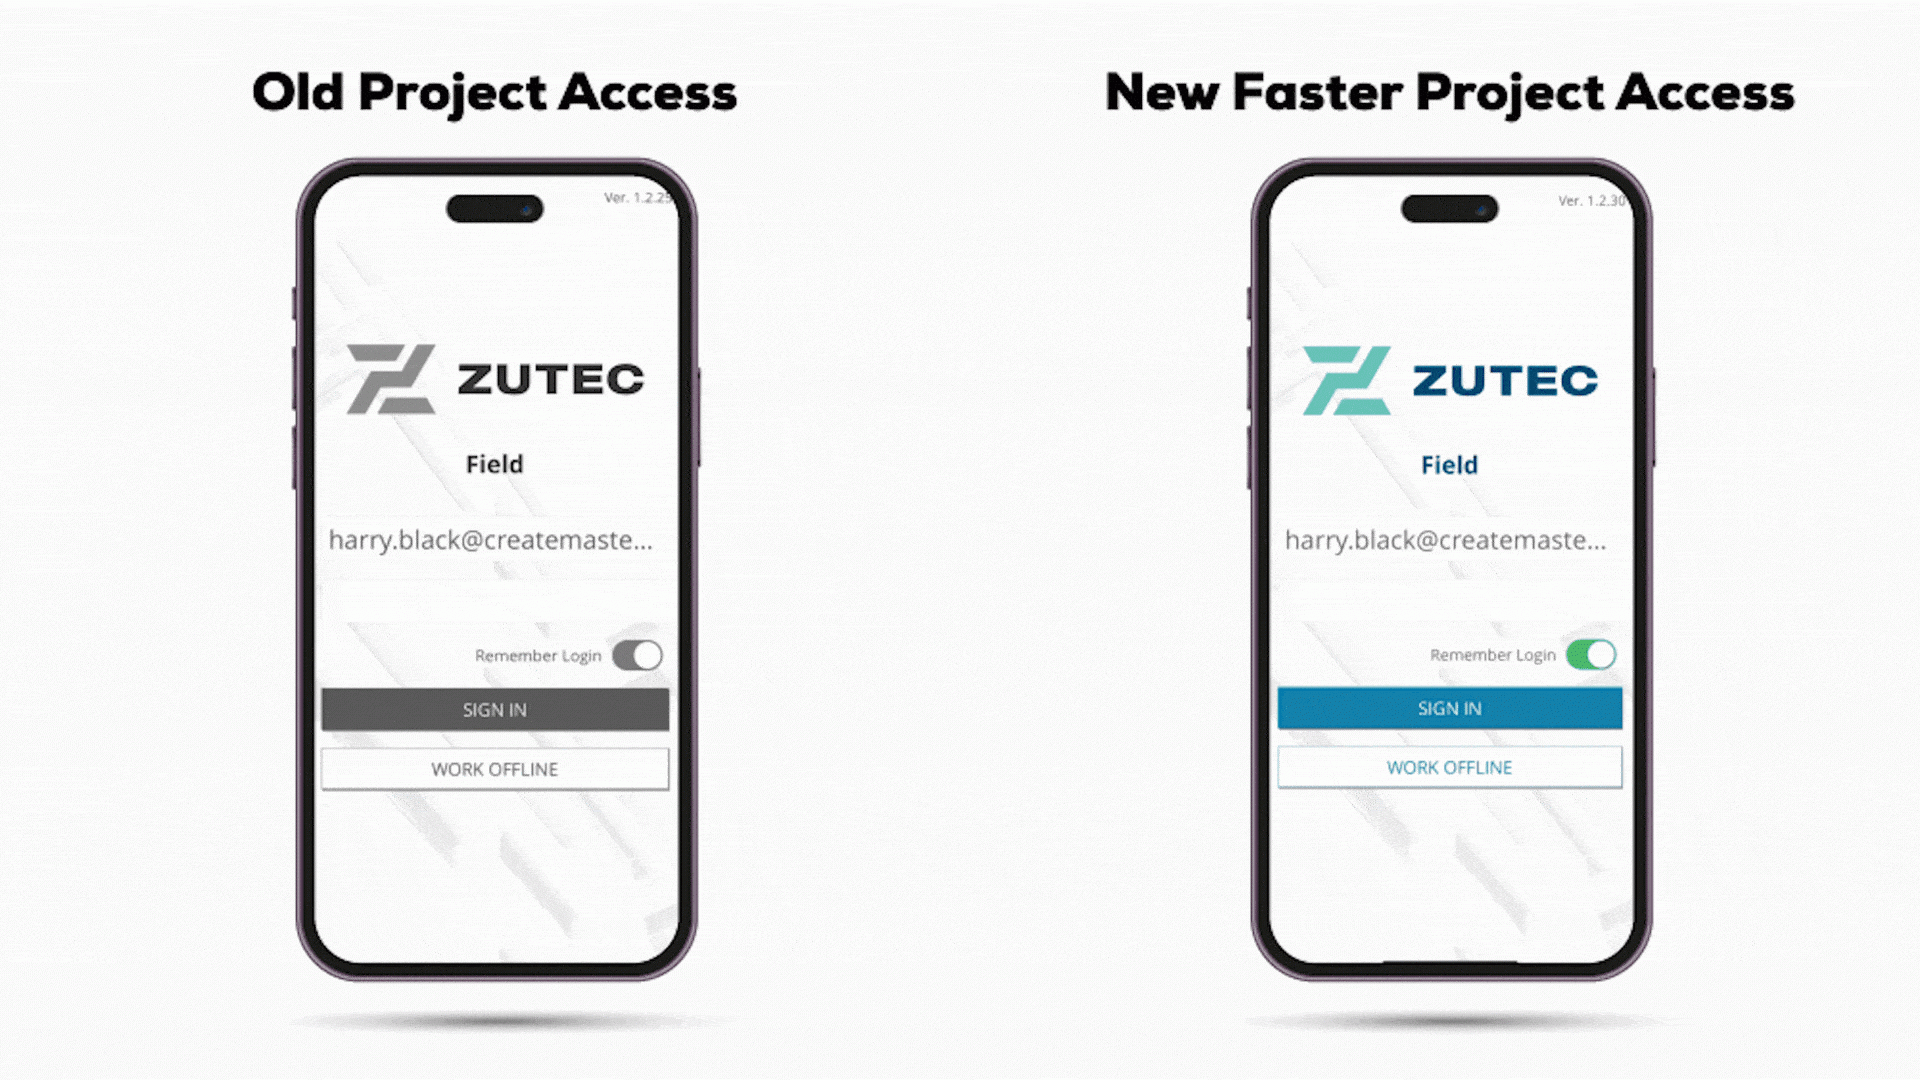
- Faster project access speed:
- We have optimised the project loading process to reduce waiting times after the initial login.
- Accessing your projects is now quicker and more seamless, providing an enhanced user experience.
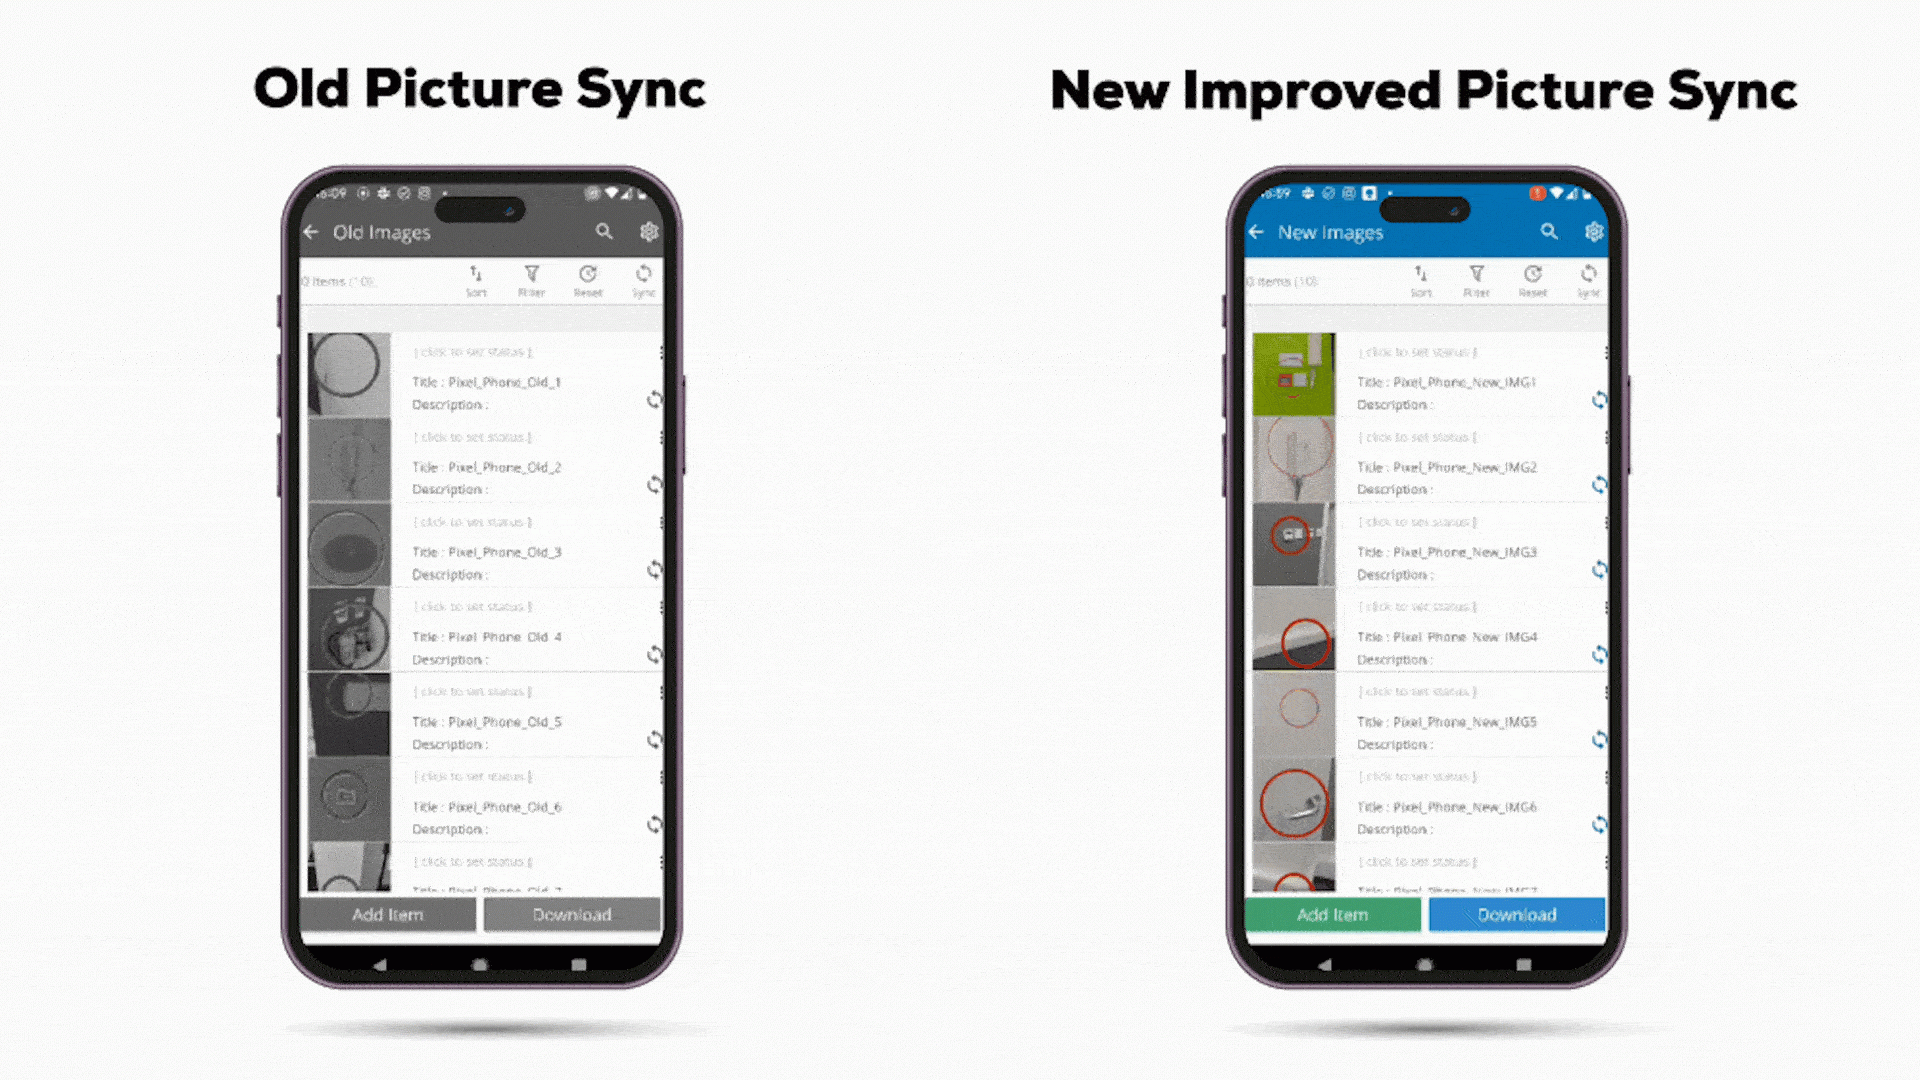
- Improved file operations:
- Downloading and uploading files have been significantly optimised for faster transfer speeds.
- File management tasks are now more efficient, saving you valuable time in your daily workflow.
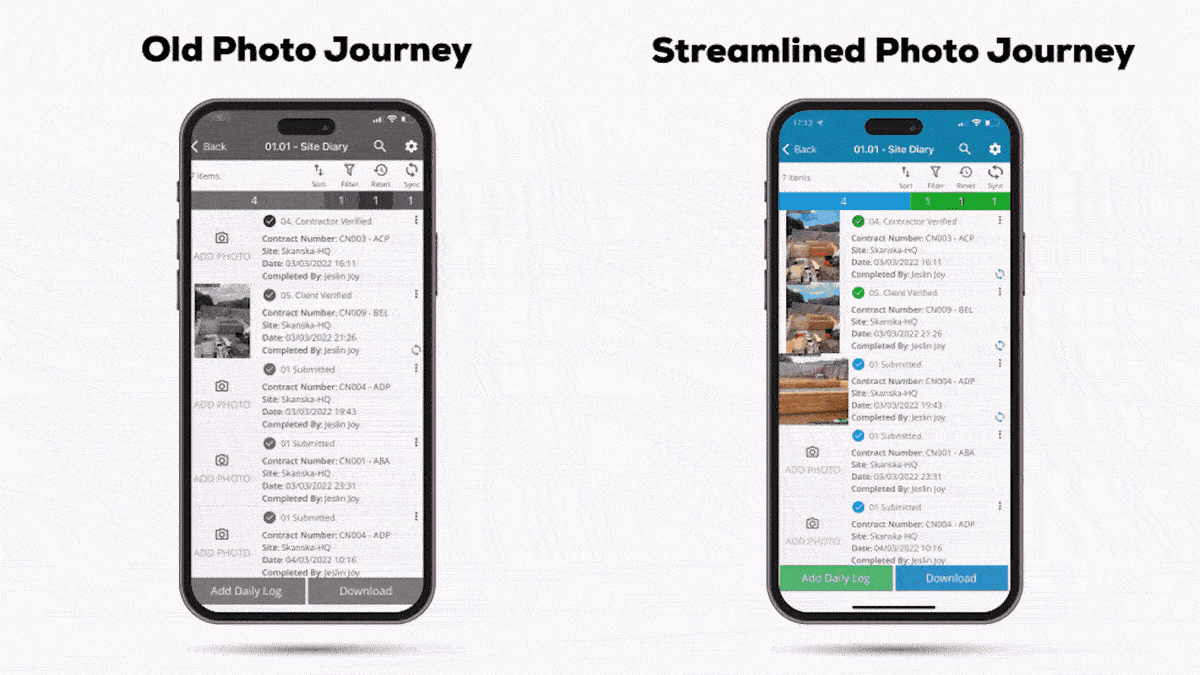
- Streamlined photo journey:
- We have enhanced the photo journey with a focus on user efficiency.
- The number of clicks required to save and add new photos has been reduced, streamlining the process and making it more user-friendly.
Benefits:
- Boosted productivity: With faster project access and optimised file operations, you can accomplish tasks more quickly, improving overall project efficiency.
- Time savings: Reduced waiting times and quicker file transfers mean you spend less time managing projects and more time on critical tasks.
- User-friendly photo journey: The streamlined photo journey simplifies the process of saving and adding new photos, ensuring smooth documentation and collaboration.
How to use:
- Navigate to the register you wish to add a photo.
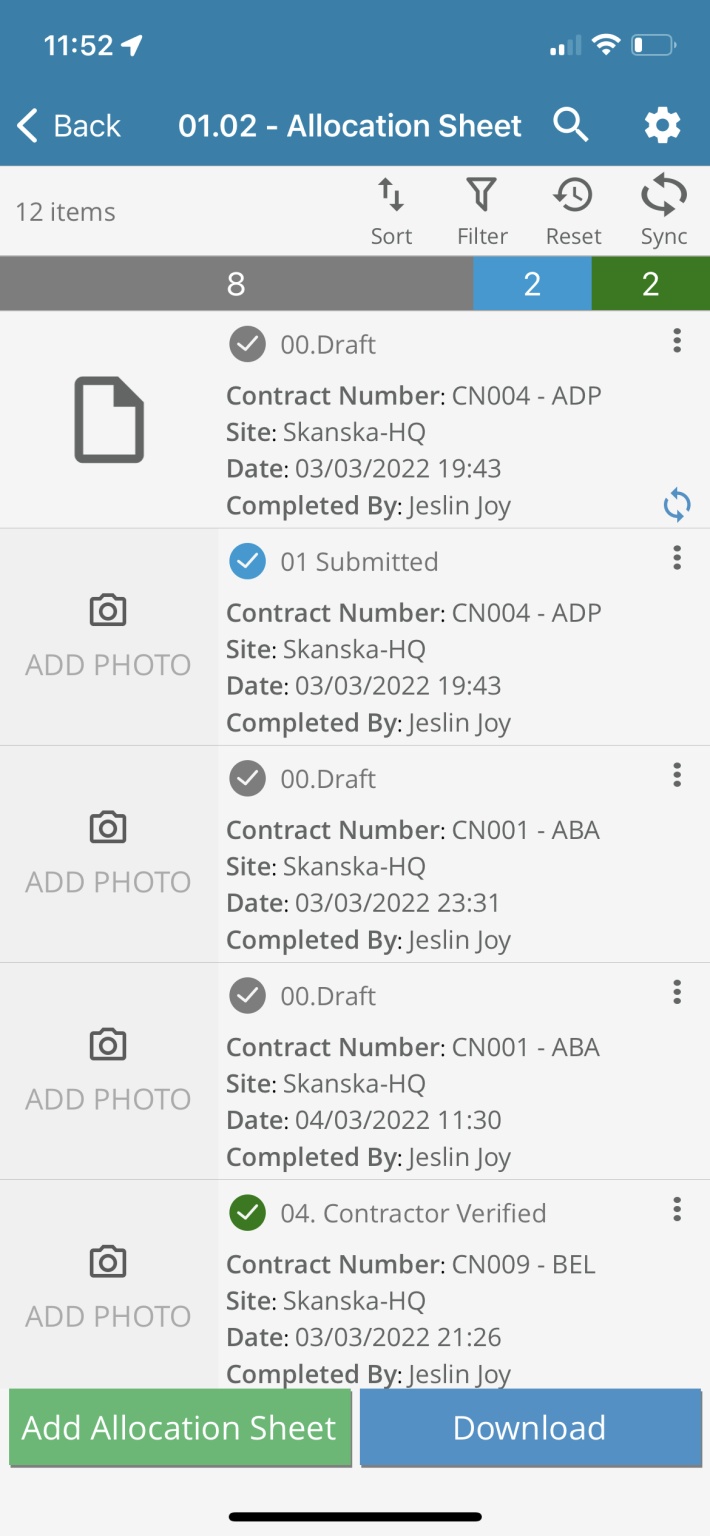
- Select the record to open the record view and click the camera icon in the top right-hand corner or alternatively tap Add Photo on the record to move straight to camera view.
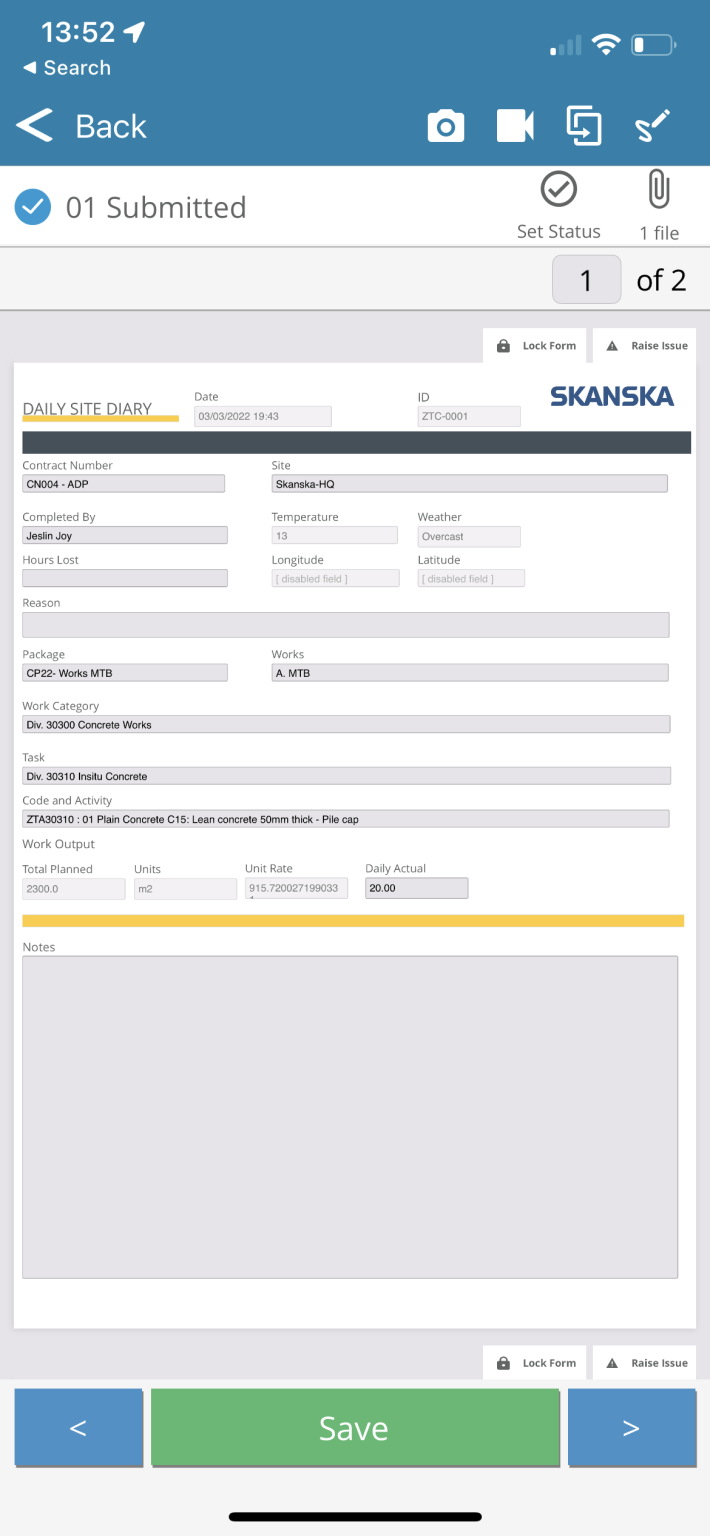
- Once in the camera, you can take a single photo, or multiple photos in sequence. Click Done when you have captured all your photos.
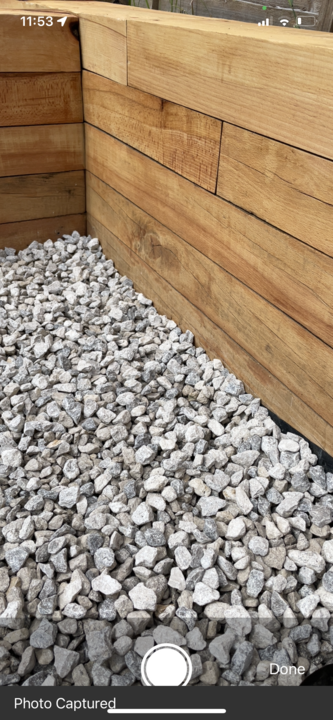
- The photos will be added to the record and a confirmation message will be shown.
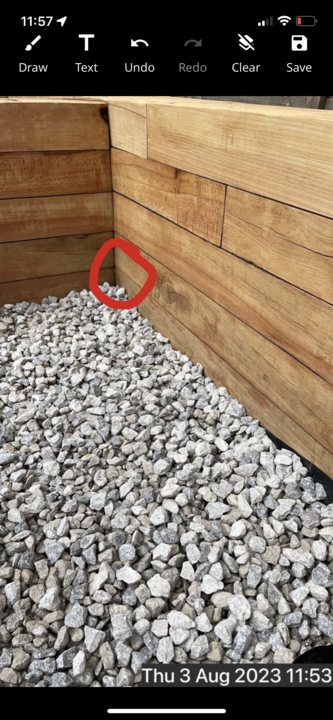
- If you wish to make any markups simply click into the photo you wish to markup and click the pencil icon in the top right corner.
- Edit your photo in the markup window and click Save to complete.
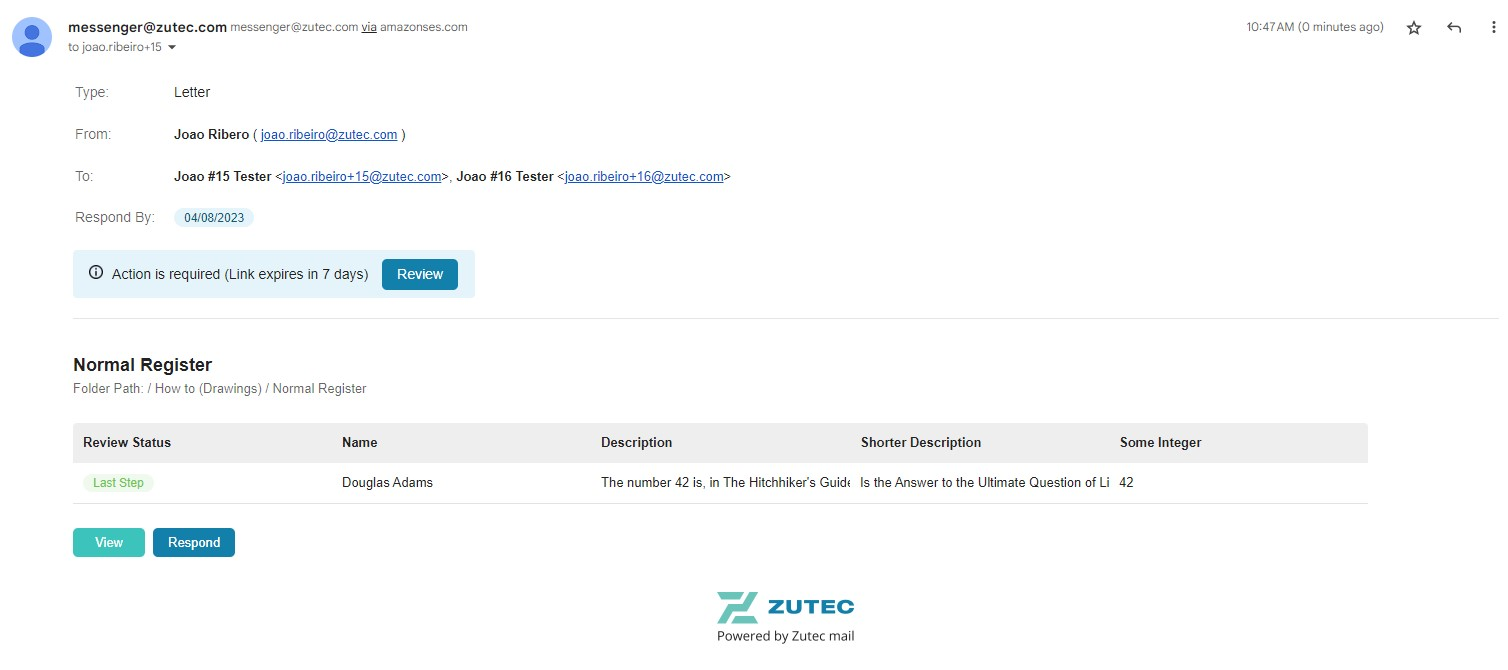
Improved email notifications and usability
In this latest release, we are excited to introduce significant improvements to email notifications, enhancing usability and providing more control over the displayed columns. Now, users can reduce the number of columns shown in notifications from the default set of five to customised columns they want to see. Additionally, notifications will include essential context and actionable call-to-actions, making it easier for users to review and access relevant information directly from their emails.
Key features:
- Customisable column display:
- Users now have the ability to set their preferred number of columns shown in email notifications.
- Choose to display the default set of five columns or customise the columns to suit your specific needs.
- Context and call-to-actions in notifications:
- Each notification is enriched with context to provide a clearer understanding of the notification's purpose.
- Actionable call-to-actions are included, allowing users to directly interact with relevant items.
- Direct links to registers:
- When reviewing notifications that require user action, a direct link to the respective register is provided.
- Easily access and address tasks directly from your email, streamlining your workflow.
- Improved branding on system notifications and emails:
- System notifications and emails have been updated with refreshed branding to ensure a consistent and professional look.
Benefits:
- Streamlined workflow: Customisable column display enables users to focus on the most relevant information, reducing clutter and improving efficiency in handling notifications.
- Enhanced user engagement: Clear context and actionable call-to-actions in notifications empower users to take prompt actions, fostering better collaboration and communication.
- Time-saving convenience: Direct links to registers in notifications save time by eliminating the need to navigate within the platform manually.
- Professional presentation: Updated branding on notifications and emails enhances the overall user experience and reinforces your brand identity.
How to use:
- In the Register’s page click in Show/Hide Columns and select the columns you want to see in the new view.
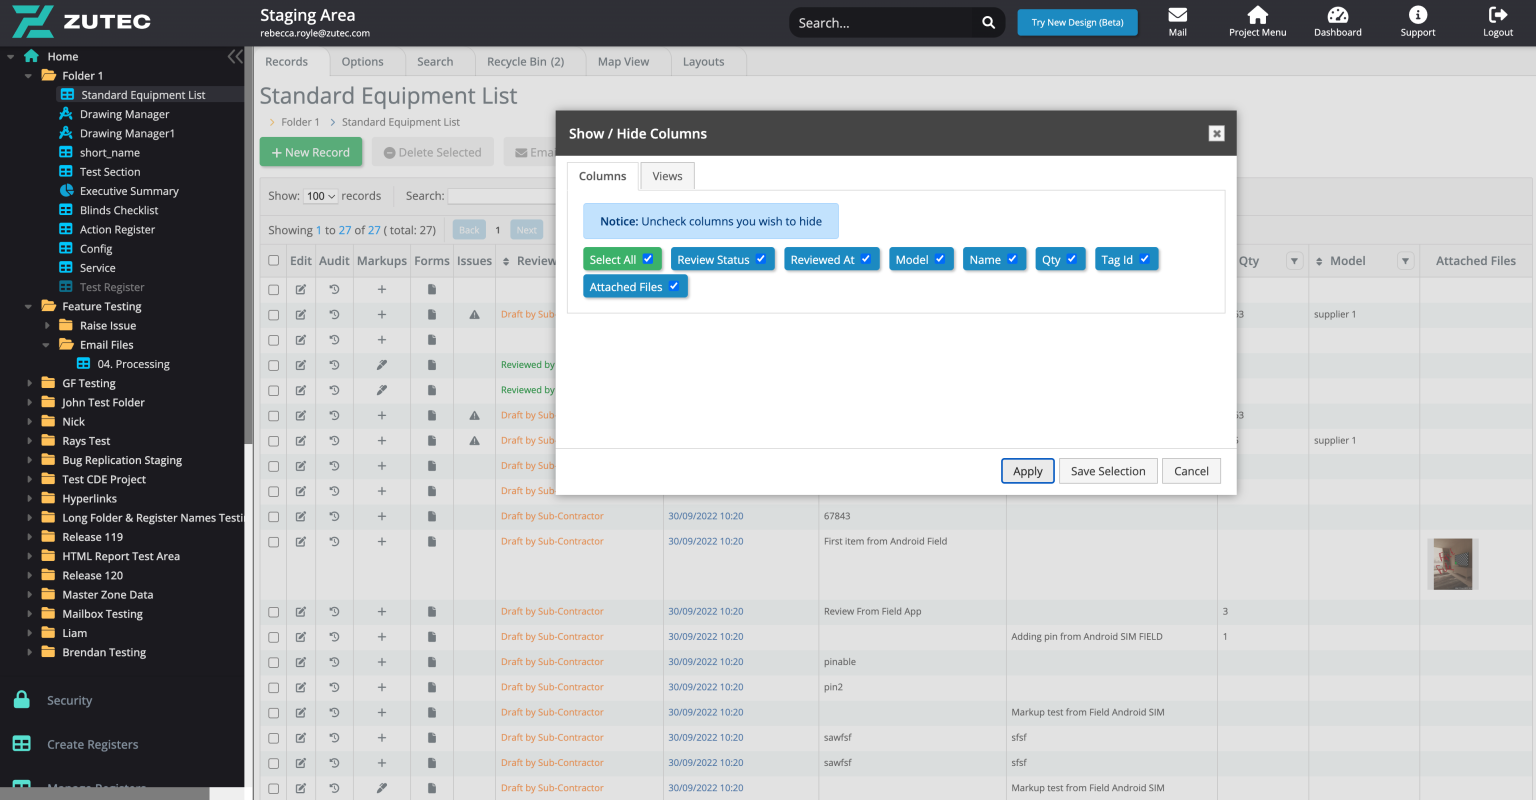
- Click Save Selection to create a new view
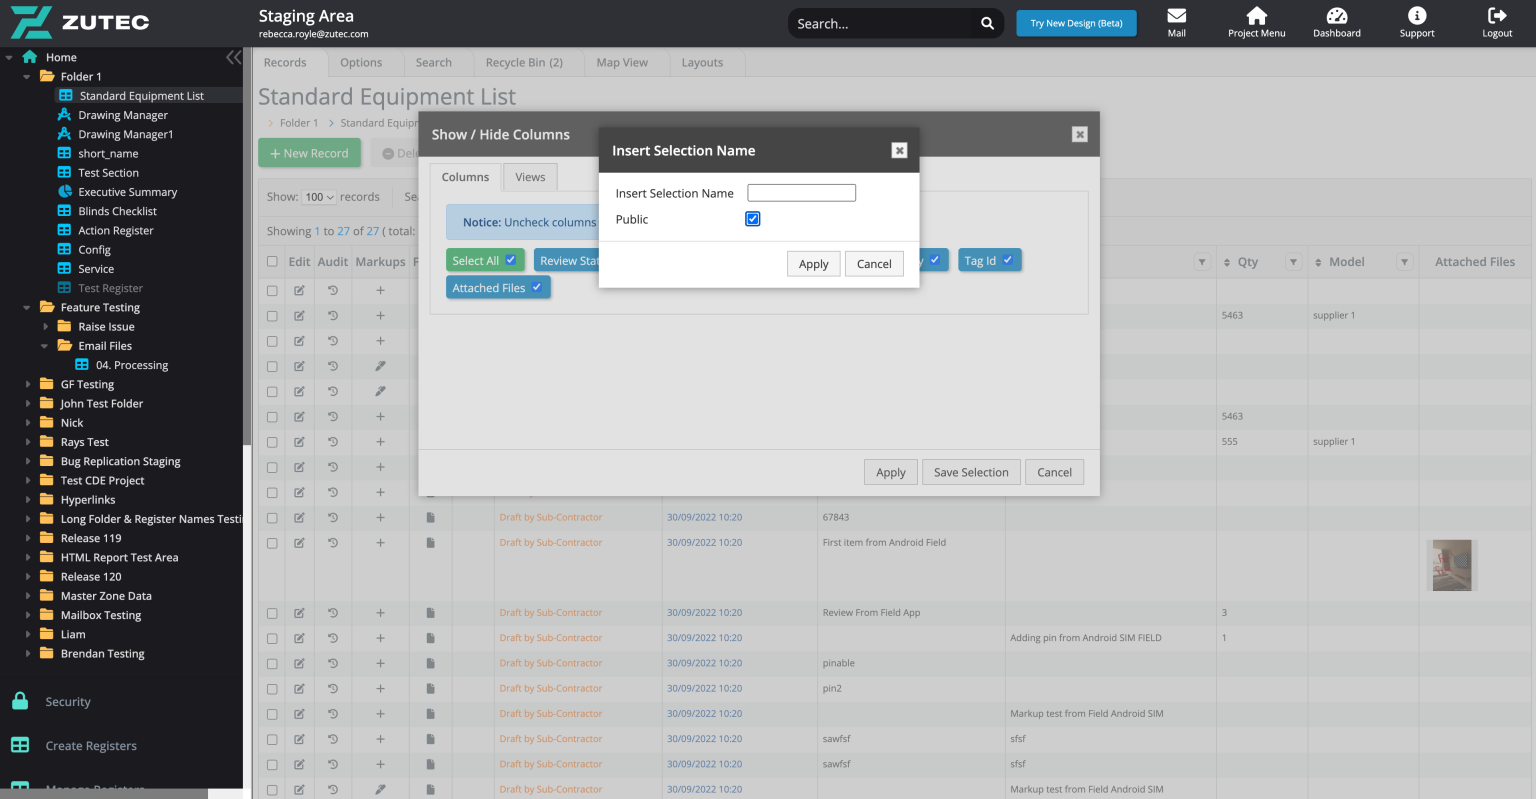
- Create a name for the new view and check as Public in order to be able to use it in any email notification body.
- Click Apply.
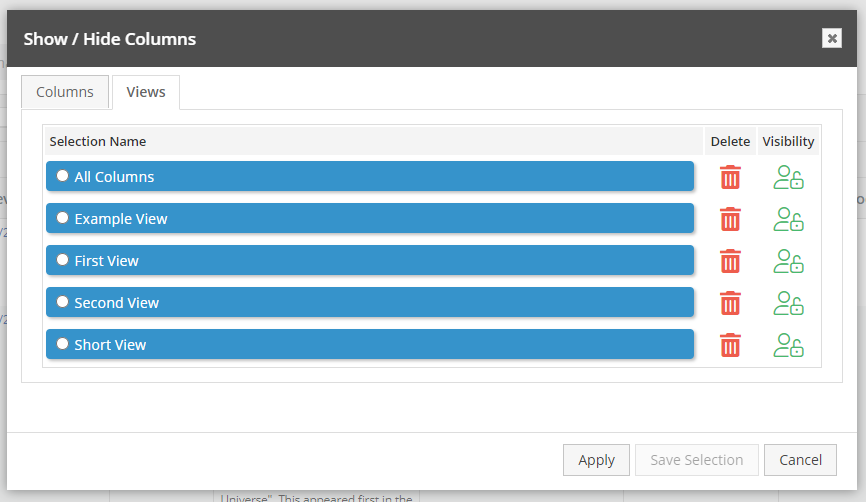
- Click Show/Hide Columns again and select the Views to see the new view in the list.
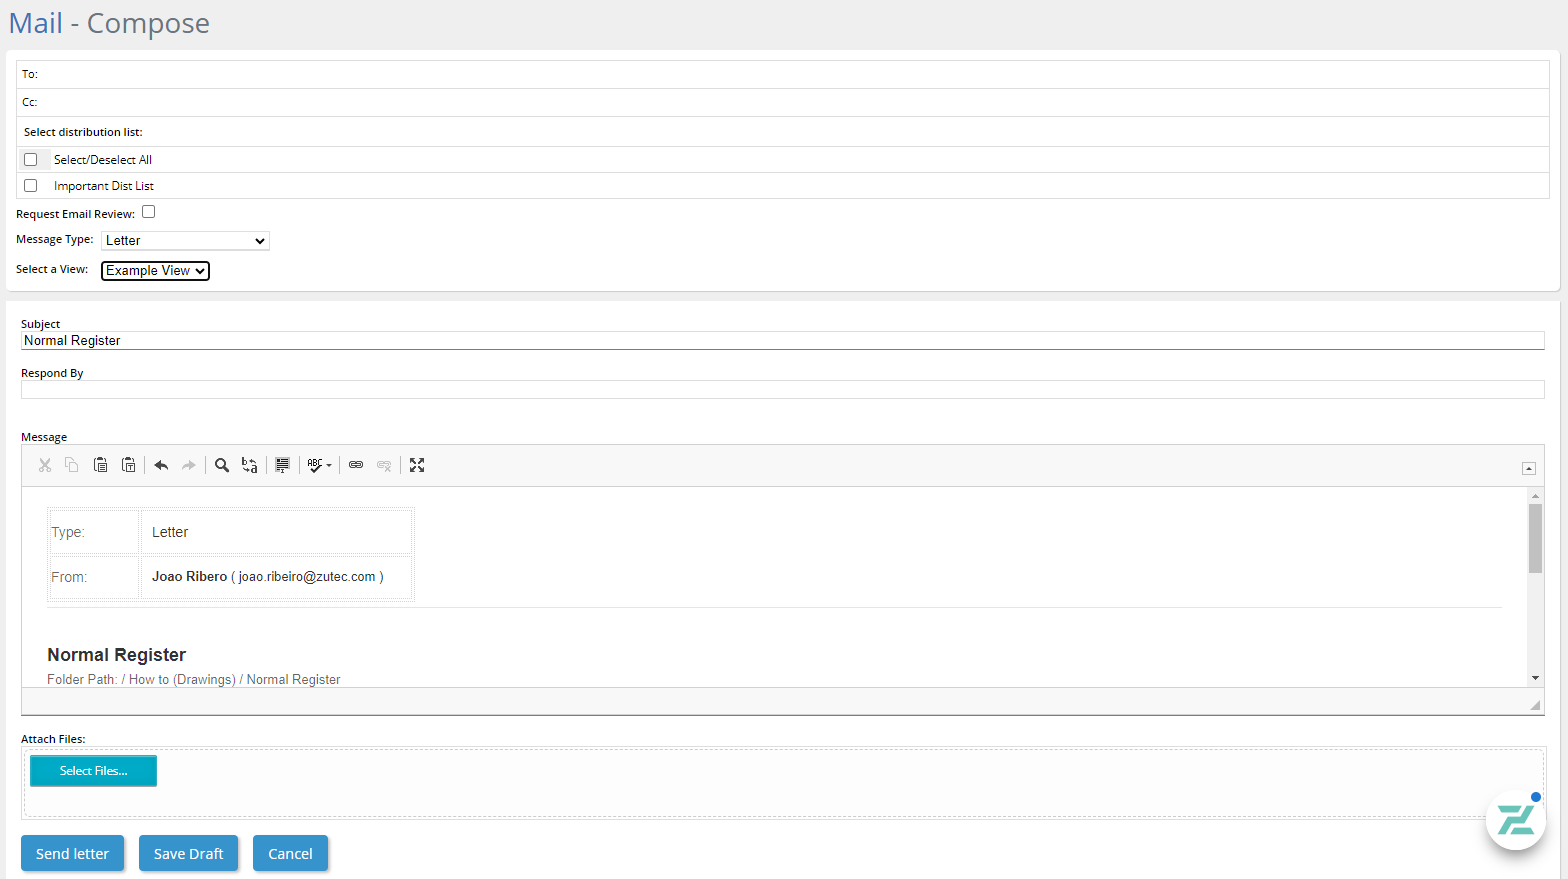
- Click Email and use the Select View dropdown menu to select the desired view for the notification template.
Note:
- The Reviewed At and Attached Files columns will never be displayed in the notification email.
- If a saved view is not selected for notifications, the email will show the first 5 columns in the register. If the view is set, it will show the columns as per the view (which may be more or less than 5).
Two-Factor user authentication (2FA)
With this release, you can now add an extra layer of protection to your account, ensuring that your personal data and sensitive information remain safe from unauthorised access.
Key features:
- Two-factor authentication (2FA): 2FA adds an additional security step beyond your password, making it significantly more difficult for attackers to gain access to your account even if they know your login credentials.
- Easy setup process: The setup process for enabling 2FA is straightforward, ensuring that you can quickly add this security feature to your account.
How to use:
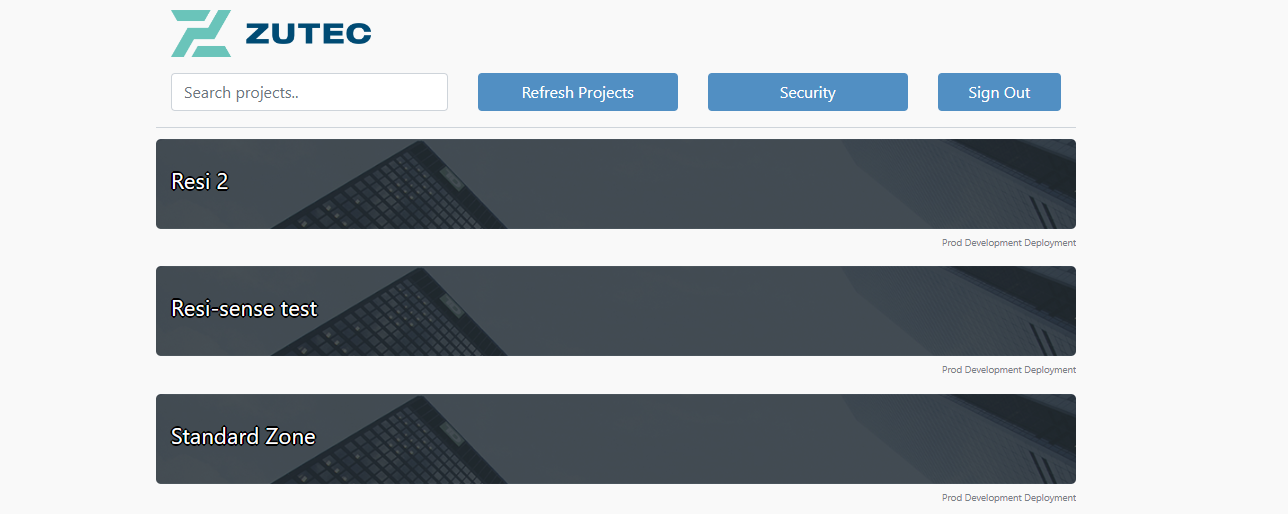
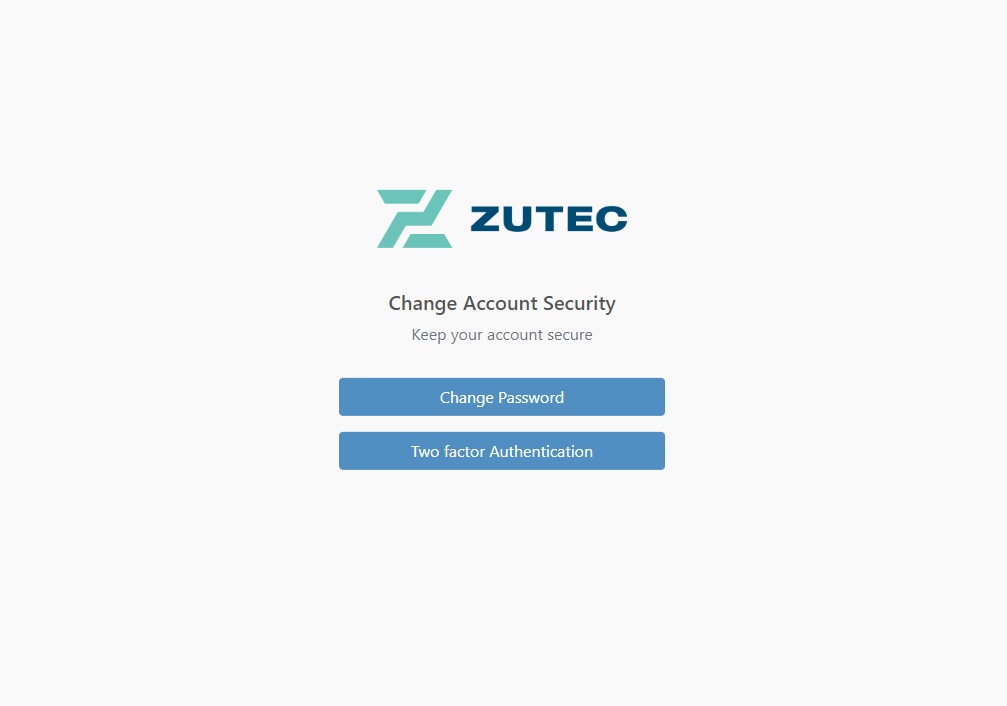
- Log in to your account and click Security.
- To keep your account secure select Two-factor Authentication.
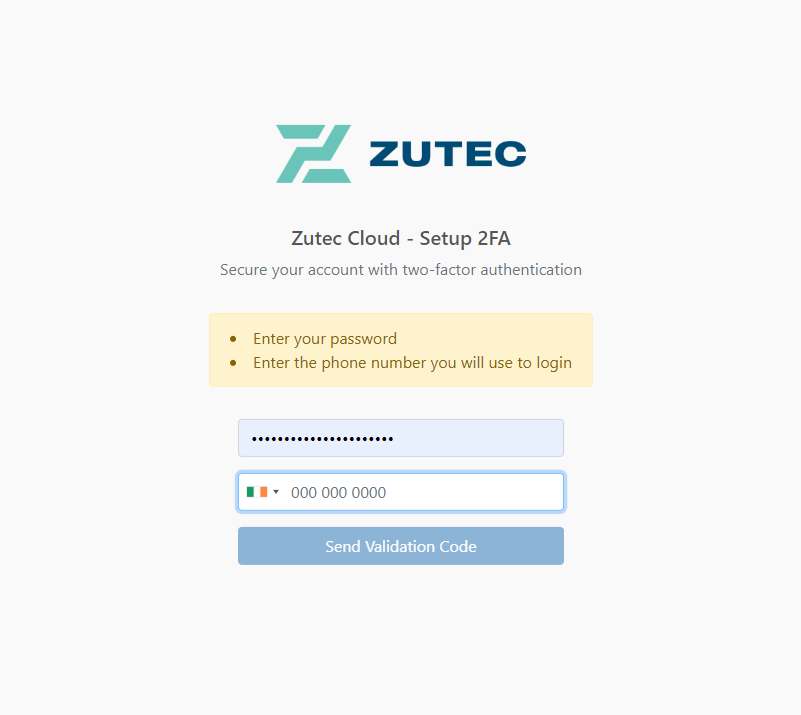
- Enter your password and telephone number to send validation code to your phone.
- Add the code click Validate and you will receive a confirmation that 2FA is set up.
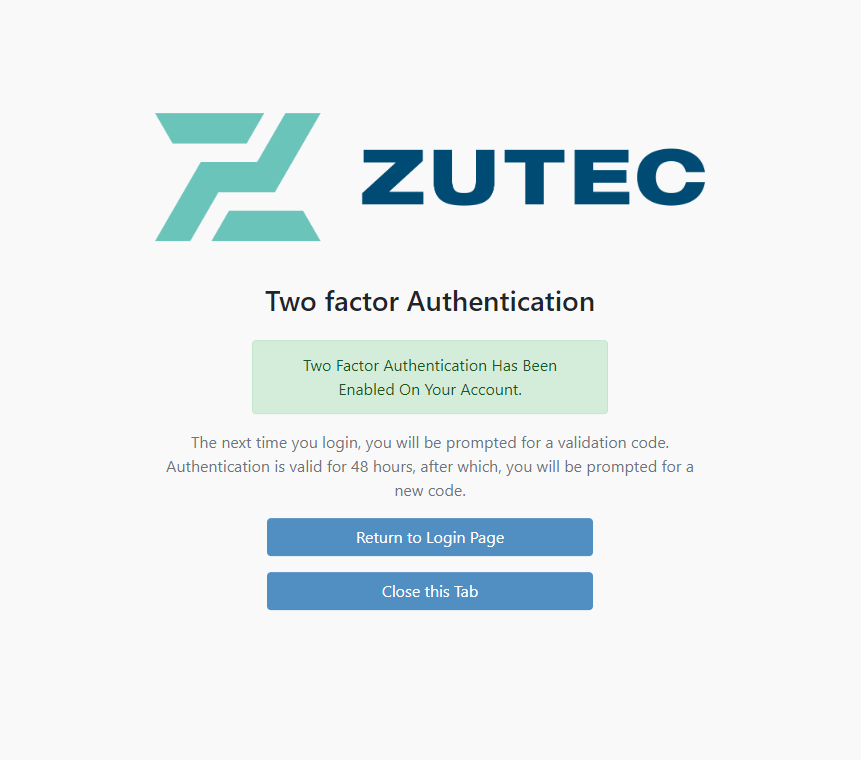
Note: 2FA is valid for 48 hours. When logging in again after this period you will be prompted to input a new validation code that will be automatically sent via text message to your contact phone number. Once it has been verified you will be logged in as usual for another 48 hours